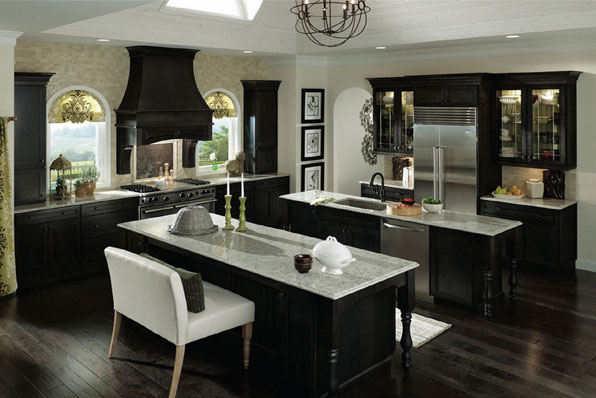
Creating a Kitchen that You – and Your Wallet – will Love!

Creating a Kitchen that You – and Your Wallet – will Love!

 Creating a Kitchen that You – and Your Wallet – will Love!Kitchen Designers are “Creative Problem Solvers”

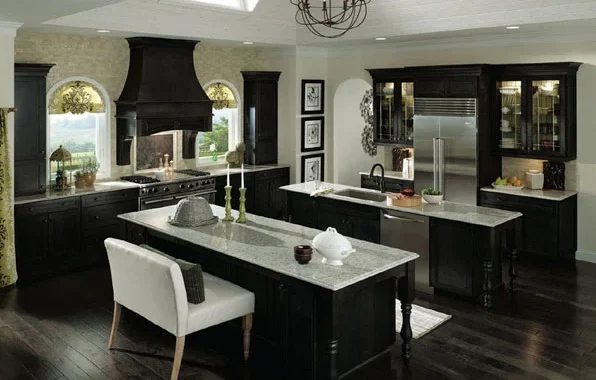
When you embark on a kitchen design collaboration with Keri at GNH Lumber, you quickly discover that she is like a seasoned guide leading you through the difficult terrain of design choices, options and considerations. You have a specific destination in mind, and your designer’s job is to get you there with as few mishaps as possible.

Keri likes to think of designers as ‘creative problem solvers,’ and her first task at hand, when working with a client, is to gather information about your “project, lifestyle, and overall design taste.” Always, her emphasis is on listening:

“You can achieve a lot through listening and asking the right questions, communication is a large part of my occupation. I then build the design around what I know of my client and their needs, as opposed to simply creating something that I like. This makes all the difference.”

Download our free kitchen planning guide.

Continue reading

Get Barefootable Grass

Get “Barefootable” Grass! Fertilize Your Lawn Regularly

Get-Barefootable-Grass-ScottsThe secret is out: feeding your lawn is the fastest, surest way to a lush, barefoot-worthy lawn. Summer equals outdoor time, so it’s important to keep your lawn green and gorgeous for maximum enjoyment all season long.

Feeding with Scotts Step-3 with 2% Iron is an important part of your summer lawn care regimen! It creates green-up, adds strength, and protects from drought. 

There are many reasons to maintain a healthy lawn, and a few may surprise you! A lush lawn…

Keeps You Cooler: Plants, including grass, help keep outdoor living spaces cool. In cities, where there are fewer lawns and trees, the temperature can be between 2 and 22 degrees warmer than surrounding areas that have lawns and wooded areas. A healthy lawn can buffer the heating effects of the sun, helping to keep your home cooler—and your electric bill lower.

Helps Fight Allergies: Some people are allergic to the pollen produced by common lawn weeds. Thick, healthy grass leaves little room for weeds. Water the right amount at the right time, feed your grass on a regular schedule, and mow at the correct height, and your weed problems may just become a thing of the past.

Improves Air Quality: When your yard is covered by lush grass rather than patchy weeds and bald spots, the air quality will be improved. Simply put, lawns trap dust, pollen, and other floating particles so you can breathe easier.

Get-Barefootable-Grass-Family-on-GrassDecreases Stress: Multiple studies have shown that spending time in, or even just looking at, nature (think grass, trees, water) naturally decreases stress hormones. In an ever-connected, screen-focused world, just looking at a lovely lawn can cause you to breathe easier, sleep better, and feel calmer.

Provides a Quieter Living Space: A lawn acts like soundproofing for your living space, helping to absorb noise from neighbors, cars, and maintenance vehicles. The result is a quieter, more serene environment.

Gives You Somewhere to Have Fun: It’s so important to take a bit of time away from work and other obligations to kick back and relax, and a beautiful lawn is just the place to do that. Lounge in the hammock, set up a croquet game, or just play with your kids in the grass—whatever brings you happiness.  

Boosts Curb Appeal: When you’re trying to sell your house, one of the first things on the to-do list is usually to improve the look of your lawn and landscaping. That’s a wise choice, as attractive, well-maintained landscaping can add 10 to 15 percent to the value of your home or property. In other words, all that time spent keeping your lawn looking gorgeous is time very well spent.

Are you ready to maintain a lush, green lawn for optimal living? A healthy lawn begins with regular feeding. Here are some of the benefits of fertilizing your lawn:

1) “Barefootable” Grass

barefootable-grass-kids

Backyards and barbecues. Trampolines and kids. Neighbors and friends. They’re everything thick, green lawns were made for. Regular feedings provide the nutrients your lawn needs to look its best and withstand the stresses of weeds, heat, drought and family activity.

2) Worry-Free Lawn

barefootable-grass-family

Regular feedings are the fastest, most affordable way to care for your lawn, keeping problems out of your yard and off your mind. Feeding your lawn two or three times a year gives grass plants the nutrients they need for deep roots and strong, full blades. One bag of Scotts® Turf Builder® feeds an average-size lawn and goes down easily in about 15 minutes. That’s all it takes to grow stronger, greener grass that can crowd out weeds and stand up to heat, sun, stress and play.

3) A Breath of Fresh Air
barefootable-grass-better-breathing

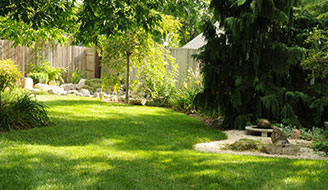
Grass is living, breathing nature right outside your door. And like all living plants, it needs food and water. While you and Mother Nature can easily take care of the watering, grass plants simply cannot thrive without proper nutrients. That’s where regular feedings become critical.


Regular Feedings Are Key

Like your teeth or your health, it’s easier to keep your lawn at its best with an ounce of prevention. Just feed your lawn every 6 to 8 weeks to keep it looking nice and worry-free.

Sources:https://www.scotts.com/en-us/library/lawn-food/benefits-fertilizing-your-lawn, https://www.scotts.com/en-us/library/lawns-matter/how-healthy-lawn-can-benefit-your-lifestyle
painting-neutral-palette-living-room

Painting for Resale: Neutral Palettes

When it comes to selling your home, first impressions are everything. Eager buyers may ask questions about house maintenance or the quality of your neighborhood and schools, but these things will pale in comparison to the feeling a buyer gets the first time they step into your home.

So, if you want to sell your house quickly, it’s critical that the decor is up-to-date and attractive. This includes the freshly-painted colors on your walls! Painting your home is quick and inexpensive way to make a dramatic improvement.

Get your painting project started!

Here are a few tips for painting your home for resale:

1. CHOOSE A PERFECT PALETTE

Think of your home’s color palette as a backdrop. This backdrop sets the stage for the home’s furnishings and decorations and gives rooms their unique feel.

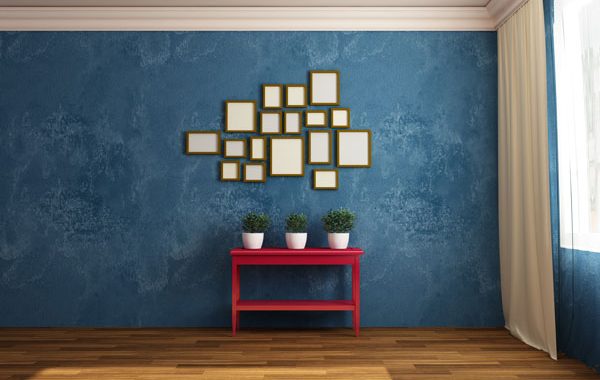
painting-neutral-palette-colorsPaint is a simple way to apply or change the whole feeling of a home. The wrong color inside or out can turn a buyer off from the entire house. To help appeal to the most buyers, seasoned real estate professionals recommend painting your home in neutral colors.

You’ll want to look at Earth tones, including shades of brown, green, blue, pale orange, and tans that are often depicted in nature.

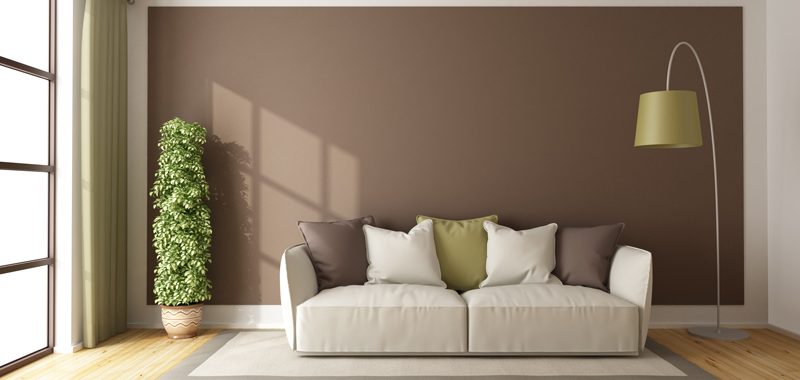
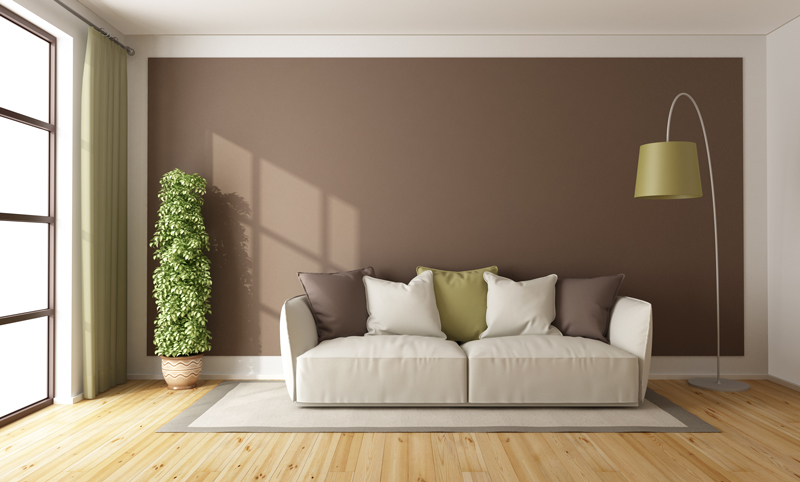
Humans are naturally attracted to the great outdoors so warm and inviting colors for living rooms and dining rooms are often perfect for when selling your home. Because these colors are often flat and muted, they’re soothing and relaxing to the eye and will go well with most people’s furniture. Earth tones also complement rooms with a lot of wood, stone, metal or glass.

2. WHAT IF YOU ARE STILL LIVING THERE?

If you’re still living in the home you’re selling, changing things up can be tricky. Just know it does not mean you’ll be stuck inside a bland, beige nightmare until your home sells!

Neutral colors are not limited to shades of white and beige. With a little pre-planning you can use shades of browns, greens and even bolder colors to highlight your home but still set the stage for a sale.


3. EXTERIOR MATTERS

Don’t forget about the exterior of your home when it comes to preparing for resale. Painting the exterior can also help attract potential buyers. Look around your block and see what’s trending in your community. This is not a time to go bold.

You’ll also want to know the type and style of your home before selecting a color. This is because beige might not work on all styles of homes. When picking an exterior color consider the type of house. Muted colors might not work on a Victorian home, where bolder hues would make the interesting architectural details pop. A farmhouse, would look odd in bright red because more traditionally, they are light colors like white or light gray.

4. HOW DO COLORS STACK UP?

Zillow did research on what colors work best for what homes. It’s impressive to see that just a simple change of color can increase your home’s value by thousands of dollars.

Here are Zillow’s findings on what colors to choose (and which to avoid at all cost):

Kitchens:

  • Blue (light blue to soft gray-blue): home sold for $1,809 more on average.
  • Yellow (straw yellow to marigold): home sold for $820 less on average.

painting-for-resale-neutral-paletteBathrooms:

  • Blue/purple (light powder blue to periwinkle): home sold for $5,440 more on average.
  • White/no color (off-white or eggshell white): home sold for $4,035 less on average.

Bedrooms:

  • Blue (light cerulean to cadet blue): home sold for $1,856 more on average.
  • Pink (light pink, to antique rose; often found in kids’ rooms): home sold for $208 less on average.

Dining Room:

  • Blue (slate blue to pale gray blue; navy blue also found in dining rooms with white shiplap): home sold for $1,926 more on average.
  • Red (brick red, terracotta, or copper red): home sold for $2,031 less on average.

painting-neutral-palette-living-room Living Room:

  • Brown (light beige, pale taupe, oatmeal): home sold for $1,809 more on average.
  • Blue (pastel gray, pale silver to light blue, periwinkle): home sold for $820 less on average.

Home Exterior:

  • Gray/brown (greige — mix of gray and beige): home sold for $1,526 more on average.
  • Brown (medium brown, taupe, or stucco): home sold for $1,970 less on average.

Front Door:

  • Gray/blue (navy blue to dark gray or charcoal): home sold for $1,514 more on average.


Keep these tips in mind, and you’ll be able to increase your home’s value with just a simple coat of paint! And stop by GNH Lumber for paint suggestions, guidance and help at every step along the way.

How to Build a Rustic Bench

DIY: How to Build a Rustic Bench

How to Build a Rustic Bench

Handmade furniture adds beauty and functionality to any home. Plus, a custom look is sure to impress friends and family.

This time of year, it’s convenient to have a bench next to the door of a mudroom or entryway for all that pulling on (or taking off) of winter boots, socks, hats and gloves.

And here’s the good news: you don’t have to be a master carpenter to build this simple, rustic bench! Just follow this step-by-step guide from Shanty to Chic based on the Providence Bench design by Ana White. It costs at little as $20-$50 and can be completed in one afternoon with the help of a handy Kreg Jig® tool (available at GNH)! A Kreg Jig® makes it easy for anyone, even a beginning DIYer, to create rock-solid wood projects and to make strong, long-lasting repairs.

Here’s what you’ll need to pick up at GNH Lumber to build your rustic bench:

Materials:

  • 5 – 2×4 @ 8 feet long – cut longest boards first
  • Optional 1×3 under bench supports
  • 1 ¼ inch screws
  • 2 1/2-inch Pocket Hole Screws
  • Wood glue
  • Finish nails
  • 120 grit sandpaper
  • Wood filler
  • Wood conditioner or primer (as needed)
  • Damp cloth
  • Safety glasses

Tools:

  • Tape Measure
  • Speed square
  • Kreg Jig®
  • Drill
  • Sander

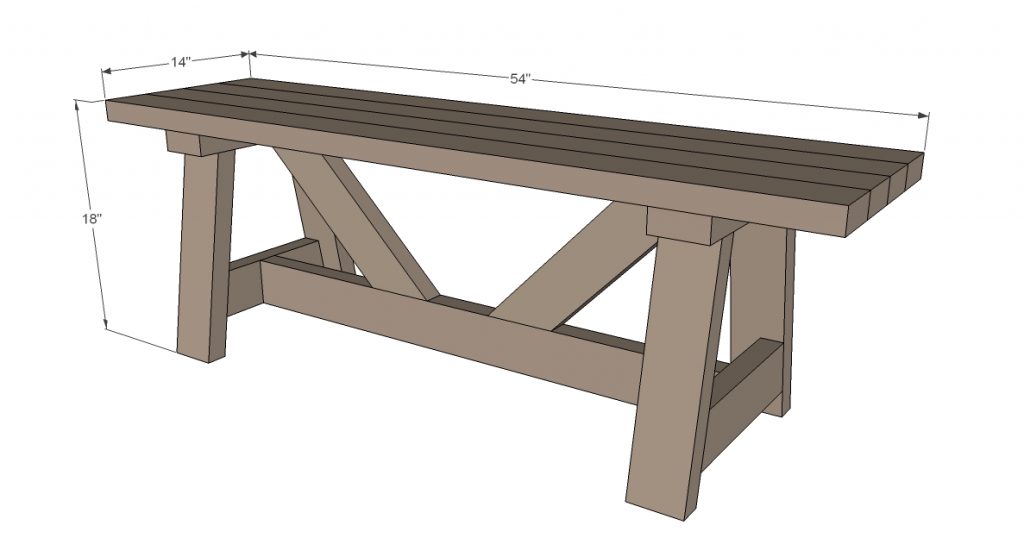
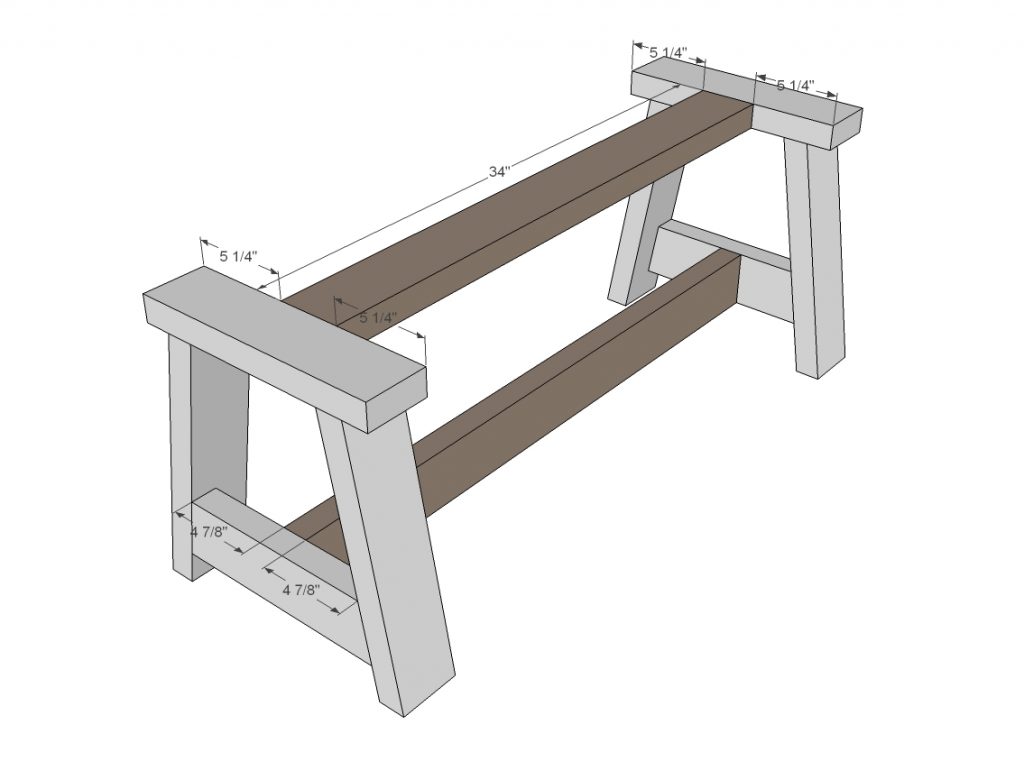
Rustic Bench dimensions

Cut List (dimensions shown above):

  • 2 – 2×4 @ 14”
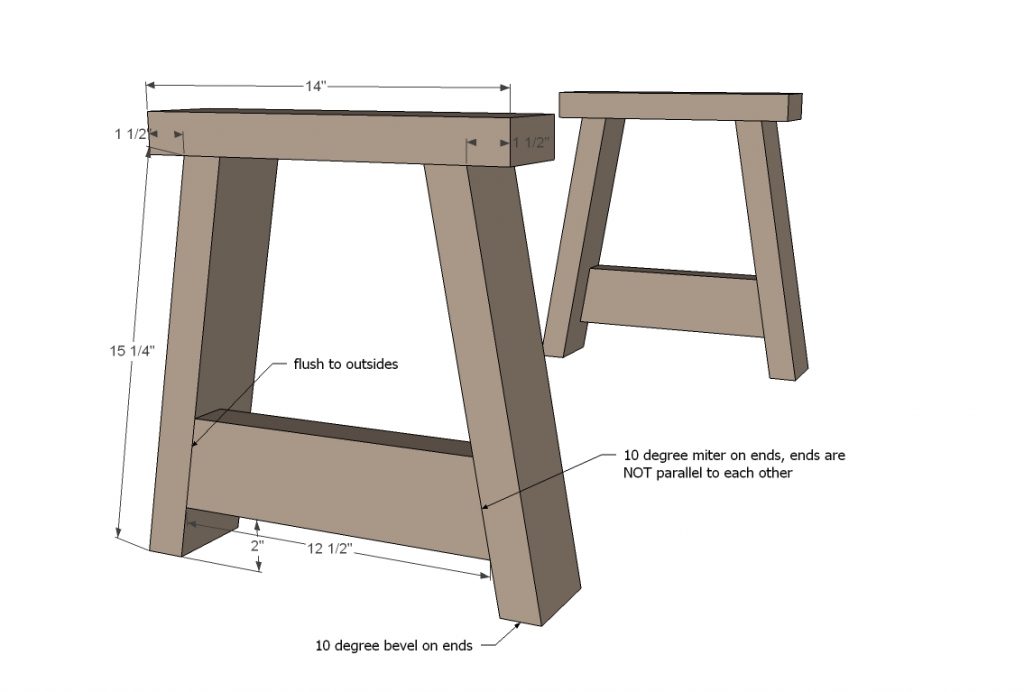
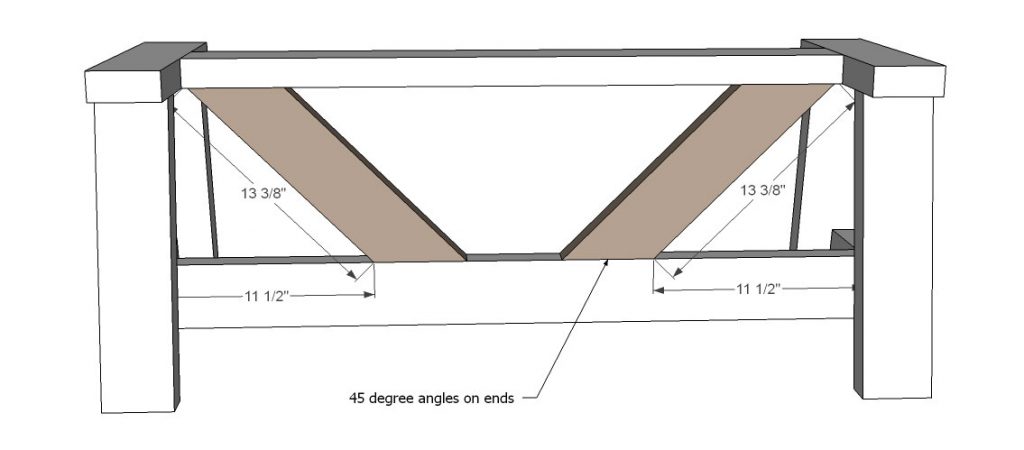
  • 4 – 2×4 @ 15 1/4″ – both ends beveled at 10 degrees off square, ends ARE parallel
  • 2 – 2×4 @ 12 1/2″ – long point to long point, both ends cut at 10 degrees off square, NOT parallel
  • 1 – 2×4 @ 34”
  • 1 – 2×4 @ 38”
  • 2 – 2×4 @ 13 3/8” (both ends cut at 45 degrees off square, ends ARE parallel)
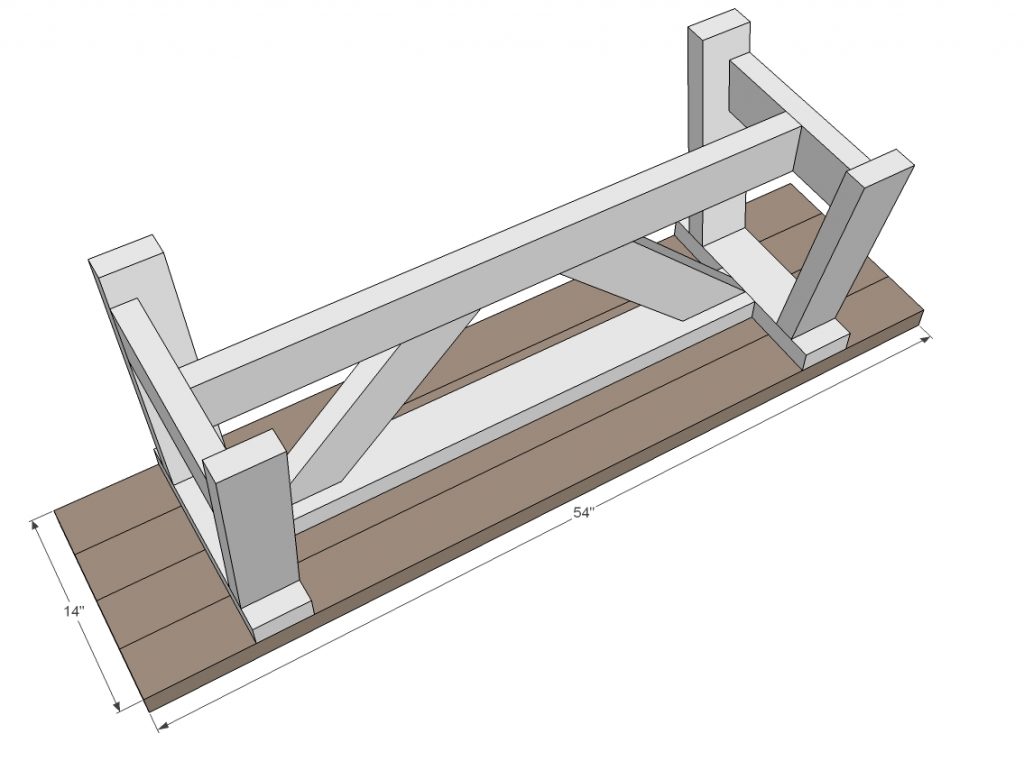
  • 4 – 2×4 @ 54”


Build Ends on Rustic bench

Step 1) Build ends

Build two ends as shown above. They are identical. Use the Kreg Jig® on 1 1/2″ setting with 2 1/2″ pocket holes, or countersink screws with glue. Here’s are our suggestions for pocket hole placement.

This is the bottom inside of the legs:

Build Ends of Rustic Bench

This is the top of the legs:

Top of Rustic bench legs


2) Add the stretchers:

Rustic Bench stretchers


3) And then the cross supports:

Rustic Bench cross supports


4) Add the seat boards:

Rustic Bench seat boards

NOTE: Use the Kreg Jig® to plank the top of the bench before attaching it to the base.

You can leave a small 1/8″ gap between boards for water drainage if desired.

Add seat boards to rustic bench


This is the back of each of diagonal piece.  Tip: Don’t worry about covering the pocket holes if they will be facing a wall:

back of rustic bench

Attach bottom piece like this:

bottom piece of rustic bench

Use 1 1/4″ screws through the bottom into the top planks to attach the seat, and don’t forget to use wood glue on all joints:

rustic bench bottom

5) Finishing touches!

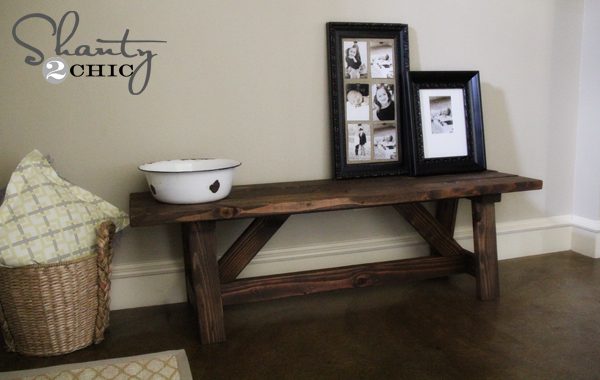
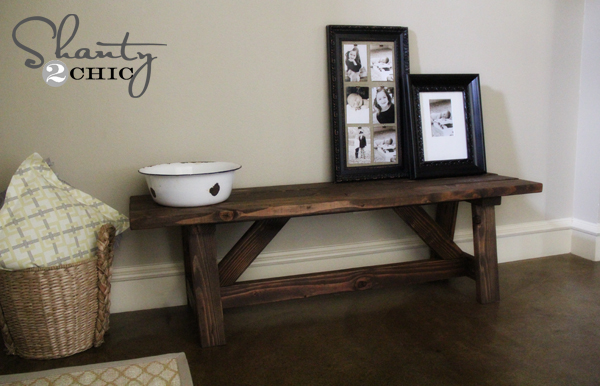
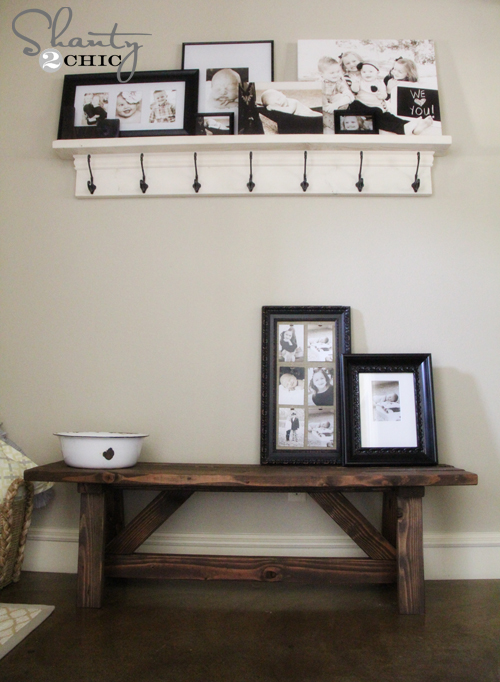
Finished rustic benchFill all holes with wood filler and let dry. Apply additional coats of wood filler as needed.

When wood filler is completely dry, sand the project in the direction of the wood grain with 120 grit sandpaper. Sand all surfaces thoroughly. Vacuum to remove sanding residue. Remove all sanding residue on work surfaces as well. Wipe project clean with damp cloth.

Use primer or wood conditioner as needed. It is always recommended to apply a test coat on a hidden area or scrap piece to ensure color evenness and adhesion. The bench shown has a coat of Rust-Oleum Ultimate Wood Stain in Dark Walnut.


That’s it!  This rustic, entryway bench is now ready to enjoy all season long! Questions about this project or another DIY-project on your list? Stop in to your local GNH Lumber for tips, guidance and recommendations!


Switching Pet Foods 101

Switching Pet Foods 101: How to Transition

Switching Pet Foods 101

Food for Every Stage of Life

There are many reasons to switch pet foods, including changes in your pet’s healthy, activity levels, age, or behavior. Just like people, pets have different nutritional requirements at different stages of life. A puppy or kitten’s needs are vastly different from that of an adult dog or cat. The same holds true for your senior pet, who may have difficulty digesting what was easier to digest as a younger pet.


Making a Pet Food Switch

There are other reasons for switching pet foods, however. Maybe you want to try a new formula, such as ingredient or brand preferences (GNH has a variety of high-quality pet food brands available, such as Taste of the Wild and Blue Buffalo).

According to the Taste of the Wild blog, it’s important to note that if your pet suddenly stops “enjoying” his current food, you should consult your veterinarian before making a switch. If your pet is sick, it can actually do more harm to change his or her diet before the illness itself is resolved.


The Right Way to Change Your Pet’s Diet

No matter the reason for switching, you should always transition slowly to a new kind of pet food or your pet may experience some bad belly aches and digestive upsets! By practicing patience, however, your pet can make the transition seamlessly to his or her brand-new diet.


Good Things Come to Those Who Wait

You should take at least 7-10 day (or up to 14 days for pets with sensitive stomachs) to transition from your current pet for to your new pet food. The idea is to add a little bit of new pet food each day, while subtracting the same amount of old pet food. This method allows your pet’s system to slowly adapt to the new food, and prevents jarring digestive troubles. You can visualize the transition this way:

Switching Pet Foods 101

Switching Pet Foods 101

Beware of Switching Too Often 

A word of caution: It might seem like a good idea to change your pet’s diet whenever you see a sale on new pet food, but think again. You might end up paying more in the end for vet bills if your pet’s diet is disrupted too frequently.

The best feeding practices for your pet’s good health is to choose a brand you trust, and stick with it – unless your pet has a specific, adverse reaction, or if his life cycle changes. Consistency is better for your pet’s overall digestive health.


Sources: https://www.tasteofthewildpetfood.com/how-why-to-change-your-pet-food/

Repair, and Protect Gutters

DIY: How to Clean, Repair, and Protect Gutters

Repair, and Protect Gutters

Making sure that your home’s gutters are clear of debris after the autumn leaves have fallen is an easy way to prevent potentially significant water and ice damage later. Since your homes gutters work to control the flow of water, and help to prevent damage to the exterior of your home, it’s vital that you keep them in proper working order.

Here are six steps to getting those gutters in tip top shape:

 
Cleaning Gutters

Step 1: Clean Out the Gutters

 
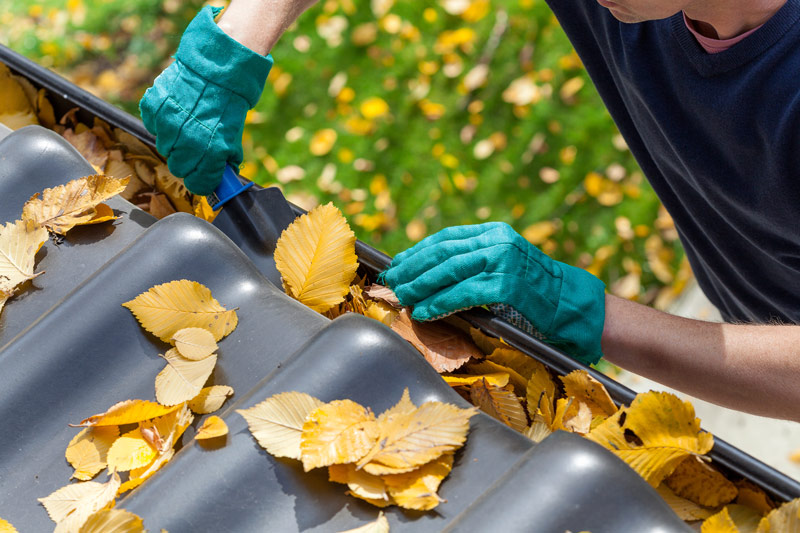
Begin by removing the debris and leaves that collect in your gutters. Most find that handheld blowers or even wet/dry vacuums are effective tools for removing debris. If the debris is dry, you’ll find it easier to remove. Blow out as much loose debris as possible and collect it into yard bags.

If you find that the plant matter is really packed in, use a gutter scoop to remove the compacted debris. Simply attach a bucket to your ladder and then scoop out the debris and place it in the bucket. Begin at the downspouts and work your way over. Do not push debris over, rather scoop it out.

You will also need to check out the downspout. Clogs often occur here. Generally, a garden hose on full blast will manage to dislodge the clog quickly.


Step 2: Fully Inspect Gutters

 
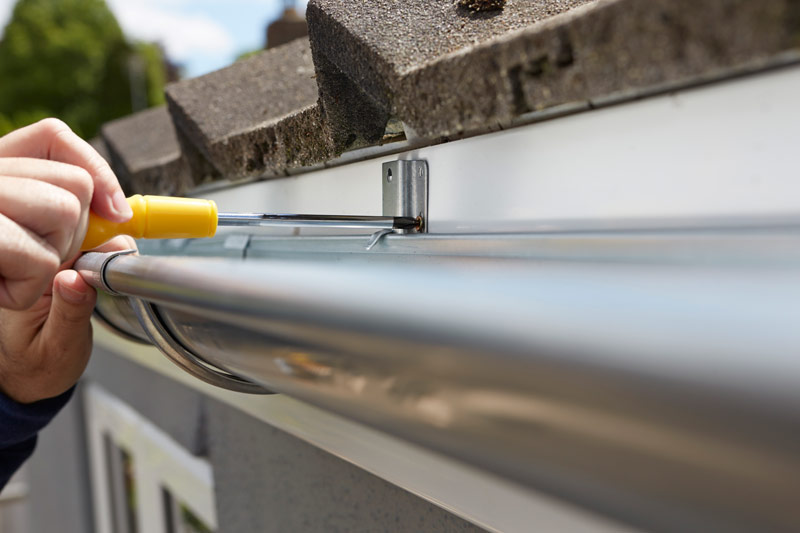
Always take the time to inspect your gutters. This will let you know if they’re in need of repair, and help you assess the scope of work ahead of you. If your gutters show any signs of corrosion, make sure you look for holes or leaking joints and check for loose, missing or even bent gutter hangers. A great tip is to use masking tape to mark where a problem area so you can go back to it quickly when you get the supplies needed to make repairs.


Repair GuttersStep 3: Repair Small Holes and Cracks

 
You’ll want to repair small holes or cracks in your gutters and downspouts with a gutter patching kit from your local GNH Lumber store.

It’s always easier to fix small issues early on as opposed to making costly repairs later (such as replacing your gutters altogether). Gutter patching kits are easy to use, and can help prolong the life your gutters and prevent damage to your home.


Step 4: Replace Sections with Large Leaks and Tears

 
Sometimes parts of your home’s roof gutter may be damaged to the point of no return. This can happen if they are not properly installed, or if they have been damage over time because of weather and wear. These sections are best replaced to keep the gutter functioning properly.


Step 5: Adjust Pitch of Gutters

 
More than likely when your gutters were installed, they had a pitch of about 1/16.” You’ll want to measure the pitch and make adjustments if necessary. This is very important because improper pitch can equal poor or no drainage.

Any high or low spots can often be corrected by slightly bending the hangers that support the gutter itself. You may need to add additional gutter hangers to raise or lower the slope of the gutter at any given point also.


Install Gutter GuardsStep 6: Install Gutter Screens or Guards

 
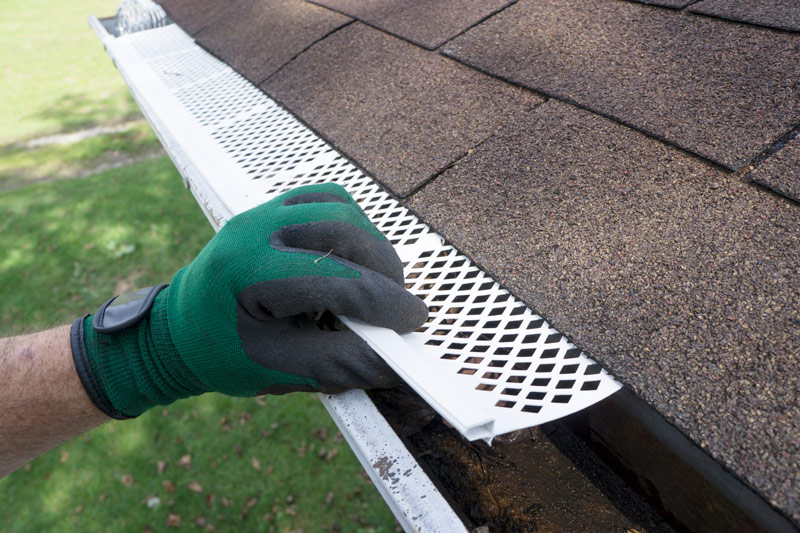
Once your gutters have been cleaned and fully repaired, you’ll want to keep them that way! One way to prevent gutters from filling with leaves and other debris is to install metal gutter screen or an aluminum gutter guard. Gutter guards simply extend across the entire width of the gutter blocking debris but still allowing water to enter. It helps to prevent clogs and makes cleaning out your gutters much easier.


By following this step-by-step guide for cleaning, repairing and protecting your home’s roof gutters, you can rest assured that they will work without clogging during the worst of rainstorms, protecting your home from the elements, and prolonging the life of your siding and foundation.


Home Exterior Maintenance Project


Questions or concerns about your home exterior maintenance projects? Stop in to your local GNH Lumber! We’re always glad to offer guidance, tips or suggestions, or point you in the right direction for just the product needed to get the DIY project done.

Stylish Painting Techniques

9 Stylish Techniques for Painting Living Rooms

Stylish Techniques for Painting Living Rooms

Does your living room need a fresh look? Are you thinking about painting your living room but don’t want to go with the same, boring solid walls of solid color?

Don’t worry – there are many creative and out-of-the-box ways to approach your living room painting project. And we’ve gathered up a few stylish and fun living room painting ideas you can try yourself.

Painting is one of the most amazing tools for creating a whole new living space quickly and at minimal cost! It’s a fun weekend project for the whole family. Beyond a rainbow of colors, sheens and finishes, there are also a wide range of textures, effects, stenciling and other creative techniques you can use to really make your living room walls pop.

The only question is: which stylish technique for painting living rooms will you pick?

Get your painting project started!

1. Ombre Walls

Ombre Walls

Image source: www.lushome.com/20-modern-wall-painting-ideas-watercolor-ombre-painting-effects/144403

Watercolor painting, or “Ombre” painting, is a beautiful decorating trend that can personalize modern interiors. It gives the effect of one color melting softly into another color, like a sunset sky. Follow these step-by-step directions from Spruce.com to make sure you get the look just right. This is a really satisfying way to create visual depth in your living room, and lend an airy, ethereal mood.

Here’s what you’ll need to pick up at GNH:

  • Masking tape
  • Two colors of Benjamin Moore Interior paint
  • Disposable measuring cup
  • Five-gallon bucket (for mixing)
  • Large mixing stick
  • Three large paint trays
  • Three medium-sized paint rollers 
  • Small paintbrush 
  • Several large paintbrushes


2. Stenciling

Paint Stenciling

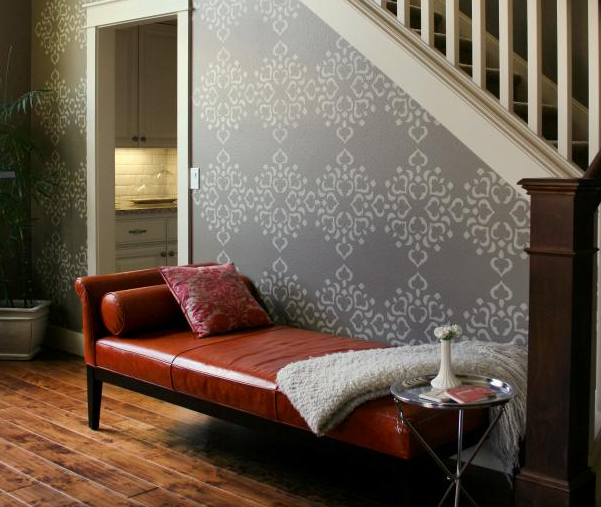
Image Source: http://www.hgtv.com/design/rooms/living-and-dining-rooms/how-to-stencil-a-focal-wall

Break out of the constraints of solid walls of color with stencils! With an endless supply of stencils available, plus, the ability to create custom stencils of your own, the sky’s the limit when it comes to designs.

If you want to create a repeating pattern—or even an entire wall mural—but don’t want to test your freehand artistic abilities, a stencil should be your tool of choice. It’s fun to involve the whole family in choosing just the right stencil pattern to create a design you love. You can stencil a whole wall or just a border to create a range of effects.


Here’s what you’ll need to pick up at GNH:


3. Rag Rolling

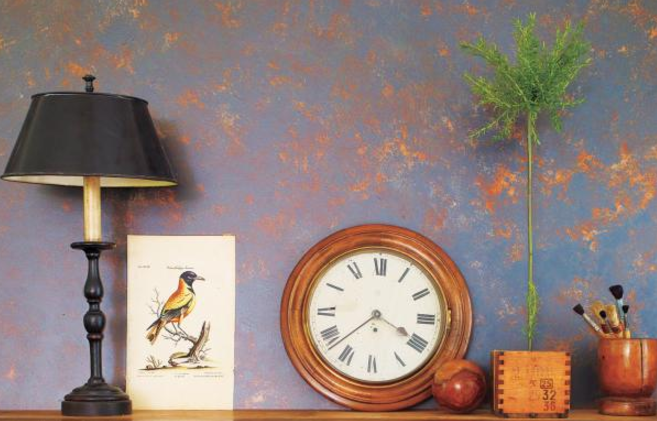
Image source: https://play.google.com/store/apps/details?id=com.DIYWallPaintMotif.Skadoosh

Rag rolling is a paint technique that’s considered “country finish.” Use this simple method on an accent wall to create a focal point, or go bold on all four walls.

To create the rag rolling look, first paint your walls with an overall base color. Allow it to fully dry. Then use a crumpled rag to apply a darker or lighter glaze color mixture over it. You simply roll the rag over the wall in random directions.

Here’s what you’ll need to pick up at GNH:

  • Painter’s tape
  • Base coat of Benjamin Moore Interior paint 
  • Top coat of lighter or darker paint glaze
  • 2 large paint trays 
  • Several large rags
  • Paint brushes
  • Paint rollers


4. Sponging

Sponging

Image source: https://www.thisoldhouse.com/how-to/how-to-sponge-paint-wall

Sponging, which is like rag rolling, is another way to create a textured wall that works well with many decorating styles. It’s easy really to do too! Just paint your walls with your desired base coat to get started. Once dry, use a natural sea sponge or sponge roller to dab on your desired top color in random, slightly overlapping patterns.


3. Strié, Dragging or Linen Look

Dragging Painting Technique

Image source: https://www.thisoldhouse.com/how-to/how-to-create-faux-fabric-effect-paint

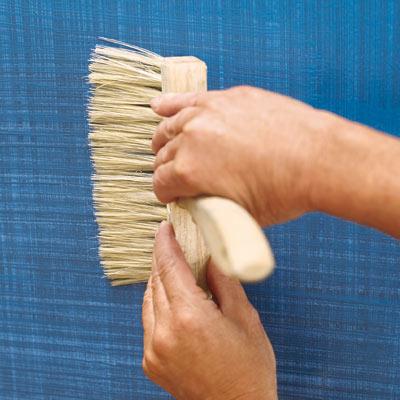
The dragging, or “Strié linen weave” painting technique is a great way to add texture to a modern, contemporary, or very eclectic space. It’s also easy to create by dragging a coarse brush through a tinted glaze in section. First, mix your satin base coat color of Benjamin Moore Interior Paint and glaze, then apply the paint/glaze mixture on the wall in sections, dragging your wallpaper brush over the wet glaze vertically and or horizontally. The idea is to create the look of a linen weave. It will take some time but the look is stunning.


What you’ll need to pick up at GNH:

  • Paint tray
  • 2″ and 4″ china bristle brushes
  • Paint pad
  • Rags
  • Water bottle
  • Benjamin Moore latex glaze
  • Base coat of Benjamin Moore Interior paint, eggshell sheen 
  • Top coat of Benjamin Moore Interior paint


4. Bold Accent Walls

accent wall

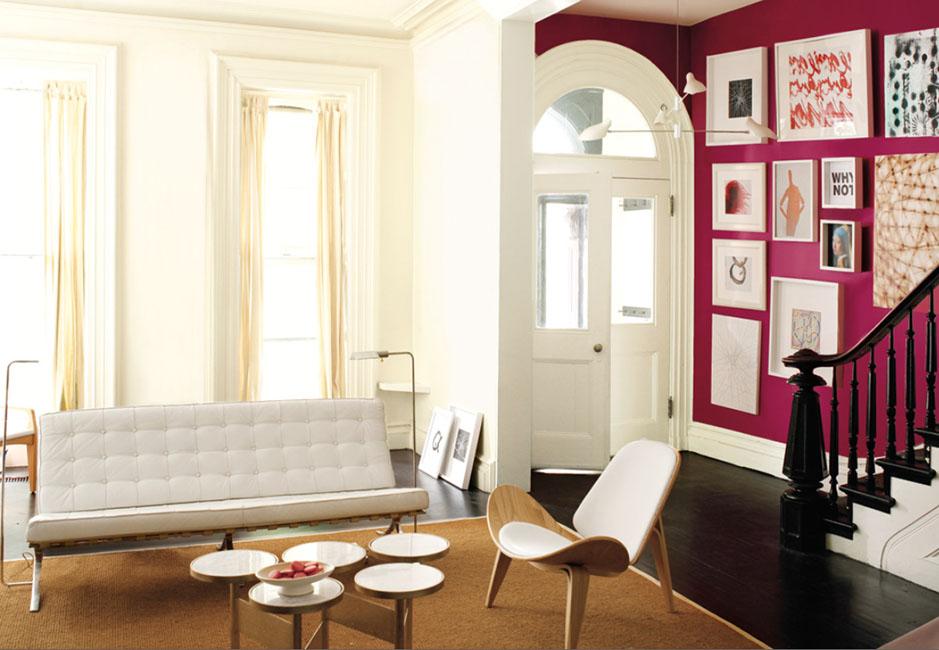
Image source: https://www.benjaminmoore.com/en-us/project-ideas-inspiration/interiors/living-room-ideas-inspiration

If you aren’t brave enough to paint the whole room with bright colors, why not consider a bold accent wall? This is a great way to introduce a pop of color, create a focal wall, or to add depth and texture to the space. You can use a focal wall to showcase artwork, photographs or to direct traffic down a hallway or up the staircase. You can also break up a smaller room into zones with a well-placed wall of color.

Here’s what you’ll need to pick up at GNH:

How to Build a Firewood Rack DIY

DIY: How to Build a Firewood Rack

How to Build a Firewood Rack DIY

If you have a wood burning fireplace or stove, that means you’ve got a wood pile. And if you’re lacking a firewood rack, chances are that a heap of unorganized wood is sitting by your back door creating an eyesore.

Even if your firewood is stacked neatly outside the door, you still need to make sure it doesn’t lean up against your house and trap moisture or you will create the ideal conditions for rotting wood and vermin.

The perfect solution? A new firewood rack that will help you stack your wood and create an attractive feature for your deck, porch or backyard. A well-made wood rack helps you store firewood nearby and keeps your porch or front step clean, and dry.

So, let’s “fire” up the DIY and get to work! Check out these easy DIY outdoor firewood racks:

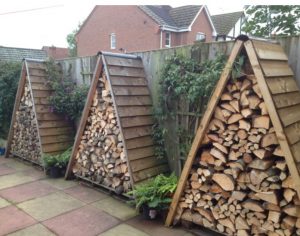
tent-firewood-rack

Stylish Storage

Looking for a stylish way to store wood? Using a pallet as a base, you can create a “tent” with a couple of two by fours and some planks of wood to use as shingles.

This idea comes from Single Track World. They also have some amazing ideas for building a DIY wood storage area or shed. Plus, they are beginner-level woodworker friendly.


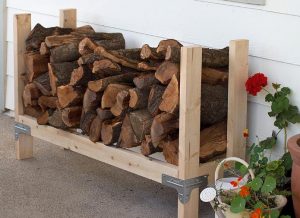
Simple Firewood Rack

If you want to build a simple yet functional firewood rack, then this is the rack for you! This is a simple but gorgeous DIY that anyone can do in less than an hour. For less than $100 dollars, you can have a firewood rack in any size you want. Stop by GNH Lumber to pick up these supplies first:

simple firewood rackTOOLS

  • Saw
  • Screw gun
  • 1/4″ hex head socket
  • Tape measure
  • Clamps
  • Framing square

SUPPLIES

  • (3) 2×4 8 ft. lumber (length can vary as needed)
  • (4) metal connectors
  • (1 box) connector screws

Check out DIY Done Right to download the plans and get started!


Rolling Firewood Cart

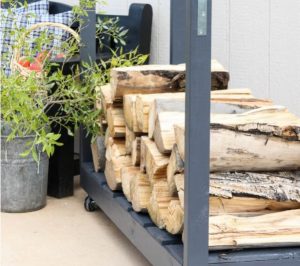
Rolling Firewood rack

If you want a firewood rack that’s easy to move, you’ll need a cart with wheels. This fun DIY is not only easy to make, it’s mobile! Having a cart that’s mobile is convenient if you entertain regularly on your patio or deck.

This DIY can easily be made in a weekend. If you like the look of wood grain, you can seal the wood in its natural state. But if you want to add color to match your home’s siding or trim, you can also add a coat of paint.  Here’s what you’ll need at GNH to get started:

SUPPLIES

  • 2″ x 4″ x 10′ Lumber, cut to size
  • 2″ x 3″ x 8′ Boards, cut to size
  • Fence Picket Boards
  • Miter Saw
  • Screw Driver/ Drill
  • Countersink
  • 3″ Torx Deck Screws
  • Clamps
  • 4 Casters
  • Sanding Block
  • Porter Cable Framing Nailer
  • 2″ 8 CC Nails
  • Air Compressor
  • Tape Measure
  • Patch Plus Primer
  • Paint Brush
  • 4 Corner Brackets
  • Black Paint

All the directions and some great DIY photos of the process can be found on thewoodgraincottage.com.


Firewood Rack with Roof

This is an awesome video that walks you through the process of building a super cool firewood rack completed with a roof and enclosed sides. They make it look easy and the end project is amazing!  If you want to create a firewood rack complete with a roof, check it out:


Happy building! And don’t forget that the experts at your local GNH Lumber are available to answer your questions, make suggestions, and help your complete your DIY project. Stop by today!

Canning versus Pickling

Canning Versus Pickling: What’s the Difference?

Canning versus Pickling

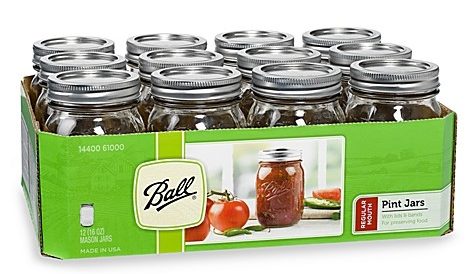
Ball Canning JarsHave you ever wondered how to preserve all that food in your garden? Learning about canning and pickling foods is a valuable tool. Not only can you create opportunities to store foods from your garden, you can also stock up on things from the store and can or pickle them!

Pick up Ball canning jars and other Ball supplies at GNH Lumber!

Before you jump in and get started, here’s a little information about each process and what makes them different.

What is Canning Anyway?

Before we start, here are the basics. Canning is a method of preserving food by processing the fruits or vegetables and then sealing the fresh foods in airtight containers.

Canning Jars“Processing” is a method of cooking the food before sealing it in glass jars. The process of canning effectively sterilizes the bacteria that normally can cause spoilage. This means you can store the food for up to five years in proper conditions which is far longer than it would keep in the fridge!
There are two processes for canning foods at home. The first involves either boiling the preserved food, or boiling it under pressure. Respectively these are known as the “Water Bath Method” and the “Pressure Method” of canning. The second is “Pickling.”


Water Bath Canning

Water bath canning is a system of “processing” the jars for a set period after they’ve been filled to kill off any bacteria present. It’s done with boiling water after the lids have been place on the jars. You often see this type of canning when making jams, jellies, and sauces.


Pressure Canning

For foods that have low-acid levels like meats, vegetables, beans and chili, it’s vital to make sure that all the bacteria are dead to prevent against botulism. Pressure canning ensures this result, by sterilizing and sealing your canned goods inside a very high-temperature pressure cooker.


Pickling 

The process of pickling is a subset of the water bath method. Pickling preserves food using a “brine” to anaerobically ferment the food. The process produces lactic acid which prevents spoilage of the food.

Storing the food in an acetic acid, better known as vinegar, causes the food to “cure,” thus making it safe for consumption at a much later date.

It’s important to note: pickling food involves “cold packing” and then covering foods with boiling hot brine. This method works for a wide variety of foods! For pickles, the cold pack method works easily (you can even put sliced cucumbers in your old jar of pickle juice and stick them in the fridge for instant pickles in 2 weeks!).

However, when it comes to fruit and other acidic foods that are not stored in vinegar, the hot-pack method must be used or you’ll retain bacteria.


Resources: The Old Farmer’s Almanac

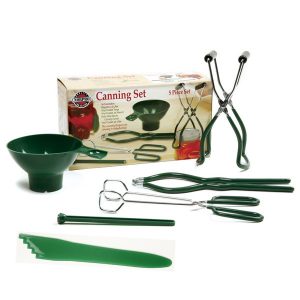
Canning Set

Is your garden overproducing? Stock up on canning supplies and kits at GNH Lumber!

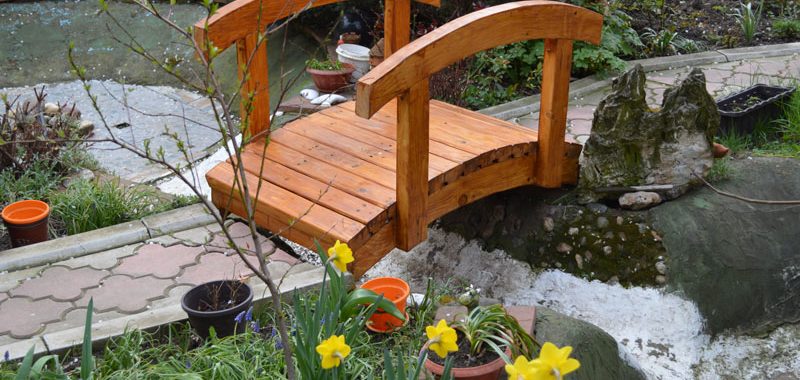
garden bridge

DIY: How to Build a Small Garden Bridge

garden bridge

What could be more charming than a small wooden bridge to accent a water feature or help you step over uneven sloping in your garden? And, it’s easier than you think to create your own bridge! Just follow these simple instructions for a sturdy, arched garden bridge with handrails that you can paint or stain any color you like.

Here’s what a small garden bridge DIY project requires:

Materials:

  • (2) 2x12s hardwood (for support stringers)
  • (13) 2x6s hardwood (for floor planks)
  • (2) 8’ 4×4 treated pine post (for handrails), cut into 6 32” posts
  • 25” Length of bendable conduit (to create arch guide on stringer)
  • Benjamin-Moore Paint or stain (available at GNH) & brushes
  • Wood screws (2” stainless steel)
  • Wood nails
  • Pencil (for marking)

Tools:

  • Circular saw
  • Jigsaw
  • Electric screwdriver
  • Drill/drill bit (1/2”)
  • Hammer
  • Wood planar
  • Vice/wood clamps

1. Draw Arches on the 1st Support Board (Stringer)

Lay one of the 2×12 boards flat to prepare to sketch pencil guides for the top and bottom arch shapes:

stringer diagram

There’s a simple trick to creating a perfectly even archway – and it works every single time! First, drive a guide nail on each end of the board. Next, bend a length of plastic conduit between the two nails (see diagram above), and use the conduit as a guide to draw the arch onto the board with your pencil.

For the lower arch, drive two nails into the lower side of the wood, each 18” from end. Repeat the process of bending the conduit between the nails and drawing the lower arch onto the wood.

You will cut the 1st archway, and then use that as a guide for the 2nd archway, so there’s no need to measure twice!

Tip: Leaving 18” from the end of the boards on the bottom cut ensures that there will be plenty of support on the stringers for the weight of the bridge.


2. Cutting & Sanding the Stringers 


The easiest way to cut the top arch from the first stringer board is by a series of short straight cuts using a circular saw. For the bottom arch, a jigsaw works best – just be sure to move slowly to get through the thick wood without damaging the blade!

Now, lay the finished stringer atop the second 2×12 board, and use it as a guide to draw the arches onto the second board in pencil. Cut the second board.

Finally, clamp both stringers together and use a wood planar to smooth out any rough edges in your archway cuts.

Paint stringer boards white (or any color or stain you choose)! We suggest Benjamin-Moore exterior paints or Arborcoat stains – available at GNH Lumber!

Allow to dry.


3. Cutting & Drilling the Planks


Cut your hardwood 2x6s into 36 inch planks. Place the stringer boards parallel on the ground and measure 32 inches between them, top and bottom (to allow for 2” of plank overhang).

Place a hardwood plank onto the stringers and arrange so that there is even overhang on both sides. Mark and pre-drill two holes on each side of the plank (all the way through to the stringers below). Drill 2” stainless steel screws to tighten.

Next, place the second plank onto the stringers. Using a carpenter’s pencil, measure a space between the first plank and the next. Now, repeat the steps above to secure the plank in place.

Continue working from one end of the bridge to the other until all the planks are secured to the stringers!


4. Attaching Posts & Handrails


If you choose to add posts and rails to your garden bridge, cut your 4 x 4 posts into four 32” lengths, and paint them white (or any color or stain you choose – just make sure it matches your stringer boards). We suggest Benjamin-Moore exterior paints or Arborcoat stains!

Allow to dry.

Remove the 2nd or 3rd planks from both ends of the bridge for post placement.

Place rail posts to the outside stringer boards, one at a time. Use a T-square to ensure they are at a clean right angle to the ground. Pre-drill holes and then secure to the stringer with wood screws.

garden bridge 2

Next, measure and cut the planks to fit around the rail posts before returning them to the bridge.

Finally, add handrails to match the planks of the bridge! Secure the handrails to the posts with 2 wood screws through each post on both ends of the bridge.


That’s all there is to it! Enjoy your brand-new garden bridge! Place it over a small creek, water feature or uneven sloping on your property.


At GNH Lumber, we have everything you need to create your beautiful garden oasis. For more guidance, tips and ideas, stop in to our Greenville or Windham locations, or visit us today online!

Sources: Great Home Ideas, How To Build A Backyard Bridge, Handcrafted Garden Bridges, Footbridge Page 1, Handcrafted Garden Bridges, Footbridge Page 2