subway tile backsplash

DIY: How to Install a Subway Tile Backsplash

subway tile backsplash
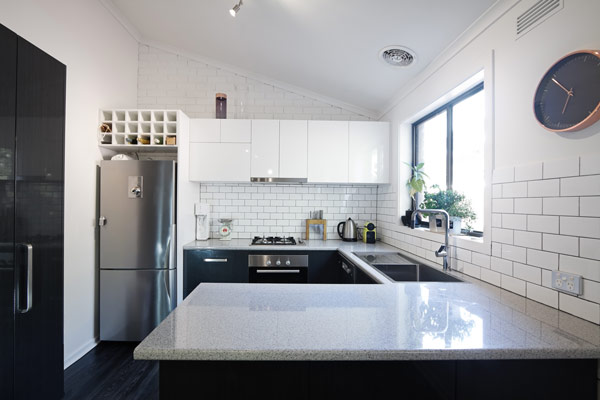
Subway tile backsplashes are a growing trend in kitchens and baths and can make for a gorgeous, clean finish.

By taking on some of the work yourself during your kitchen or bath remodel, you can save money and have fun in the process! Installing a subway tile backsplash is a simple project for any DIYer.

Download our free kitchen planning guide.

In this DIY, we’ll help you learn how to install a kitchen or bath subway tile backsplash in 7 simple steps:

Materials & Tools

  • Subway tiles
  • Tile spacers
  • Tile saw
  • Grout
  • Grout sealer
  • Wall tile mastic or adhesive
  • Notched trowel
  • Squeegee or tile float
  • Sponge
  • Level


7 Easy Steps to Installing a Subway Tile Backsplash

Step 1: Apply the Mastic

Cover the surrounding area to protect adjacent surfaces.

Begin by applying the thin-set adhesive or mastic to the wall using a notched trowel while tilted at about a 45-degree angle, moving in the same direction. Use a thinner notch with this adhesive so you don’t have build-up and unevenness behind the tile itself. Create consistent ridges of the adhesive on the wall. Only apply as much adhesive as you can cover in 10 or 15 minutes.

Smooth over or knock down the thin-set to get rid of the comb marks. Otherwise, you’ll see the comb marks through the tile. The trick is to do this without changing the depth of the thin-set on the wall. Use spacers to make sure the tiles are set in a uniform pattern.


Step 2: Set the Tile

Set the tile into the adhesive. Install any border tile first, then position the sheets of subway tile on the wall next to the border. Align your outer lower tile flush with the edge of the countertop and press into the mastic. Work horizontally, placing your second tile next to your first and adding 2 tile spacers in between them.

Clean out any mastic that was squeezed in between the tile (a toothpick or a knife will work). This will make it easier for you in the long-run.


Step 3: Cut Your Tile

Once you are done with the first row, you’ll start on the second row. Remember, you’re installing subway tile so you’ll want them to be staggered. You can cut your tiles in half using your tile saw.


Step 4: Tackling an Obstacle

When you’re working around an obstacle such as an outlet, measure the distance between the electrical outlet and the last laid tile. Subtract the length of your space (most likely 1/8 of an inch), and then mark a tile for cutting.

Cut the tile along your marked line. A tile wet saw makes this project much quicker and easier with better results than other tile cutting methods. You’ll want your tile to be hidden under the switch plates, so make your tile as close the electrical outlet as you can. Use a level to make sure you’re on track and tiling in a straight line.

Step 5: Let it Sit

Once the tiles are installed, let the mastic set up overnight.


Step 6: Add the Grout

Once the mastic has dried completely, remove the tile spacers. It’s now time to add the grout!

Tape off any edges you don’t want grout to go, including cabinets, outlets and walls.

Mix the grout according to the package. The consistency should be similar to peanut butter.

Using a tile float, apply the grout to the backsplash. Use the same 45-degree angle to work the grout into all the crevices. Work in 2-feet to 3-feet spaces.

When you spread the grout on with the float, you’ll want to apply pressure into the tile spaces themselves so you are squeezing the grout completely into the spaces to prevent cracking and flaking over time. Run the grout line in multiple directions.


Step 7: Sponge Off the Grout

Once you have applied the grout to the tile spaces, it’s time to sponge off the grout from the tile themselves. Wet the sponge with water and ring out most of the water.

Begin wiping down the grout with the sponge. It’s a messy job, so you’re going to have to ring out the sponge quite a few times.

Get the tiles mostly cleaned of grout and then let it sit. Once the gout has dried completely, you’ll be able to totally clean the tiles. Make sure you let it sit before completely wiping off the grout or else you will begin to pull the grout out of the tile spaces!

Use the terry cloth side of your sponge for your final wipe-down before allowing the grout to dry completely. You’ll want to wipe down your grout about 5 times before letting it dry completely.

Step 8: Admire Your Hard Work

Now that you’re done, step back and admire your hard work!

Allow at least four hours for the grout to cure.

Congratulations! You’re an expert at installing subway tiles! Now get to work and make your kitchen or bathroom look gorgeous.


Kids Bedroom Paint

11 Fun Ways to Paint a Kid’s Bedroom

Kids Bedroom Paint

Painting your child’s bedroom can be a lot of fun. Whether you’re preparing a nursery or supporting your child’s wish for a new look, here are eleven style ideas to consider:

There’s Value in Simplicity

1. Pastel Colors

Sometimes simple is best. Choosing to paint the whole room one solid color is quick, easy, and versatile. The walls are just a background; if you want the focus on posters, furniture, or other content in the room, why make them compete?

Get your painting project started!

Using pastel colors will fade the walls out of notice even further, and allow for extensive style changes as your child grows, without the need to repaint. Consider pale yellows, blues, greens, and tans. Just a hint of friendly color, to last an entire childhood.

2. Bright Colors

Pastel sound too boring? Go bold! Keep the simplicity of one solid color, but add a bit of personality. Bright yellow, orange, blue, purple, pink… what kid wouldn’t love a bedroom painted their favorite color?

3. Accent Wall

Kids Bedroom Paint
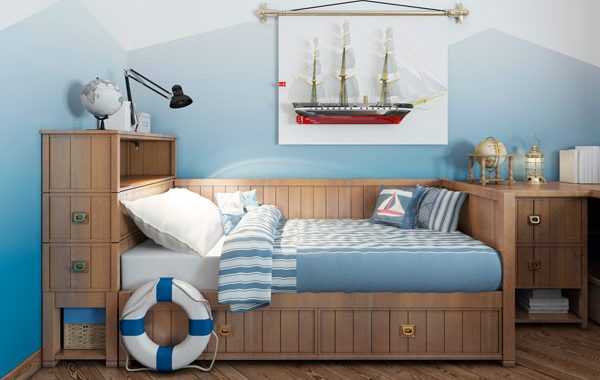
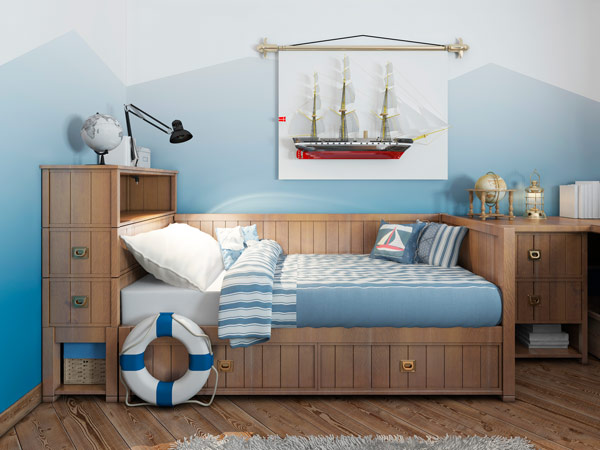
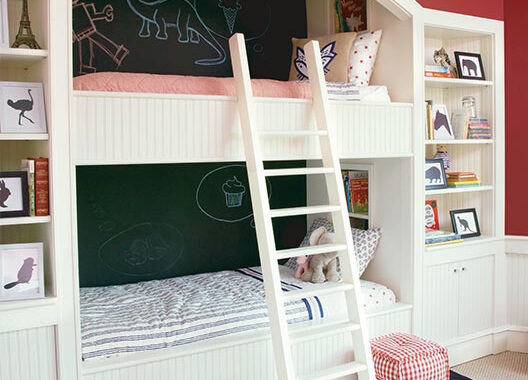
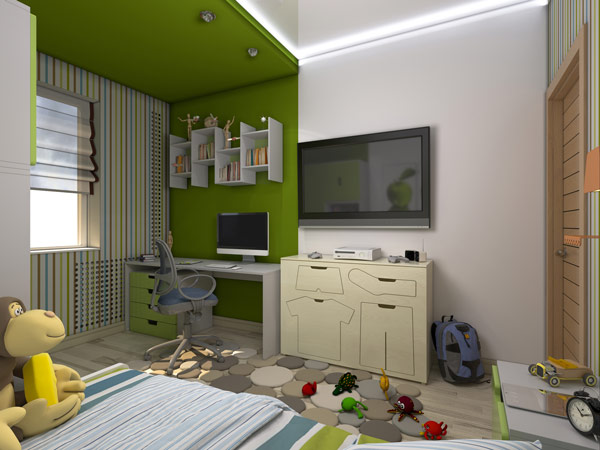
Add interest to the room by breaking away from the idea of a single, solid color.

Painting a single wall in a second color doesn’t take much extra work. Just be sure to let the first, lighter color dry before taping the corners and adding the second color.

4. Chalkboard Paint

Best used as an accent wall, chalkboard paint will extend the fun long past the initial paint job. If your kid likes to write on the walls, now you can let them!

Alternatively, an entire room can be painted in chalkboard paint. Just be aware that the end result of this is black walls. Think carefully about how dark or bright the overall effect on a room will be before committing to dark-colored walls.


Fun for the Whole Family

5. Personal Touch

Allow your child to help paint their bedroom. With a drop cloth on the floor and tape or plastic over everything you don’t want painted, even a five-year-old can be allowed to help. Dress your child in an oversized shirt you don’t mind getting messy, and let the fun begin!

The image of your child with a paint roller a little too scary for you? Give them a smaller project: the light switches. Light switch covers can be removed from the wall – you may even have done so already, to more easily paint around them. Set your child up with the switch covers and their own paints, and they can design them however they want. Once finished, make sure the paint is dry and the switch openings clear, then screw them back in.

6. Sponge Painting

Another great way to get the kids involved is by sponge painting. Prepare the wall with a base coat, then let your children join the fun of sponge painting.

Natural sponges work best, though you can use any porous sponge. Mix the paint color of your choice with glaze – usually one part paint to four parts glaze – and begin dabbing the paint over the base color.

Experiment first on a piece of cardboard, but when you’re happy with the effect it’s time to start the walls.

For the best results, start in an upper corner of the wall, but if your child can’t reach let them start where they want. The best part of sponge painting is how easy it is to redo – just go back over an area with a different color. If only using two colors, this means mixing a little of your base color with glaze as well, to allow sponging over areas where your second color is too thick.

7. Stenciling

Kids Bedroom Paint
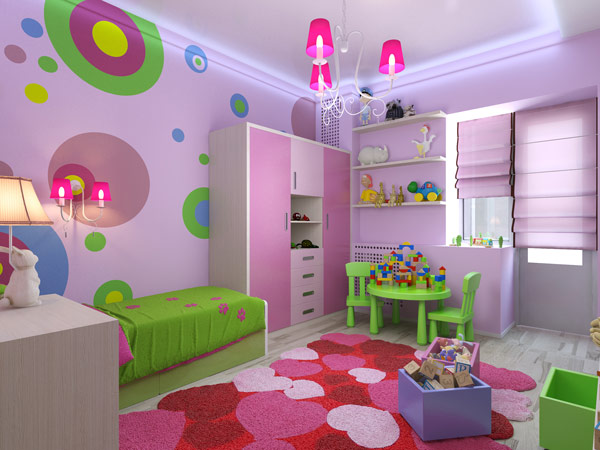
You don’t have to be an artist to add images to the walls of your kid’s bedroom. Use stencils, which can be bought or homemade. For homemade stencils, cut a shape out of paper or cardboard. For smaller images, you don’t have to draw anything: you can print from your computer and then just cut along the outline.

Attach the stencils firmly to the wall before painting. For larger images, you can even trace the edges and let your child fill in the rest.

An alternative to stenciling – if you have a steady hand – is projection. Project the image you want onto the wall, and trace the outline. Then turn off the projector, and fill in within the lines. Kids can help here too; you’ll have turned the whole room into a coloring book.

A variant of using a projector is to use shadows. Turn off the main light for the room, and turn on a bright lamp or flashlight pointed at the wall. Then ask your child to pose in front of it, perhaps pretending to do their favorite activity and trace their shadow! You can get as creative as you want for this, even bringing in props.


A Work of Art

8. Accent Image

A kid’s bedroom can also be a chance to enjoy a real work of art. If you, your child, or another family member or friend has artistic talent, consider the opportunities for a truly unique bedroom. It doesn’t have to be too time-consuming. A single accent piece can add a lot of interest, without taking weeks to finish or making you reluctant to cover the walls with furniture.

An accent image or design can be as unique as the child whose room it appears in, but some possibilities to consider are a tree in one corner, vines around a window, or a spaceship on one wall.

9. Literary Touch

When painting a kid’s bedroom, you’re not limited to colors and images for accents. You can also use words. Consider a favorite poem or saying, or the opening lines of a favorite story. Letters can be stenciled or hand-drawn; for more stylized fonts you can even use a projector.

10. Themed Room

Kids Bedroom Paint
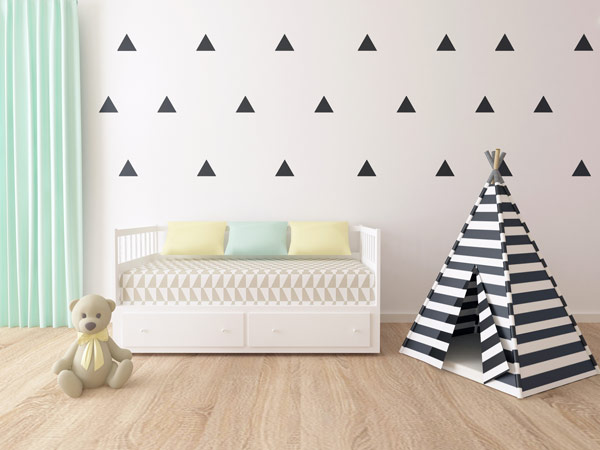
Feeling ambitious? You’re certainly not limited to a few accents. Many kids enjoy having a themed room. What does your child enjoy the most? Can you create a bedroom that reflects this theme?

A kid who loves mermaids could have a room with sponge-painted walls in blues and greens, with stenciled fish scattered over the walls and a mermaid painted on one wall. A kid who loves soccer could have a soccer net painted around a window, and the outline of themselves kicking a soccer ball traced onto the wall.

11. Mural

Are you all in? Imagine your kid’s bedroom as a sprawling mural that covers all four walls and maybe even the ceiling. If you have the time and talent to do this yourself, go for it! If not, it may be possible to hire someone to help.

DIY: Floating Shelves

How to Build Floating Shelves

DIY: Floating Shelves
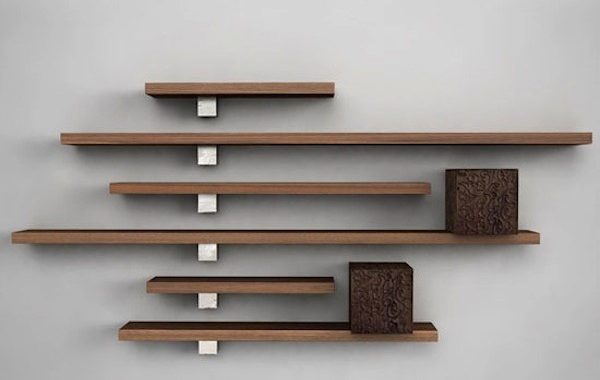
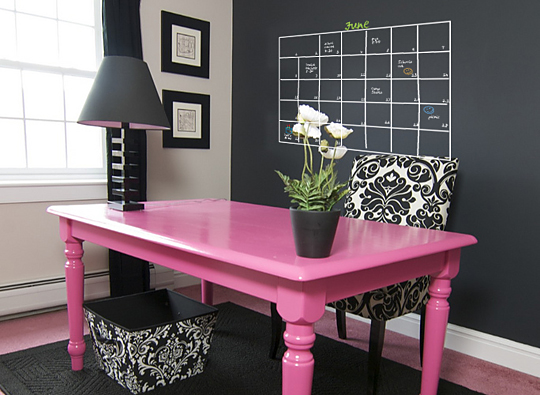
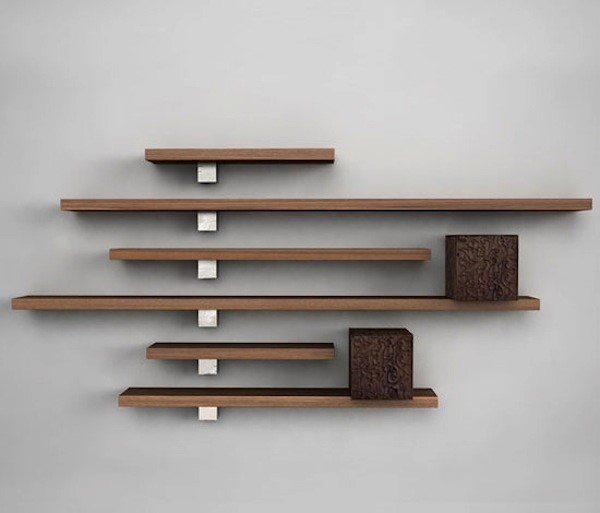
Floating shelves are an elegant way of displaying collectibles, photos, travel mementos, or other decorations. This project is great for any DIY beginner because it’s simple, inexpensive and doesn’t take very long to make!

Floating shelves are useful for displaying items in your living room, bathroom, or just about any room of the house.

This easy DIY guide will show you how to build these floating shelves. Just follow the simple step-by-step instructions!

To start building simple floating shelves, determine whether the type of wood you’re going to start with. For this DIY, we’re going to use a hollow core door.

Materials Needed

  • 1 – 2 x 4 x 8
  • 1 – 18-in. wide hollow core door
  • 1/4-in. x 3-1/2-in. lag screws
  • 1-in. brads
  • Masking tape

Tools Needed

  • Hammer
  • Tape measure
  • Circular saw
  • Stud finder
  • Level
  • Glue
  • Straightedge
  • Table saw
  • 40-tooth carbide blade

Steps to Building Floating Shelves

Step 1: Mark the shelf position on the wall

Trace the horizontal location for each shelf using a 4-ft. level as your guide. Using a stud finder, you should mark the locations of your studs and lightly press masking tape over each one.

Step 2: Cut the door

Clamp a straightedge guide to the door, and then cut the hollow core door lengthwise. Be sure to use a 40-tooth carbide blade for a better and more smooth cut.

Step 3: Measure to determine cleat thickness

Measure the space between the outer veneers of the door and cut cleats from a 2×4 to this thickness. Use dry lumber for cleats.

Step 4: Screw the cleats to the wall

Pre-drill 1/4-in. diameter holes at the stud locations after you cut the cleats to length by holding the cleat to your line on the wall and drilling into the stud with a 1/8-in. bit. Using a wrench, install one lag screw into each stud until it’s tight. Use 1/4-in. x 3-1/2 in. lag screws. Each cleat must be straight.

Step 5: Test fit the shelf

Make sure the hollow core door fits over the cleat. Use a sander to remove material from the back edge for a proper fit.

Step 6: Install the shelf

Apply glue to the top of the cleat and the inside bottom edge of the hollow core door blank. Slide the shelf over the wood cleat.

Step 7: Secure the shelf

Nail the shelf to the cleat using a square as your guide. Start at the middle and work your way to each end. You should use 1-in. brad nails spaced 8 in. apart.


And you’re done!

Now that you know how to create beautiful, inexpensive floating shelves, get to work! For all the lumber and tools needed to build these custom shelves, visit your local GNH Lumber location.

Blanket Ladder DIY

DIY: How to Build a Blanket Ladder in 5 Easy Steps

Blanket Ladder DIY

Blankets can be an essential design element in your living space. Not only are they great to have on-hand when it’s chilly, they also add a pop of color, interesting textures and a cozier feel to your living room.

Because most living rooms have blankets scattered all over the couches and chairs, the trick is deciding how to display them in an attractive and functional way. Blanket ladders are a nifty and visually-interesting way to keep those blankets stored yet still in view. Keep your home tidy – and stylish – this winter by making your own blanket ladder!

Even if you’re a newbie to DIY projects, building your own blanket ladder is quite simple – and fun!

Get started by bring the following supply list to your local GNH Lumber.

Materials:

  • 2 six foot (1 x 4-inch) pieces of lumber
  • 1 six foot (2 x 2-inch) piece of lumber
  • Saw
  • Wood screws
  • Drill
  • Sandpaper, rough
  • Minwax Stain
  • Paint brushes
  • Cloth
  • Rags
  • Felt pads to protect the wall the ladder leans against (optional)


Step 1: Cut the boards and sand the edges.

First, cut four 18-inch boards out of the 2 x 2 lumber, and sand all board edges to create a rustic look. Sand the edges of the 2 six foot (1 x 4-inch) pieces of lumber, as well.


Step 2: Determine the placement of the boards to construct the ladder.

Place the six foot (1 x 4-inch) pieces on the ground and place the 18-inch boards at even intervals between them.

Spacing the rungs at 14 1/2 inches apart works well, but you can space the rungs however you like.


Step 3: Secure in place with screws.

Screw the rungs of the ladder into the rails of the ladder using wood screws.


Step 4: Staining (or painting).

Wipe thoroughly with a slightly damp cloth to remove any dust. Then use a paint brush to apply your favorite wood stain (or paint), wiping away any excess stain with a rag.

*Don’t forget to the stain dry overnight to prevent smudging and sticking.


5: Attach felt pads.

Attach felt pads to the back of the ladder on the top end to protect the walls it leans against. These can be purchased inexpensively.


Voila! You now have a stylish and interesting display ladder for your blankets.

Don’t forget, you can customize this DIY in a variety of ways to personalize it for your home. If your room has very high ceilings, you may want a taller ladder with wider spacing between the rungs. You can you dowels for ladder steps, or choose a bright paint color instead of a stain. You can also place several light coats of paint and then sand roughly for a more distress look. You’re only limited by your imagination!

Holiday Light Displays 7

Our Top 10 Ideas for Holiday Light Displays

Holiday Light Displays 7Are you looking to light up the neighborhood? Create a sparkling light display each night during the holiday season and be the talk of the town.

At GNH Lumber you can find Holiday lighting and décor supplies from lights to outdoor timers. Let us help you celebrate the season your way!

For ideas and inspiration, check out these top 10 ideas for holiday light displays: Continue reading

How to Pick House Paint Colors

How to Pick House Paint Colors for Curb Appeal

How to Pick House Paint Colors Whether your home is brand new or in need of an update, the best way to make it stand out on the curb is with a beautiful coat of exterior paint. While this might sound like an opportunity to go crazy expressing yourself with bright and busy colors, there are many things to consider before choosing a color scheme for your house:

  • Do you intend to resell your home in a few years?
  • How will the color scheme work with your gardens and landscaping?
  • Does your house have wood or vinyl siding?
  • Are there pre-existing colored materials, like brick, stone or stucco, to complement with your palette?
  • What is your region or climate? What are your neighborhood trends?

Get your painting project started!

If you’re planning to sell your home in the future, sticking to a more neutral color scheme is a good resale strategy. Keep in mind that tried and true combinations are always a great choice.

Five of the most popular house colors are:

  • White/Off-white
  • Tan
  • Gray
  • Yellow
  • Blue

house-paint-colors2These are time-tested hues that work well against green lawns and gardens, and complement reddish brick fireplaces and roofs. You can add more impact by using darker or lighter variations of the main house color to accent things like window frames, shutters and trim.

If your plan is to keep your home for generations to come, or you want to make it stand out from the rest in the neighborhood, there are ways to successfully add vibrant colors without losing curb appeal.

  • Consider using that daring red paint on your front door in order to easily direct visitors to your doorsill.
  • Or add bright yellow shutters against a pale blue house to create nice visual contrast.
  • Sometimes highlighting an architectural element like an archway or chimney with a bold color can have a whimsical result.

If you’re working with natural wood stains, you can choose to highlight the natural warmth by adding cool-hued accents. Very large homes appear less sprawling with a bright white coat of paint accented with primary colors. Smaller homes are more forgiving with a vibrant color palette, especially when the roof and trim are neutral toned. Using pastel versions of a bright color is a great way to add uniqueness and charm without creating disharmony with the environment.

Whatever color scheme you choose, make sure to follow general rules for color harmonies, so your hues won’t compete or clash.

house-paint-palette
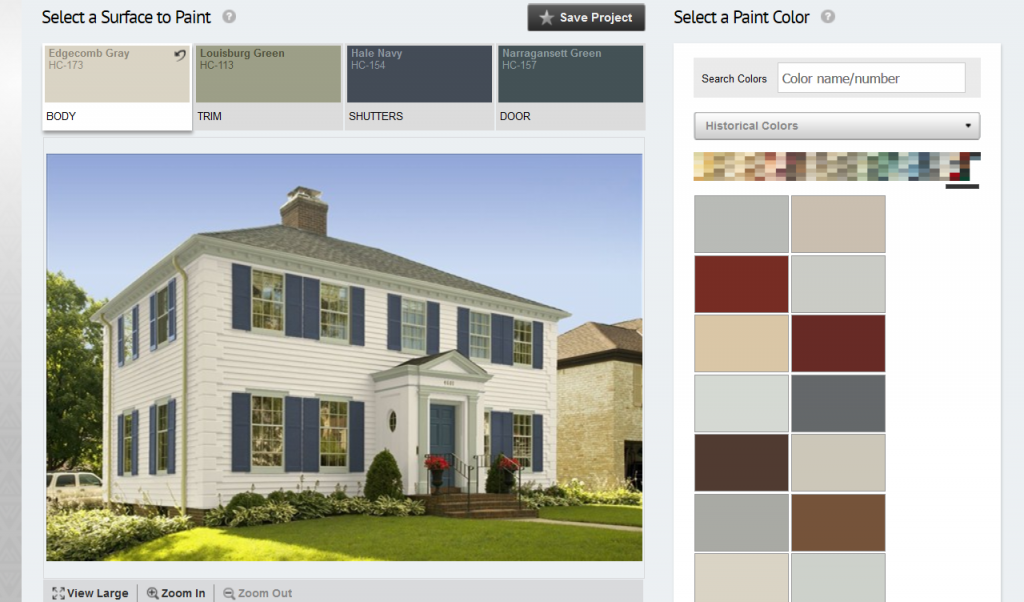
Not sure what your final color scheme will look like? Looking for a way to test out some wild ideas? Check out this great tool from Benjamin Moore! Paint your home online and see how colors will look before making a purchase with the Personal Color Viewer virtual paint color visualization tool.

How does it work? Simply choose a home exterior that is similar to yours (or upload a photo) and have fun experimenting with all kinds of color schemes for body, trim, shutters and door. The best part is, when you’re done, you’ll have a list of Benjamin Moore paint colors to bring in to GNH Lumber for your new home exterior color scheme.

So, explore your color options and get creative with the possibilities! Your home’s exterior color scheme will greet you every time you turn into your driveway. So, make choices that will enhance your home’s appearance for years to come… And don’t forget to have fun!


kitchen cabinets uplighting

8 Ways to Bring Your Kitchen Cabinets to Life

kitchen cabinets uplighting

Is your kitchen bland and uninspired? Do you want to update the look of your kitchen quickly and without a major renovation?

Well, you’re in luck! There are a variety of simple ways to improve the look and feel of any kitchen space without breaking the bank with a full redesign. Choose from one or several of the methods below, to create a unique space that’s functional — and beautiful.

Download our free kitchen planning guide.

Here are a few suggestions to help you bring your kitchen cabinets to life!

Continue reading

How to Apply Chalkboard Paint: A Rookie Guide

IA_chalkboard_pink_table_540x395
Chalkboard paint is gaining popularity due to its eccentric yet practical traits.  Who doesn’t love the idea of writing a quick note on the walls without ruining them?  Kids love it because they can go crazy drawing and doodling indoors, and adults love it because it helps them create and revise lists the easy way, or better manage household chores. It’s fun, original, and overall a cool concept! Which is why homeowners are using this paint everywhere from bedrooms to playrooms, and from offices to kitchens.

Are you a chalkboard paint rookie? Don’t worry! It’s easy to apply. The process for applying chalk paint is similar to that of regular wall paint – with a few key differences. It’s important to apply this specialized paint correctly so that it will function as a durable writing surface for years to come.

So, are you ready to get started on your custom-made chalkboard?

Get your painting project started!

Here is the supply list you will need to bring to your local GNH:

  • Rust-Oleum Chalk Board Paint (in your choice of color)
  • Paint rollers/brushes
  • Painter’s tape
  • Paint tray
  • Drywall filler or wood putty
  • Putty knife
  • Sandpaper, fine
  • Damp rag
  • Drop cloth

And here’s how to properly apply chalk paint in your home:

  1. Buy Enough Paint. Make sure you know how much chalkboard paint you need before you go to your local GNH. Don’t make the mistake of underestimating how much paint your project will require. The complete surface of the chalkboard has to be painted at the same time to keep the color and tint consistent. If you run out of paint and have to purchase and apply a new batch, you will see a difference in the way the two paints appear after drying.
  2. Clean & Sand. Whether you’re painting a large or small area, you must clean the surface thoroughly before applying any paint. Use a damp rag to remove dirt and dust. It’s also very important to lightly sand the surface with a fine sandpaper, so that it’s smooth to the touch. Use a damp rag to remove dust from sanding.
  3. Fill Cracks & Holes. Next, you finish preparing the surface by filling in any cracks or small holes. This can be accomplished with drywall filler, wood putty (or another filler depending on the surface you are painting) and a putty knife.  Wait until the filler dries before sanding it down and wiping away dust.
  4. Stir GENTLY. This step is very important – so pay attention! Chalkboard paint is very susceptible to breaking down if stirred too hard. Use your paintbrush and gently move the paint around in the can. When stirred too hard, the properties that allow you to write on the finished surface can break down, so be careful!
  5. Start in the Middle. Place a drop cloth on the floor below the surface you are painting to protect it from spills and drips. When applying the chalkboard paint, you want to start in the middle of the surface you are painting, and work outward. Use a roller for large areas, and brushes for smaller areas. Maintain a consistent stroke, overlap all brush marks, and clean up any drips as they occur to ensure a smooth finish.
  6. Allow 3 Days to Dry. Regular paint usually dries within a day, but not this paint! Chalkboard paint takes about 3 days to dry. This is very important as the agents inside the paint need to harden completely before you will be able to write on it.
  7. Prepare for Chalk. The last step is to prepare your new chalkboard surface. How? With none other than chalk, of course! Once the chalkboard is fully dried, prepare the surface by rubbing chalk over the entire area. Leave the chalk on for a few seconds, and then erase it. Now your homemade chalkboard is ready to be used and enjoyed!

Chalkboard paint is a ton of fun for both kids and adults. Not only can you use it to paint your walls, but you can also apply it to glass, cabinets, clay pots, and many other surfaces. This allows you really get creative and use your imagination. Have fun!

painted ceiling

Transform Any Room with A Painted Ceiling

painted ceiling

Flip through any home décor magazine and you’ll notice that the ceilings are almost always painted – and, more often than not, in bright, bold colors.

Designers never omit the ceiling when designing the color scheme of a space.  After all, the ceiling is the largest area of uninterrupted surface in a room. Therefore, the color you choose for a ceiling will dramatically impact the room’s overall effect. Think back and remember which rooms drew your eyes in the most and made a lasting impression – they likely had elegant painted ceilings!

Not sure what color to choose? Here are some tips on how to transform your room with a painted ceiling:

Get your painting project started!

  • Deeper Shade

    A grand room with high ceilings can feel impersonal and unbalanced after you’ve added furniture, rugs, drapes and wall art. Why? Because all of these embellishments occupy the bottom half of the room. Meanwhile, the top half is left bare and boring. In a room such as this, try painting your ceiling a deeper shade of the wall color. This will pull the eye upward, and harmonize the room from top to bottom. Deeper shades can also add an element of dignity and luxury to your room as well! You can make any space into a relaxed and refined area to gather with friends and family to unwind at the end of the day.

  • Accent Color

    ceiling-paint1.jpg
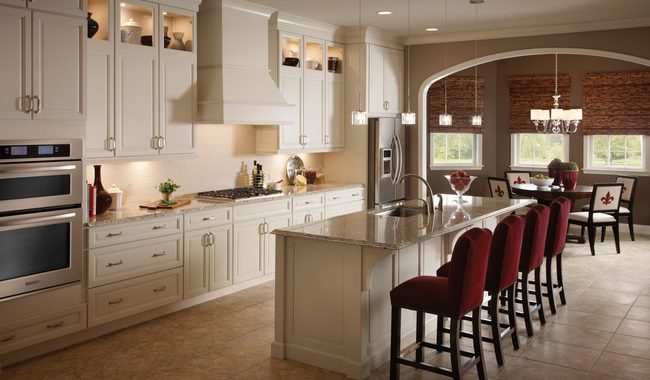
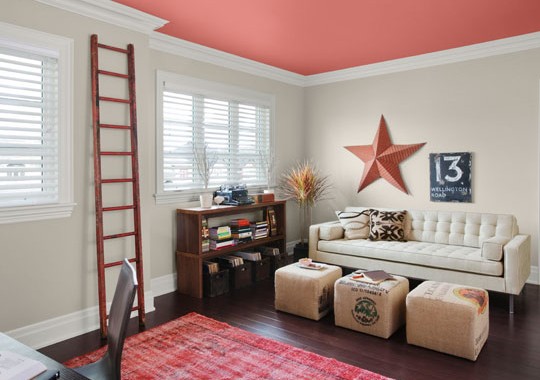
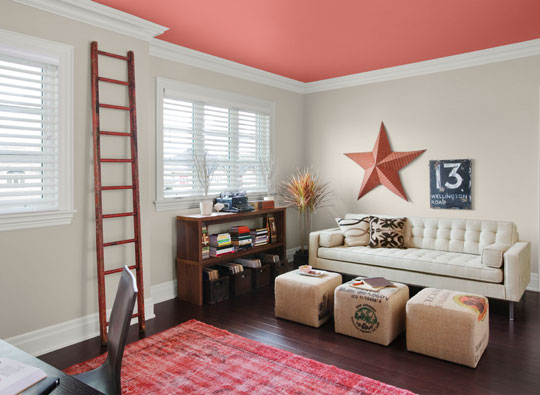
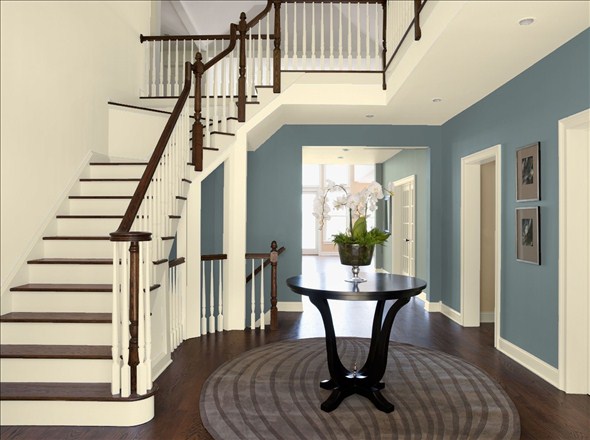
Many designers love the idea of an accent wall. Well, why not make the accent wall your ceiling? An unexpected pop of color on the ceiling in a room with neutral colored walls can add personality and charm to a room. If you need help deciding on a color, just look to the furnishings and other room elements for inspiration and choose a color that complements them. Don’t be afraid to stock up on color samples to get the best idea of how different combinations will work.

  • Lighter Shade

    If you don’t want to paint your ceiling a vibrant color, that’s no problem! Paint your ceiling a color that is a few shades lighter than the color you have on your walls. Tip: Even a light shade of color is better than white – stark white ceilings are visually disruptive and can break up the flow of a room design.

  • Warm Colorsceiling-paint2.jpg

    Experiment with your bedroom. Warm, organic colors on both the walls and ceiling create a cozy yet elegant look. It can also help unify your space by tying into other design elements, like rugs and furniture. Plus, warm colors can have a positive effect on your attitude and mental health! Add these colors to rooms where you need an extra boost of focus or energy, or transform an office into an outside-the-box creative zone.

  • Dark Colors

    If you live in an older Victorian or Colonial home with a lot of woodwork detail, add drama to a room by painting a dark tone on the ceiling. This brings the eye down and allows the room’s architectural details to become to main focal point.

Experimenting with painted ceilings is a lot of fun, and you will be surprised and pleased by the outcome. Ceilings often go unconsidered during the decorating process, but they represent a golden opportunity to highlight, complement, accent, and add drama to your room. Happy designing!

How to Paint Trim

165-pa3730-168-pa464-164-pa464-166-pa464-167-pa529

Thinking of ways to brighten up a space without breaking the bank? Painting the trim around windows, doorways and baseboards is a quick way to brighten up the appearance of any room in your home. Painted trim not only completes the design scheme of any room, it also protects mouldings and transitions from everyday wear and tear.

Never painted trim before? Don’t worry! It’s easy to paint the trim in your home as well as any professional painter. It may require a little time and patience at first, but the end result is very satisfying, and well worth the effort!

The process of painting trim is broken down into two parts: preparing the surface, and applying the paint.

Get your painting project started!

Continue reading