Do It Yourself Winter Projects

7 Do It Yourself Projects You’ll Want to Start This Winter

Do It Yourself Winter Projects
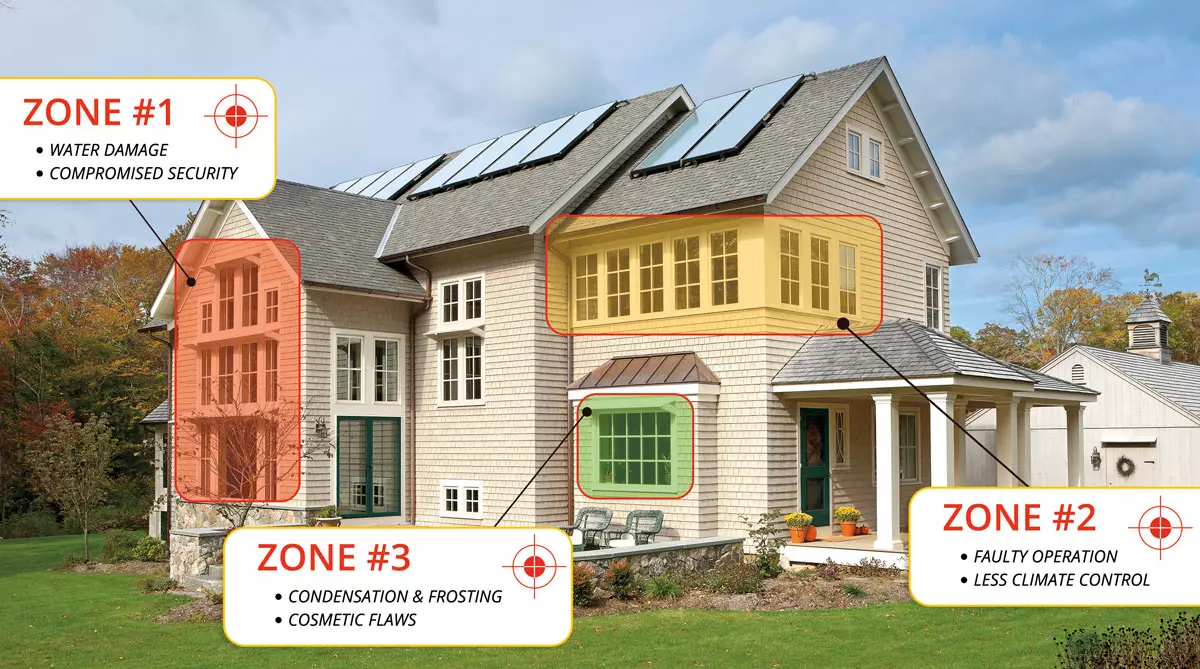
Having an occasional lazy day indoors is relaxing, but if you’re stuck inside because of the cold, why not be proactive? There are a variety of easy projects you can take on during the winter that you will appreciate thoroughly when springtime rolls around again… So, why not make the most of the next winter storm?

If you’re feeling the winter blues, here are 7 DIY home improvement projects to lift your spirits:
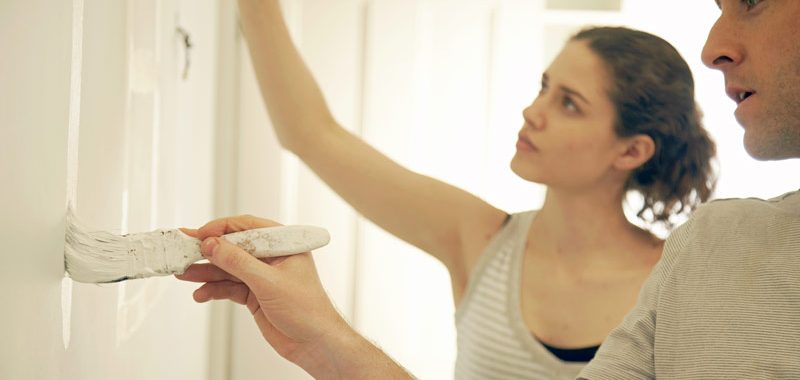
1) Painting

Did you know that cold weather is ideal for drying paint? The dryness of the winter months makes winter the perfect time to paint the interior, so crack a window, and start painting. Select a bold color and paint an accent wall in your living room. Or add dimension to your bedroom by painting the ceiling.

Backsplash project


2) Add a Backsplash to Your Kitchen

Backsplashes are important to adding personality to your kitchen. For a kitchen that needs some life, a flashy or textured tile can wake it up. For a kitchen that already has personality, a sleek, neutral tile can add unity to the room’s look.


3) Add More Lighting

What better way to brighten and warm your spirits in the winter than with new lights, lamps or ceiling fans. Not to mention it’s an easy and affordable way to update the style of any room.

LED-style lights, which come in contemporary and bold styles, also provide a money-saving option. Installing dimmers in areas like the family room or dining room saves money, while allowing homeowners to customize the ambiance.


Organize Closet4) Make Your Closet More Organized

Is organization on your list of resolutions? Kick off the year by tackling your closet.

If you create a place for everything, you’ll be a lot more likely to put things away. There are so many things you can do to customize a closet for your needs. You can install shelving, purchase a shoe rack, create drawers and dividers, and much more. You can even try designing your own Modular Closet.

Remember, you’re only limited by your imagination.


5) Remodel Your Bathroom

There’s no better time than the winter to spice up your boring bathroom. While replacing a faucet, tile, or repainting are relatively easy for the DIYer, more ambitious jobs like replacing the tub or adding tile floor might be better left to a professional. Though a complete remodel will be a bigger investment, it’s worth considering.


Reburbish Doors

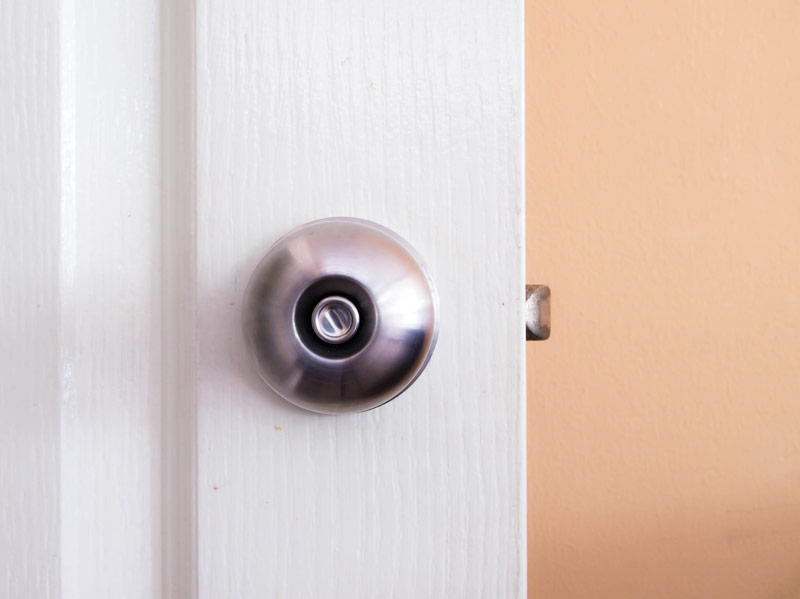
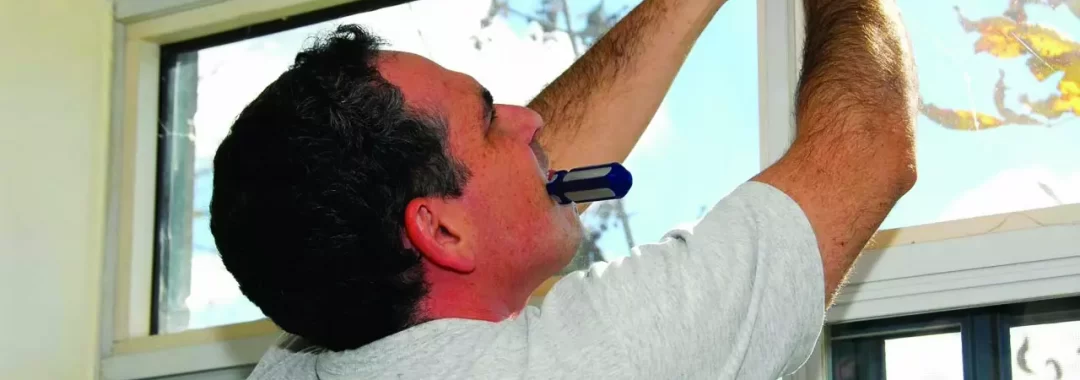
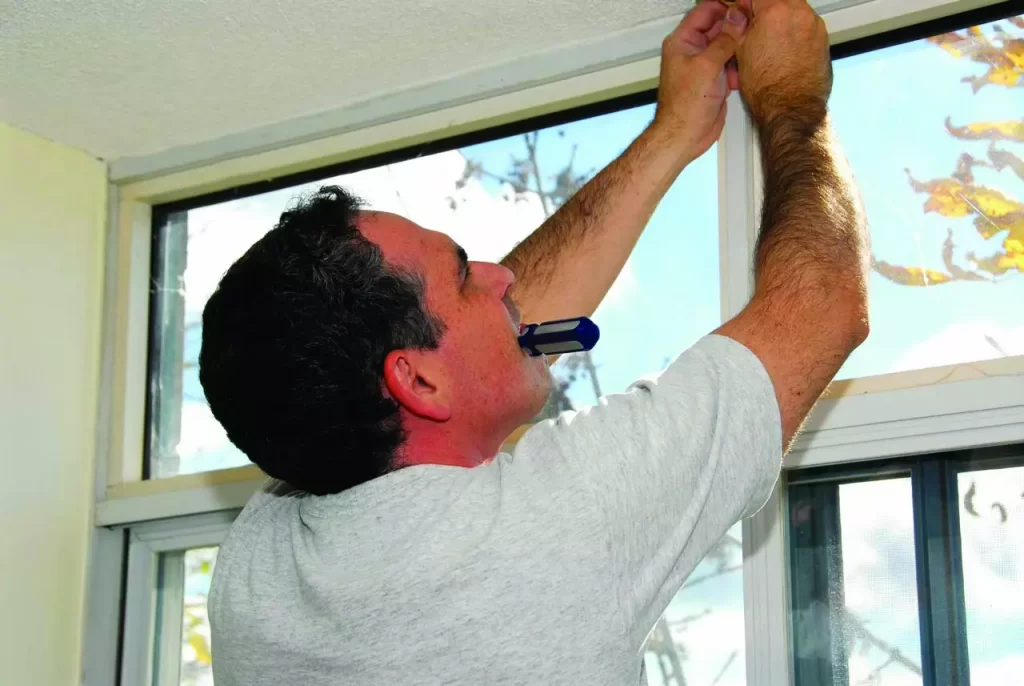
6) Refurbish Your Doors

Interior doors can have a lot of visual impact on your home. The good news is you can virtually “replace” all of your doors without spending excessively.

You can easily refurbish your interior doors by painting them, changing the doorknobs, and even adding moulding.


7) Change Your Light Bulbs

You won’t regret replacing your bulbs with energy-efficient ones. It’s a great way to go green and save money. On average, an Energy Star qualified light bulb will save between $30 and $80 in electricity costs over its lifetime, so don’t let the upfront cost of these bulbs scare you away from making the purchase.


By focusing on the inside of your home while the weather is cold, you’ll have a lot more time to tackle the warm-weather stuff when spring rolls around. And, as you begin your project, stop by GNH Lumber for all the supplies you’ll need, including tips and guidance!


Sources: “5 Easy Home Improvement Projects & Upgrades For the Winter”, moneycrashers.com.

Winter Preparedness 101: Is Your Home Ready?

winter-preparedness

It’s fall season again. The leaves have fallen from most of the trees and the air is increasingly chilled. Like it or not, we all know that winter is close behind. Before the snow starts falling and temperatures drop, it’s a good time to think about things like:

  • Preparing your home for snowstorms
  • The cost of winter heating
  • Ways to improve your home efficiency

Is your home ready for the coming winter? Not yet? Not sure? Don’t know? Don’t worry! There are a few simple steps you can take each autumn to protect against damage from winter storms and create a more efficient home.

So, let’s start exploring some steps you can take right now to prevent those wintertime headaches:

Continue reading

Fire prevention week

Tips for Fire Prevention Week

Fire prevention week

In a fire, seconds count. Seconds can mean the difference between residents of our community escaping safely from a fire or having their lives end in tragedy.

That’s why this year’s National Fire Protection Association’s Fire Prevention Week theme: “Every Second Counts: Plan 2 Ways Out!” is so important. It reinforces why everyone needs to have an escape plan.

Here’s this year’s key Fire Prevention Week campaign messages:


  • Draw a map of your home by using our grid in English (PDF) or Spanish (PDF) with all members of your household, marking two exits from each room and a path to the outside from each exit.
  • Practice your home fire drill twice a year. Conduct one at night and one during the day with everyone in your home, and practice using different ways out.
  • Teach children how to escape on their own in case you can’t help them.
  • Make sure the number of your home is clearly marked and easy for the fire department to find.
  • Close doors behind you as you leave – this may slow the spread of smoke, heat, and fire.
  • Once you get outside, stay outside. Never go back inside a burning building.


The NFPA has developed a series of Sparky video clips that reinforce important home escape planning and practice messages. In the video above, Sparky says know two ways out of every room.


Tips for Creating and Practicing Your Escape Plan:

  • Everyone in your household should know two ways to escape from each room in your home.
  • Decide where to meet once you get outside.
  • If a fire starts, you may have just two minutes to get to safety. So, time your fire drills and find out: what’s your escape time?
  • Smoke is dangerous: practice low crawling.
  • If your clothes catch on fire: stop, drop and roll.


Top Tips for Fire Safety from The American Red Cross:

  1. Install smoke alarms on every level of your home, inside bedrooms and outside sleeping areas.
  2. Test smoke alarms every month. If they’re not working, change the batteries.
  3. Check smoke alarms yearly to be sure they are less than 10 years old.
  4. Carbon monoxide alarms are not substitutes for smoke alarms. Know the difference between the sound of smoke alarms and carbon monoxide alarms.
  5. Talk with all family members about a fire escape plan and practice the plan twice a year.
  6. If a fire occurs in your home, GET OUT, STAY OUT and CALL FOR HELP. Never go back inside for anything or anyone.

If your home needs a new smoke detector, Carbon Monoxide detector, or combination of both, GNH Lumber is offering several options on sale this October. In support of National Fire Prevention Week initiative’s, we are also featuring a sale on fire extinguishers and straps. Visit our web sales page for pricing and details.


CLICK HERE for Fire Prevention & Safety Checklist

CLICK HERE for this month’s GNH Web Sales


Sources: Home Fire Safety“, RedCross.org; “Fast Facts About Fires“, NFPA.org.


Smoke & Carbon Monoxide Alarms are ON SALE this month only at GNH Lumber! CLICK HERE for web sale details.

Benefits of Going Cordless

Are you sick of having to plan your construction project around a power source? Tired of tripping over extension cords or pulling them out of the outlet when you take just a step too far? You may want to consider upgrading to cordless power tools.

Why Cordless?

There are a number of perks to using cordless power tools. For example:

  • Convenience- Cordless tools allow you to be more mobile. Outdoor projects are a breeze without having to find an outdoor outlet, extension cords or a set up a generator. If you’re moving from job site to job site, they’re easy to pack up and go without the hassle of wrapping a cord.
  • Efficiency- Long battery life allows you to work for hours without interruption. When it does finally die, you can seamlessly switch the battery out with a fresh, charged one.
  • Safety: No more tripping on cords. No more patching up frayed cords with electrical tape.

Is Cordless right for you?

Before making the switch, it’s important to consider whether a cordless tool is right for the type of project(s) you are working on. For most every day projects around the house, a cordless tool will get the job done. Cordless tools are also a good choice if you’re going to be working in tight areas or on a ladder.

If the tool you need uses a lot of power, such as miter saws or metal cutoff saws, or if you’re going to be working with very tough material such as concrete or stainless steel, chances are you will need a corded tool.

While there is not a huge difference in cost between the corded and cordless tools themselves, you need to also factor in purchasing at least two batteries and a charger. This means that cordless tools cost more upfront, but the added convenience is worth the price.

Here are some cordless DeWalt power tools you can find at GNH:

20V MAX* Inflator Bare Promo

This versatile Air Inflater can either be used with a power cord or with a battery to inflate tires, pool floats and basketballs. It features a simple, easy to use digital gauge and its automatic shutoff feature ensures accurate inflation. The inflater also has an LED light for increased visibility in dimly light spaces.

ATOMIC™ 20V MAX* 1/4 in. Brushless Cordless 3-Speed Impact Driver

This Cordless 3-Speed Impact Driver is great for your framing, decking, cabinetry, electrical, dry-wall or plumbing projects. It features an LED light that increases visibility in dimly light work areas. At less than 4” in length, this driver is lightweight and compact, perfect for tight spaces. But don’t let its small size fool you: its motor delivers 1,825 lb of torque and 3,250 rpm to get the job done.

ATOMIC™ 20V MAX* Brushless Cordless Compact 1/2 in Drill/Driver

This Cordless ½” Drill/Driver has variable speeds for increased precision and control, as well as an LED light for increased visibility. Its compact, ergonomic design is comfortable in your hands. Despite its small size, the motor delivers 340 unit watts out and the 1/2” ratcheting chuck has superior bit gripping strength.

20V MAX* XR® Brushless Cordless 3-Speed Oscillating Multi-Tool Kit

This 3-Speed Oscillating Multi-Tool Kit comes with the oscillating multi-tool, battery, charger, bi-metal blade, wood cutting HCS blade, universal accessory adapter, sanding pad, 15 sheets of sandpaper, a depth guide and a tool bag. The Quick-Change accessory system makes switching blades easy without the need for wrenches, and the DUAL-GRIP variable-speed trigger increases precision and control. The multi-tool’s powerful brushless motor provides up to 57% more runtime over similar brushed tools.


To see our full line of DeWalt power tools, stop by GNH at our Greenville or Windham locations.

Make Your Deck Cozy for Fall

5 Ways to Make Your Deck a Cozy Gathering Place This Fall

Make Your Deck Cozy for Fall

Fall is the perfect time to gather out on the deck and enjoy the crisp cool air. That means it’s time to transition your summer deck from a “fun in the sun” hotspot to a warm and cozy autumn hangout!

And here’s the good news: it doesn’t take much time, effort, or money to change the feel of your deck, and effectively reinvent it for the coming fall season.

Get your deck or porch project started!

Here are 5 easy ways to make your deck a cozy gathering place this fall:

1. Create a Focal Point

One easy way to give your deck a cozier feel is to create a visual focal point. Focal points encourage people to gather, chat and gravitate together in the space. This can be created by using an outdoor rug or a sitting area with a coffee table and comfy chairs. You can also use a stylish Chimenea or an outdoor fireplace to create a warm, inviting focal point

2. Make Large Areas Smaller

Pulling furniture closer together naturally makes people feel cozier. If your furniture is strewn out across the deck, try rearranging it into several smaller seating areas. Also, bring grills, benches and potted plants into tighter circles to improve this effect. You can also screen off larger portions of deck with room-divider screens or trellises covered with fabric to create cozy nooks.

3. Spice Up Your Space

If you want people to gather on your deck, then give them something fun to do!  The addition of a spa or hot tub might just be the thing that beckons everyone outside. Try adding stylish outdoor lighting or strings of outdoor lights to further enhance that cozy glow in the evening.

Remove canopy umbrellas, sun-lounging chairs and other remnants of summer. Then try placing sturdy, woodsy furniture, like Adirondack chairs and picnic benches. Add some large, cozy pillows to encourage people to kick back and relax.

4. Add Some Greenery

Cozy Deck Greenery for Fall

Adding plants is a quick and easy (and budget-friendly!) way to update your outdoor areas each season. Vines crawling up a pergola softens the space while adding interest. You can also create a splash of color with potted plants and seasonal flowers like goldenrod and chrysanthemums. This not only adds color and interest, it also gives you the flexibility to replace them depending on the occasion or your color palette.

3. Use Warm Colors

Summer means bright-colored plastic and garish, colorful decor. Fall calls for a more subdued, warm palette. Earthy tones like maroons, oranges and rusts. You can easily change out your color scheme by changing out cushions, accessories and carpets. Consider adding painted wood-furniture with deep-red and orange throws for snuggling under!

When making your deck the superstar of your cozy autumn gatherings, you’re only limited by your creativity and imagination! And don’t hesitate to stop by your local GNH Lumber for expert tips and guidance for your decking project.


Fall Deck Design TipsStop in to your local GNH Lumber for more tips and techniques for making your deck the gathering place of the season. We have outdoor furniture, lighting, Halloween decorations and other items to help you create a magical effect this fall!

Lawn Before Lawn Repair

DIY: Lawn Repair 101 – How to Fix Bare Spots

Lawn Before Lawn Repair
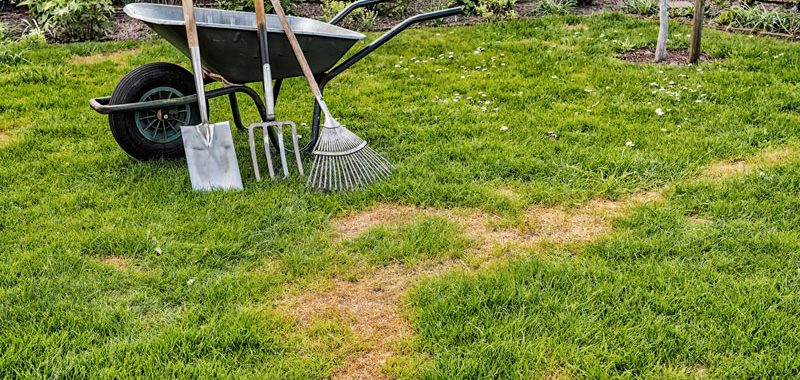
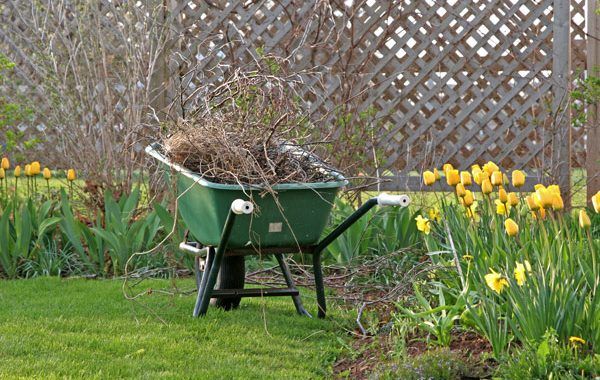
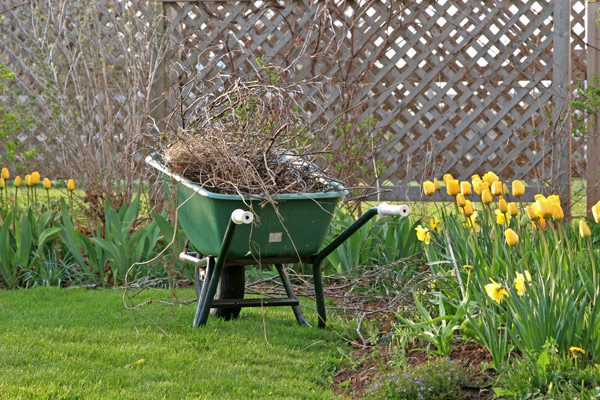
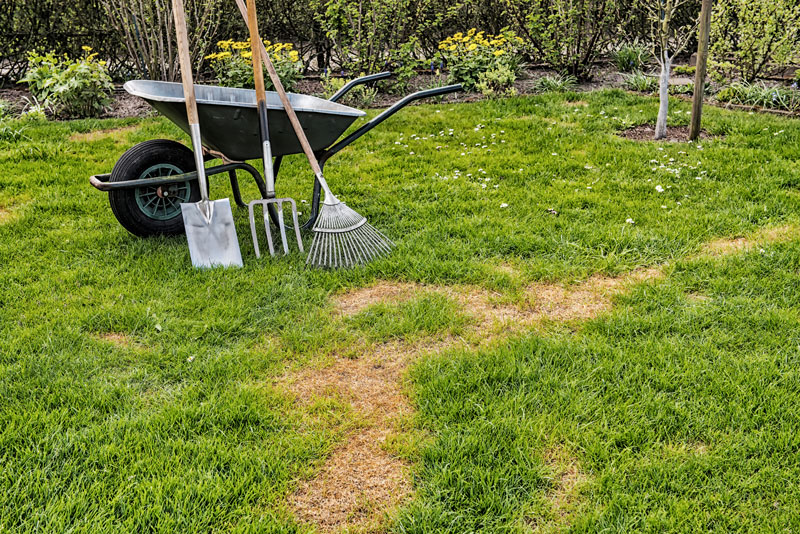
Ahhh! A lush lawn of perfect green! It’s what we all dream about when it’s summertime. The soft, rolling green backdrop to our cookouts, ballgames, BBQs and entertaining. That said, if you have a lawn with bald or bare spots, it can be frustrating to diagnose and fix.

Do I Need Lawn Repair?

It’s not uncommon to encounter bare spots at some point or another throughout the summer season. Take heart! There are easy ways to diagnose and repair these unsightly patches of yellow, brown and beige, and restore your lawn to its true GREEN GLORY.

A few common causes for those bare spots and patches in your lawn:

  1. Not enough water
  2. Over-fertilizing or spilled chemicals
  3. Lawnmower damage
  4. Grubs or other insects
  5. Pet damage or foot traffic

Depending on the type of damage, there are different solutions to your lawn’s bare spots. However, most involve adding new grass seed, lawn food and water (see steps below). Considering the unusually rainy spring and summer we’ve had so far in upstate New York, it’s doubtful that your lawn has bare spots due to dryness. But if there is a dry spot, it’s an easy fix – just be sure to water frequently, in addition to reseeding to improve thickness.

If the bare spots are due to overfertilizing or lawnmower damage, you will see them appearing uniformly across the lawn. For damage caused by overfertilizing, reseed the bare spots and do not add additional fertilizer until the lawn heals itself. For lawnmower damage, be sure your lawnmower blades are sharpened regularly, and keep the blades raised high enough from the ground when you mow.

Grubs or other insects can wreak havoc on your lawn, as well. Grubs, curling white worms, are a common problem in mid to late summer, and most easily identified when your sod easily pulls back from the ground like a carpet. More than ten grubs per square foot can cause lawn damage. Grub control products are available at your local GNH.

Pet or backyard animal urine can create bare spots of yellowed-grass with a brighter ring of green around them. These can be repaired following the steps below, but to prevent future damage you will want to train your pets to do their business elsewhere. Likewise, foot traffic must be redirected to allow these spots in your lawn to heal.

How to repair bare spots in your lawn the quick and easy way:


Supplies & Tools:

  • Grass Seed (we recommend Scotts® Turf Builder® seed varieties)
  • Topsoil or compost
  • Fertilizer (we recommend Scotts® Step-3 Lawn Fertilizer)
  • Small gardening trowel and rake

1. Break Up the Bare Spot and Reseed.

Use a small gardening shovel or rake to break up the dry spot on your lawn. Remove any rocks, leaves or debris. Choose the appropriate grass seed for the spot’s shade density (such as Scott’s Turf Builder seed varieties, available at GNH) and cast the seeds over the turf. Spread about a half an inch of compost or topsoil on the strewn seeds.

Tip: To get good seed-to-soil contact, gently rake the seeds and soil into the grass.


2. Water Generously at First, Less Later

Water the area immediately, and then continue to water lightly three times a day for 7-10 days. When you can see the new grass sprouting, reduce watering to once daily.

Tip: After the new grass emerges, less is more. A good, thorough soaking rather than a quick watering ensures that the water gets down to the root system. This helps roots grow strong and deep for a thick, more drought-resistant lawn.


3. Feed Your Entire Lawn to Nourish It

To encourage the new growth, and keep your whole lawn looking its best, add a gentle lawn fertilizer to the spot, like Scotts Step-3 Lawn Fertilizer, available at GNH!  Tender seedlings, as well as existing grass, need nutrients to help grow thick and strong.


4. Kick Back & Enjoy the Results!

Repairing bare spots in your lawn is a quick and easy project that reaps many rewards. It’s the perfect weekend task that you can finish in no time, so you can get back out in the hammock and enjoy the results! Don’t forget to improve the lushness and color of your whole lawn (and reduce the chance of future damage) with regular feeding and proper maintenance.

Lawn After Lawn Repair

For more on bare spot lawn repair, check out this helpful video from Scott’s Lawn: https://youtu.be/rI4WhxUq4zM

https://www.todayshomeowner.com/how-to-identify-the-cause-of-brown-spots-in-your-lawn/, http://www.planitdiy.com/how-to/lawn-garden/lawn-repair-fix-a-bare-spot/, https://www.scotts.com/en-us/library/grass-grass-seed/how-repair-seed-bare-spots-lawn, http://www.hgtv.com/design/outdoor-design/landscaping-and-hardscaping/how-to-repair-bald-spots-in-your-lawn  

How to Replace Windows in Zones

How to Replace Windows in Zones

How to Replace Windows in Zones

Should you replace windows in zones?

Replacement windows can save you as much as 15% on your energy bills while reducing wear and tear on heating and cooling systems. Plus, updated windows will improve your quality of life by introducing more light and fresh air to your favorite room or home office.

If you’re overwhelmed by the idea of a full window replacement, don’t worry. You don’t have to replace every single window in your home to start enjoying beauty, function, and energy-savings. Instead, you can replace windows one zone at a time.

Explore replacement Marvin windows in a wide range of styles at GNH Lumber! Simply request a project quote today

Want to learn more about the benefits of new windows? Get the FREE guide!

Window Replacement by the Zone

Now is the perfect time to replace your home’s older or malfunctioning windows before the chill of autumn comes and begins stealing away precious heating dollars. But how do you know which windows need replacing? Some signs, such as condensation or cosmetic damage, might not need replacement at all and are actually perfectly normal. Others, like water stains and wood rot, need immediate replacement.

Knowing the signs that require prompt attention versus those that can be easily fixed can help you evaluate whether and how soon a replacement is needed. This will help you replace windows in “zones” for a more targeted, cost-effective approach.

Remember, you don’t have to replace every single window in your home in order to make a dramatic improvement in your home’s style, airflow, and energy savings!

Here’s our guide to evaluating your home’s overall window health and creating “zones” for targeted window replacement.

How to Replace Windows in Zones

Zone #1 – Immediate Attention Needed

Sometimes replacement windows are non-negotiable, especially when they greatly compromise your home’s energy-efficiency and/or security. Look for these signs that you’re in the “red” zone:

  • WATER DAMAGE – Water between glass panes, leaking, water stains or evidence of wood rot can be signs excess moisture is accumulating where you cannot see it, which means your windows are no longer effective. This can lead to mold, mildew, warping, or structural damage.
  • COMPROMISED SECURITY – As entry points into your home, you should address broken windows immediately.


Zone #2 – Time to Investigate

Sometimes replacement isn’t immediately necessary, although it would still help with ease of operation and climate control. Here are some warning signs for windows you should keep an eye on:

  • FAULTY OPERATION – Difficulty opening or closing, sticking sash and pesky operational issues can sometimes be solved with a thorough cleaning or small repair. However, these can also be signs that parts are nearing the end of their lifespan.
  • LESS CLIMATE CONTROL – New windows can get rid of drafts to make rooms more comfortable. But if the time isn’t right, replacement can wait!


Zone #3 – No Need to Replace

Some of your home’s windows may not need replacing at all! Don’t mistake these signs for critical damage. They are likely normal and can be corrected during routine maintenance:

  • CONDENSATION – Condensation is perfectly normal. It simply indicates the presence of humidity, which means your windows are doing their job and holding heat inside your home. There are many easy ways to remove condensation that don’t involve replacement. 
  • COSMETIC ISSUES – Issues like chipped paint, tarnished hardware, and dirty weather stripping can be addressed on your schedule with routine care and maintenance.

By dividing your home into zones using the evaluation methods above, you can make the right window replacements now while keeping less urgent updates on the back-burner for a later date.

yard cleanup

5 Things to Include on Your Yard Cleanup List

yard cleanup
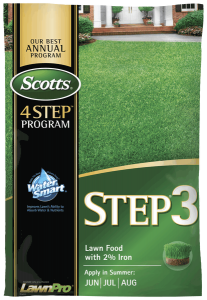
Can’t wait to get back out into the garden? Well, here’s the good news! It’s time to get a head start on your spring cleaning checklist, and that includes taking care of your yard and garden beds.

To look and feel its best after the harshest winter months, your yard and gardens require spring cleaning the same as the inside of your home. Taking a weekend to clean up as the weather begins to warm will save you time later, and it helps prevent some problems further down the road in summer.

First, look over your yard before creating a specific checklist of what needs to get done to be ready for the season.

To help you get started, don’t forget these 5 things when cleaning up your yard this spring:

1. Clean Up Around Plants

To help your plants and shrubs get ready for new growth, clean up any debris left over from the winter months. Make sure you rake out fallen leaves and dead foliage, since this can smother your plants and help foster disease. Don’t forget to cut down any mums or other fall-season plants that you haven’t had a chance to cut down due to the snow and ice.

Toss your yard waste into a wheelbarrow for easy disposal and cleanup (ideally, this is done after the threat of frost has passed). Next, you’ll want to remove existing mulch to set the stage for a new layer after spring planting. You’ll also want to push heaved plants back into flower beds and borders. To encourage new growth, you can also spread a pelletized fertilizer tailored towards your existing plantings onto the soil’s surface. Spring rains will then carry these nutrients to the root systems.

2. Prep Your Lawn

The first step to a gorgeous lawn all spring and summer long is a good feeding now. Fertilizing your lawn with Scotts STEP-1 Crabgrass Preventer Plus Lawn Food can improve a lawn’s ability to absorb water & nutrients. Apply to your lawn for a fast green-up after winter. It also controls crabgrass for up to 4 months!

Apply in early spring, anytime between February and April when temperatures are still cool (under 80° F). Step-1 prevents crabgrass before it can germinate. It also feeds to green up a winter-weary lawn, too. Learn more about the Scotts Program.

In mild climates that experience little to no snowfall, winter lawn damage is usually minimal. However, that’s not the case for us here in the Catskill Region. As a rule, it’s best to avoid walking on soggy areas of the lawn until they are dry so the grass doesn’t become damaged. But there is usually some damage from snow removal, ice prevention, shoveling and the mud of thawing.

Remove any turf damaged by salt, plows, or disease to prepare for the seeding that should follow in a few weeks. Resume mowing once the grass grows to 4 to 5 inches tall and only trim it back to 3 to 4 inches. But don’t start mowing too early! Mowing too early in spring, or trimming your lawn too low, results in weak grass that is more prone to summer damage during dry periods.

3. Clean Walkways and Patios

yard cleanup 2

The early spring is a perfect time to neaten up your hardscape surfaces, too. This includes both walkways and patios.

Make sure to rake escaped gravel back into your walkways and patios, and purchase more gravel to spread if needed. Refill joints between flagstones by sweeping in new sand or stone dust; water with a hose to set it, then repeat. Use a pressure washer with a low-pressure tip to remove any algae spots or leaf stains.

4. Replace and Paint Worn Wood

Remove badly rotted or damaged pickets or boards in your fencing, then scrub the wood clean by mixing water, bleach, and liquid soap. Once you’ve fully cleaned it, allow it time to dry before continuing. You can patch rotted sections with wood epoxy, and subsequently install new wood as needed.

Check to make sure that you don’t have any wobbly fence posts that need to be replaced. You should also scrape off old paint, sand the wood, and apply a new finish coat. Once temperatures go above 50° F, brush on a new coat of paint or stain.

5. Prune Dead and Damaged Branches

Many non-flowering shrubs, trees and woody plants respond well to spring pruning, which cleans up their appearance. Prune back to live stems if damaged, and shape hedges with hand pruners rather than electric shears. Electric shears have the tendency to cause a thick outer layer of growth, which prevents sunlight and air from reaching the shrub’s center.

home maintenance resolutions for 2018

5 Home Maintenance Resolutions to Keep This Year!

home maintenance resolutions for 2018 Start the year off on the right foot by giving your home maintenance projects top priority! How? By making a list of monthly to-dos and tackle them one at a time. Then, you won’t lose track of the home maintenance projects you want to get accomplished this year.

Not sure what home maintenance items should be on your list?

Here are 5 home maintenance resolutions to keep this year.

They are simple to do, minimal cost, and can help you save big money on costlier repairs down the road. So, if you’re getting cabin fever this winter, get to work and give your home some TLC!

1) Apply Fresh Paint

It’s always a good time for an interior painting project. So start by select some fabulous colors this winter! Painting is an inexpensive way to improve your home’s value and appeal. It can also help protect your walls from dirt and moisture, which may lead to bigger headaches later.
 
Wondering what to do? Go for broke and select a bold color to paint an accent wall in your living room. Or add dimension to your bedroom by painting the ceiling. You’re only limited by your creativity and imagination.

home maintenance-resolutions 2018 floor protection

2) Protect Entryway Floors

The elements of nature can wreak havoc on your entryway floors, including rain, snow, mud, and ice. Moisture and muck not only looks awful, it can destroy hardwood floors over time, leading to costly repairs.

So, how do you protect your floors from the mess? Place mats both inside and outside the door, along with boot trays inside the entryway. It will help if your mudroom is organized and ready with a place to dry wet jackets, hats, mittens and gloves.

3) Get Ahead of Ice Dams

Ice dams form when the edges of a house’s roof is colder than the rest of the roof, causing ice to form around the eaves. Snow melts above, and the melted snow backs up behind a “dam” of ice, potentially causing leaks and permanent damage to the roof and home — if you’ve ever experienced an ice dam on your roof-line, you know what a nightmare it can be!

Here’s what Houzz.com recommends if you notice the beginnings of an ice dam:

  1. Carefully remove snow and ice if possible without damaging roof and gutters.
  2. If you have heat cables, turn them on. Heat cables cannot prevent or fully remove ice dams, but can melt enough of the ice to create a channel for water to flow out, preventing some damage.

4) Maintain Your Hot Water Tank

Yearly maintenance of your hot water tank can improve performance, meaning more hot water when you need it, and less waiting for hot water to replenish. It can also help prevent expensive repairs (or even replacement) later.

Flush your hot water tank to remove sediment to save on the cost of replacing the entire hot water tank down the road. You can also wrap an older hot water tank with an insulating blanket to help conserve energy (and save you money). And these blankets prevent hot water heaters from losing heat in cold rooms and closets.

5) Keep Driveways and Walkways Clear of Snow & Ice

home maintenance-resolutions 2018 snow removal
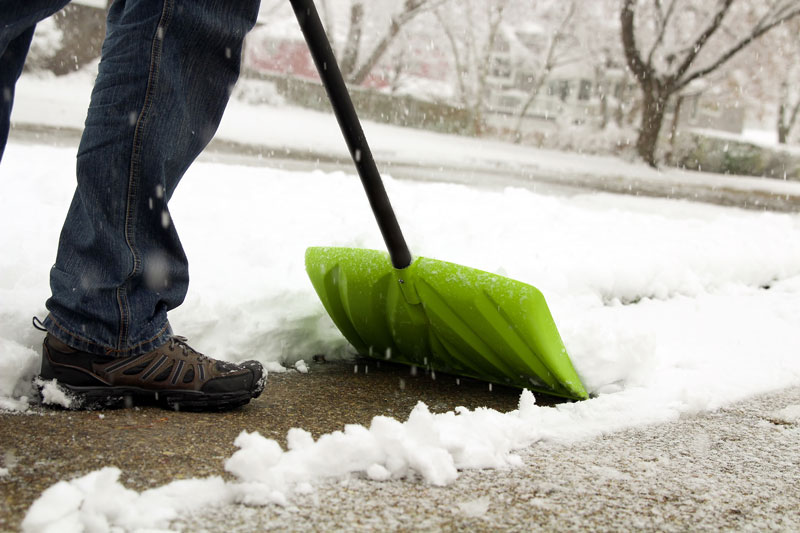
Keeping your driveway and walkways clear from snow and ice accumulation from each winter storm serves a dual-purpose. It prevents slips and falls, and allows for easy access by vehicles. But it also prevents excess moisture from seeping into the small cracks of your driveway or walkway and doing greater damage when it expands into ice. This moisture could potentially cause damage, resulting the need to repave your driveway or walkway prematurely.

Try removing the snow with easy-push shovels to save your back from strain (check out shovels, snow and ice removal tools available at GNH). Then add a sprinkle of salt or ice-melt to help the moisture evaporate when the sunshine returns.


As you go about maintaining your home and property, don’t forget that our expert team is happy answer your questions, offer guidance and provide time-saving tips!


Sources: “27 Tasks for Your Winter Home Maintenance Checklist”, FamilyHandyMan.com; Your Winter Home Maintenance Checklist”, Houzz.com.

Vinyl Window Care

How to Care for Vinyl Windows: “Do’s and Don’ts”

How to care for vinyl windows?

Are you wondering how to care for vinyl windows? Vinyl windows are designed for easy care and maintenance. Just a tiny bit of elbow grease from time to time will extend the life and beauty of your windows.

Below are some quick and basic tips for caring for your vinyl windows. Following these “do’s and don’ts will extend the life and performance of your vinyl windows:

Vinyl Window Care “Do’s”

  • Vacuum soil and debris from the sill or track before washing.
  • Use a mixture of mild dish soap or any non-abrasive soap and water to gently clean window frames.
  • Rinse thoroughly and dry with a soft absorbent cloth.
  • Make sure any weep holes are clear of obstruction and draining properly. Weep holes help your window drain and are located on the bottom of the window.
  • Remove the screens and wash them with a soft brush on a flat surface with mild dish soap and water.
  • Check the weather stripping around all window sashes in the fall.
  • Occasionally lubricate moving parts including rollers and tracks. Make sure to test the lubricant on an unseen part of the window to ensure it doesn’t stain.

Vinyl Window “Don’ts”

  • Don’t use abrasive or caustic cleaners or solvents as they may damage the finish of your windows.
  • Don’t wash windows in direct sunlight, if possible.
  • Don’t use a high-pressure spray to wash the windows as it may damage the insulation and glass seal.
  • Don’t use sharp instruments or abrasive pads to clean the glass.
  • Don’t attach anything to the glass, such as masking tape. Heat from the sun may bake the adhesive into the glass, and make it difficult to remove.
  • Don’t use a silicone spray on plastic parts as it may damage them; use a non-wax furniture polish instead.

Vinyl windows are a great investment for your home. Ask one of our GNH Experts about vinyl windows or visit our showrooms to see the latest styles and options for yourself!