Get Barefootable Grass

Get “Barefootable” Grass! Fertilize Your Lawn Regularly

Get-Barefootable-Grass-Scotts
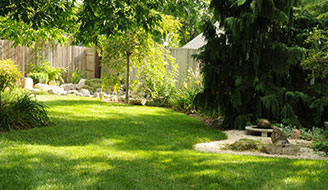
The secret is out: feeding your lawn is the fastest, surest way to a lush, barefoot-worthy lawn. Summer equals outdoor time, so it’s important to keep your lawn green and gorgeous for maximum enjoyment all season long.

Feeding with Scotts Step-3 with 2% Iron is an important part of your summer lawn care regimen! It creates green-up, adds strength, and protects from drought. 

There are many reasons to maintain a healthy lawn, and a few may surprise you! A lush lawn…

Keeps You Cooler: Plants, including grass, help keep outdoor living spaces cool. In cities, where there are fewer lawns and trees, the temperature can be between 2 and 22 degrees warmer than surrounding areas that have lawns and wooded areas. A healthy lawn can buffer the heating effects of the sun, helping to keep your home cooler—and your electric bill lower.

Helps Fight Allergies: Some people are allergic to the pollen produced by common lawn weeds. Thick, healthy grass leaves little room for weeds. Water the right amount at the right time, feed your grass on a regular schedule, and mow at the correct height, and your weed problems may just become a thing of the past.

Improves Air Quality: When your yard is covered by lush grass rather than patchy weeds and bald spots, the air quality will be improved. Simply put, lawns trap dust, pollen, and other floating particles so you can breathe easier.

Get-Barefootable-Grass-Family-on-GrassDecreases Stress: Multiple studies have shown that spending time in, or even just looking at, nature (think grass, trees, water) naturally decreases stress hormones. In an ever-connected, screen-focused world, just looking at a lovely lawn can cause you to breathe easier, sleep better, and feel calmer.

Provides a Quieter Living Space: A lawn acts like soundproofing for your living space, helping to absorb noise from neighbors, cars, and maintenance vehicles. The result is a quieter, more serene environment.

Gives You Somewhere to Have Fun: It’s so important to take a bit of time away from work and other obligations to kick back and relax, and a beautiful lawn is just the place to do that. Lounge in the hammock, set up a croquet game, or just play with your kids in the grass—whatever brings you happiness.  

Boosts Curb Appeal: When you’re trying to sell your house, one of the first things on the to-do list is usually to improve the look of your lawn and landscaping. That’s a wise choice, as attractive, well-maintained landscaping can add 10 to 15 percent to the value of your home or property. In other words, all that time spent keeping your lawn looking gorgeous is time very well spent.

Are you ready to maintain a lush, green lawn for optimal living? A healthy lawn begins with regular feeding. Here are some of the benefits of fertilizing your lawn:

1) “Barefootable” Grass

barefootable-grass-kids

Backyards and barbecues. Trampolines and kids. Neighbors and friends. They’re everything thick, green lawns were made for. Regular feedings provide the nutrients your lawn needs to look its best and withstand the stresses of weeds, heat, drought and family activity.

2) Worry-Free Lawn

barefootable-grass-family

Regular feedings are the fastest, most affordable way to care for your lawn, keeping problems out of your yard and off your mind. Feeding your lawn two or three times a year gives grass plants the nutrients they need for deep roots and strong, full blades. One bag of Scotts® Turf Builder® feeds an average-size lawn and goes down easily in about 15 minutes. That’s all it takes to grow stronger, greener grass that can crowd out weeds and stand up to heat, sun, stress and play.

3) A Breath of Fresh Air

barefootable-grass-better-breathing

Grass is living, breathing nature right outside your door. And like all living plants, it needs food and water. While you and Mother Nature can easily take care of the watering, grass plants simply cannot thrive without proper nutrients. That’s where regular feedings become critical.


Regular Feedings Are Key

Like your teeth or your health, it’s easier to keep your lawn at its best with an ounce of prevention. Just feed your lawn every 6 to 8 weeks to keep it looking nice and worry-free.

Sources:https://www.scotts.com/en-us/library/lawn-food/benefits-fertilizing-your-lawn, https://www.scotts.com/en-us/library/lawns-matter/how-healthy-lawn-can-benefit-your-lifestyle

Repair, and Protect Gutters

DIY: How to Clean, Repair, and Protect Gutters

Repair, and Protect Gutters

Making sure that your home’s gutters are clear of debris after the autumn leaves have fallen is an easy way to prevent potentially significant water and ice damage later. Since your homes gutters work to control the flow of water, and help to prevent damage to the exterior of your home, it’s vital that you keep them in proper working order.

Here are six steps to getting those gutters in tip top shape:

 
Cleaning Gutters

Step 1: Clean Out the Gutters

 
Begin by removing the debris and leaves that collect in your gutters. Most find that handheld blowers or even wet/dry vacuums are effective tools for removing debris. If the debris is dry, you’ll find it easier to remove. Blow out as much loose debris as possible and collect it into yard bags.

If you find that the plant matter is really packed in, use a gutter scoop to remove the compacted debris. Simply attach a bucket to your ladder and then scoop out the debris and place it in the bucket. Begin at the downspouts and work your way over. Do not push debris over, rather scoop it out.

You will also need to check out the downspout. Clogs often occur here. Generally, a garden hose on full blast will manage to dislodge the clog quickly.


Step 2: Fully Inspect Gutters

 
Always take the time to inspect your gutters. This will let you know if they’re in need of repair, and help you assess the scope of work ahead of you. If your gutters show any signs of corrosion, make sure you look for holes or leaking joints and check for loose, missing or even bent gutter hangers. A great tip is to use masking tape to mark where a problem area so you can go back to it quickly when you get the supplies needed to make repairs.


Repair GuttersStep 3: Repair Small Holes and Cracks

 
You’ll want to repair small holes or cracks in your gutters and downspouts with a gutter patching kit from your local GNH Lumber store.

It’s always easier to fix small issues early on as opposed to making costly repairs later (such as replacing your gutters altogether). Gutter patching kits are easy to use, and can help prolong the life your gutters and prevent damage to your home.


Step 4: Replace Sections with Large Leaks and Tears

 
Sometimes parts of your home’s roof gutter may be damaged to the point of no return. This can happen if they are not properly installed, or if they have been damage over time because of weather and wear. These sections are best replaced to keep the gutter functioning properly.


Step 5: Adjust Pitch of Gutters

 
More than likely when your gutters were installed, they had a pitch of about 1/16.” You’ll want to measure the pitch and make adjustments if necessary. This is very important because improper pitch can equal poor or no drainage.

Any high or low spots can often be corrected by slightly bending the hangers that support the gutter itself. You may need to add additional gutter hangers to raise or lower the slope of the gutter at any given point also.


Install Gutter Guards
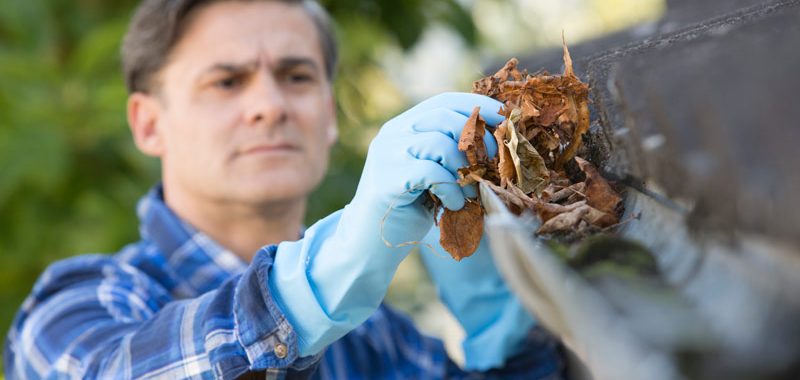
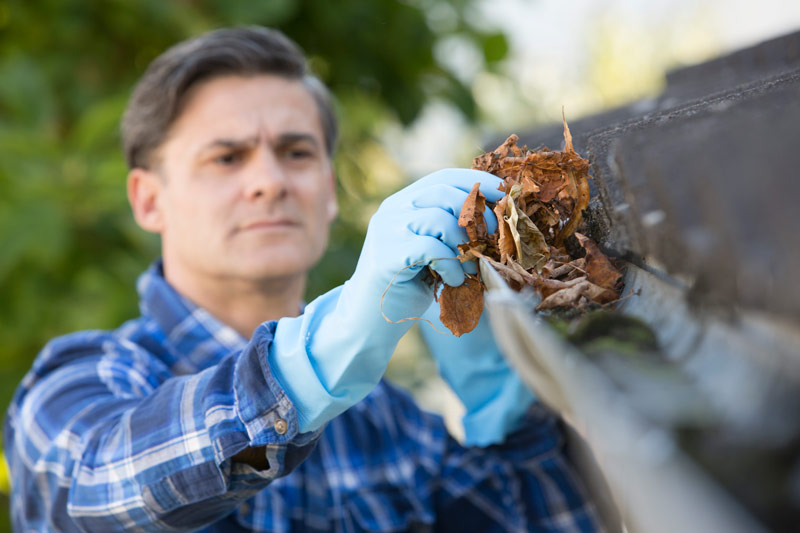
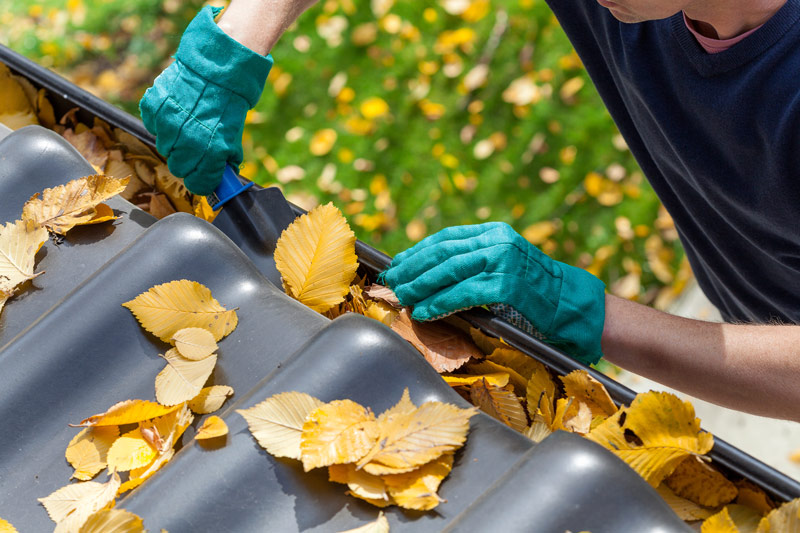
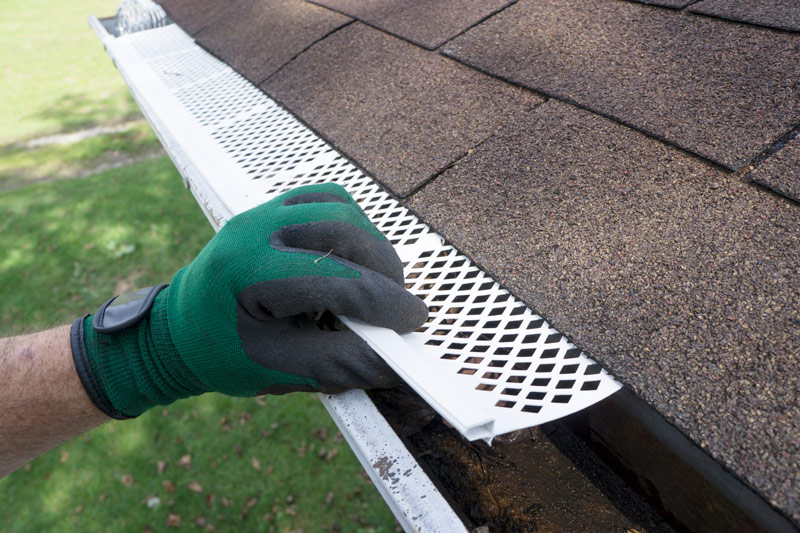
Step 6: Install Gutter Screens or Guards
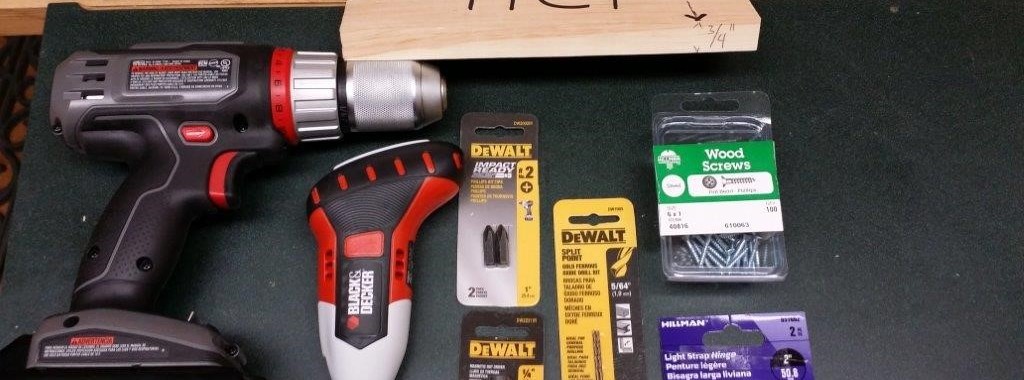
 
Once your gutters have been cleaned and fully repaired, you’ll want to keep them that way! One way to prevent gutters from filling with leaves and other debris is to install metal gutter screen or an aluminum gutter guard. Gutter guards simply extend across the entire width of the gutter blocking debris but still allowing water to enter. It helps to prevent clogs and makes cleaning out your gutters much easier.


By following this step-by-step guide for cleaning, repairing and protecting your home’s roof gutters, you can rest assured that they will work without clogging during the worst of rainstorms, protecting your home from the elements, and prolonging the life of your siding and foundation.


Home Exterior Maintenance Project


Questions or concerns about your home exterior maintenance projects? Stop in to your local GNH Lumber! We’re always glad to offer guidance, tips or suggestions, or point you in the right direction for just the product needed to get the DIY project done.

How to Build a Firewood Rack DIY

DIY: How to Build a Firewood Rack

How to Build a Firewood Rack DIY

If you have a wood burning fireplace or stove, that means you’ve got a wood pile. And if you’re lacking a firewood rack, chances are that a heap of unorganized wood is sitting by your back door creating an eyesore.

Even if your firewood is stacked neatly outside the door, you still need to make sure it doesn’t lean up against your house and trap moisture or you will create the ideal conditions for rotting wood and vermin.

The perfect solution? A new firewood rack that will help you stack your wood and create an attractive feature for your deck, porch or backyard. A well-made wood rack helps you store firewood nearby and keeps your porch or front step clean, and dry.

So, let’s “fire” up the DIY and get to work! Check out these easy DIY outdoor firewood racks:

tent-firewood-rack

Stylish Storage

Looking for a stylish way to store wood? Using a pallet as a base, you can create a “tent” with a couple of two by fours and some planks of wood to use as shingles.

This idea comes from Single Track World. They also have some amazing ideas for building a DIY wood storage area or shed. Plus, they are beginner-level woodworker friendly.


Simple Firewood Rack

If you want to build a simple yet functional firewood rack, then this is the rack for you! This is a simple but gorgeous DIY that anyone can do in less than an hour. For less than $100 dollars, you can have a firewood rack in any size you want. Stop by GNH Lumber to pick up these supplies first:

simple firewood rackTOOLS

  • Saw
  • Screw gun
  • 1/4″ hex head socket
  • Tape measure
  • Clamps
  • Framing square

SUPPLIES

  • (3) 2×4 8 ft. lumber (length can vary as needed)
  • (4) metal connectors
  • (1 box) connector screws

Check out DIY Done Right to download the plans and get started!


Rolling Firewood Cart

Rolling Firewood rack

If you want a firewood rack that’s easy to move, you’ll need a cart with wheels. This fun DIY is not only easy to make, it’s mobile! Having a cart that’s mobile is convenient if you entertain regularly on your patio or deck.

This DIY can easily be made in a weekend. If you like the look of wood grain, you can seal the wood in its natural state. But if you want to add color to match your home’s siding or trim, you can also add a coat of paint.  Here’s what you’ll need at GNH to get started:

SUPPLIES

  • 2″ x 4″ x 10′ Lumber, cut to size
  • 2″ x 3″ x 8′ Boards, cut to size
  • Fence Picket Boards
  • Miter Saw
  • Screw Driver/ Drill
  • Countersink
  • 3″ Torx Deck Screws
  • Clamps
  • 4 Casters
  • Sanding Block
  • Porter Cable Framing Nailer
  • 2″ 8 CC Nails
  • Air Compressor
  • Tape Measure
  • Patch Plus Primer
  • Paint Brush
  • 4 Corner Brackets
  • Black Paint

All the directions and some great DIY photos of the process can be found on thewoodgraincottage.com.


Firewood Rack with Roof

This is an awesome video that walks you through the process of building a super cool firewood rack completed with a roof and enclosed sides. They make it look easy and the end project is amazing!  If you want to create a firewood rack complete with a roof, check it out:


Happy building! And don’t forget that the experts at your local GNH Lumber are available to answer your questions, make suggestions, and help your complete your DIY project. Stop by today!

Keep Your Pool Water Clear

How to Keep Your Pool Water Clear this Summer

Keep Your Pool Water Clear

Summer is finally here, hot and humid days are upon us, and there is no better way to cool down and relax than a dip in your pool. Unfortunately, the bacteria and algae that form in your pool can prevent you from enjoying it. The best way to keep your pool water crystal clear and safe is through prevention.

Here are the important preventative steps to make sure your pool is clean and ready to enjoy at all times:

  • Maintain proper disinfectant levels. Every pool (even the best kept ones) have germs and bacteria. Keeping the chlorine above 1 ppm will eliminate them. Use a professional grade chlorinating solution like Smart Liqui-Shock by Sunbelt Chemical (available at GNH) to disinfect and clarify pool water.
  • Putting chlorine sticks or tablets in the skimmer basket is a common mistake. Keep the skimmer and line basket clear of debris and don’t add pool chemicals through the skimmers as this erodes the pump impeller.
  • Check your flow meter frequently to be sure the pool is circulating water at a proper flow rate.
  • Brush the walls and floor weekly.
  • Shock the pool on a regular basis. Swimmers and the environment add waste to the pool that must be eliminated continually to prevent problems such as algae and cloudy water. Aqua Chem Shock Xtra Blue (available at GNH) keeps your water clear and kills any algae that may be growing.
  • Algaecides act as a backup to your normal sanitization program and prevent algae from starting and growing in the pool. Algaecide should be added after every shock treatment.

Follow these basic steps and you will be able to enjoy your pool all season long. Happy summer!

Shrub Cover

The time it will take to build this will vary between 30-90 minutes.

Tree/Shrub Cover Kit

The following are tools and supplies needed to complete your tree/shrub cover project.
Stop into your local GNH Lumber and pick up any items that you may need.

Supplies
  • 1X4 Pine boards nominal size 3.5″ wide by 3/4″ thick (14CP)
  • Box of #6×1 (H40816) wood screws for small sizes or #8×1 for large sizes.
  • Pair of strap hinges. (H851662)

Tools
  • A corded or cordless drill or the Gyro by Black & Decker
  • 1/16″ or 5/64″ drill bit
  • A #2 Phillip’s head with magnetic bit holder
  • Tape measure
  • Pencil
  • Framing speed square
  • Handsaw or circular saw (a miter saw works as well)
  • For safety we recommend safety glasses and leather gloves. Nothing is worse the getting wood dust in your eye or friction burn on your fingers driving wood screws!

Plan and Build Your Shrub Cover

Step 1

First, decide that size or sizes or tree/shrub coverings you want. Then, bring your list of material needs and measurements for the wood to GNH Lumber and we will be happy to help you with your tree/shrub cover needs. We recommend trying to maximize your measurements with the ability to transport your wood home in your vehicle. GNH Lumber does offer delivery for a nominal fee of $35.00

Step 2

GNH can cut your boards for you to the nearest full inch, we have a $1.00 fee per cut. Be sure you have the right length as cut products are not returnable to GNH Lumber.

Begin by putting on your safety glasses. Measure your 1×4 pine boards to the length you wish to cut (our demo was 18″). Remember to measure one last time before you cut. Use the framing speed square and pencil to get a nice clean straight line across your 1×4 for your cut. Cut your 1×4 to get all of your vertical pieces. Most covers will have eight pieces.

Step 3

Next, get ready to cut your horizontal pieces. Take one last measurement, then use your framing speed square and pencil to mark where you will cut. Cut your horizontal pieces to the length you need. Save your scarp pieces of 1×4! These will come in handy when getting the spacing between boards to match. Stack your vertical pieces together to make sure they all came out the right length. Adjust accordingly if you desire.

Step 4

Shrub Cover Step 2

On a flat surface, lay your 1×4 vertical pieces out side by side. Use one of your scrap 1×4’s for spacing between the boards (using the 3/4″ thick side), and use your framing speed square to make your first piece straight. Take one of your horizontal pieces and lay it on top of the vertical 1×4’s perpendicular (at a 90-degree angle). Get your drilling device of choice. Remember if using a cordless drill be sure that you have a freshly charged battery it will be easier to drill your pilot holes and drive your wood screws. Load your drill bit of choice in the drill.

Step 5

Shrub Cover Step 3

If unsure that your drill bit is long enough, compare the drill bit on the edge of 1×4 to see if the bit will be long enough to get to the lower 1×4 board before you drill. When drilling, most drills have a “drill” setting. Set to drill. Be sure you are at least 3/4″ from any edge. When you drive the screw the wood may still split.

Step 6

Shrub Cover Step 4

Firmly hold the two pieces down, plunge the drill bit into the top 1×4 and proceed down so it penetrates into the lower board a bit. Switch the drill to reverse, pull trigger and extract. Repeat this process in a zigzag pattern; making two holes in each vertical piece and three on the two outer pieces.

Remove your drill bit and put in your magnetic bit holder with the #2 phillips bit. Open your box of #6 or #8 x 1 wood screws. For safety keep your safety glasses on and put on your leather gloves. Take your drill off of the “drill” setting. We recommend a driving speed of 14. Put your screw on the phillips bit and firmly push the screw into the pilot hole and squeeze the trigger, keep the drill as straight as possible and drive the screw down a little past the face of the 1×4. Repeat this step on the other three horizontal pieces.

Step 7

Shrub Cover Step 5

Your panels are now together. Open your strap hinge package and choose which will be the top or your cover. Place both hinges down on the horizontal 1×4 line up to make sure the hinge screw won’t land on one of the other screws. Mark the locations with your pencil. With your drill and drill bit drill, pilot holes for the hinges. When you are done, place the hinges back over the pilot holes and drive the screws into the holes. When this is complete, place another panel next to hinges and repeat the process.

Step 8

Shrub Cover Step 6

Once all are finished, lift up your new tree-shrub cover, opened like an “A”, and admire your handy work!

Shrub Cover Step 7