Simple Deck Design Ideas to Improve Your Outdoor Space

Simple Deck Design Ideas to Improve Your Outdoor Space

Simple Deck Design Ideas to Improve Your Outdoor Space
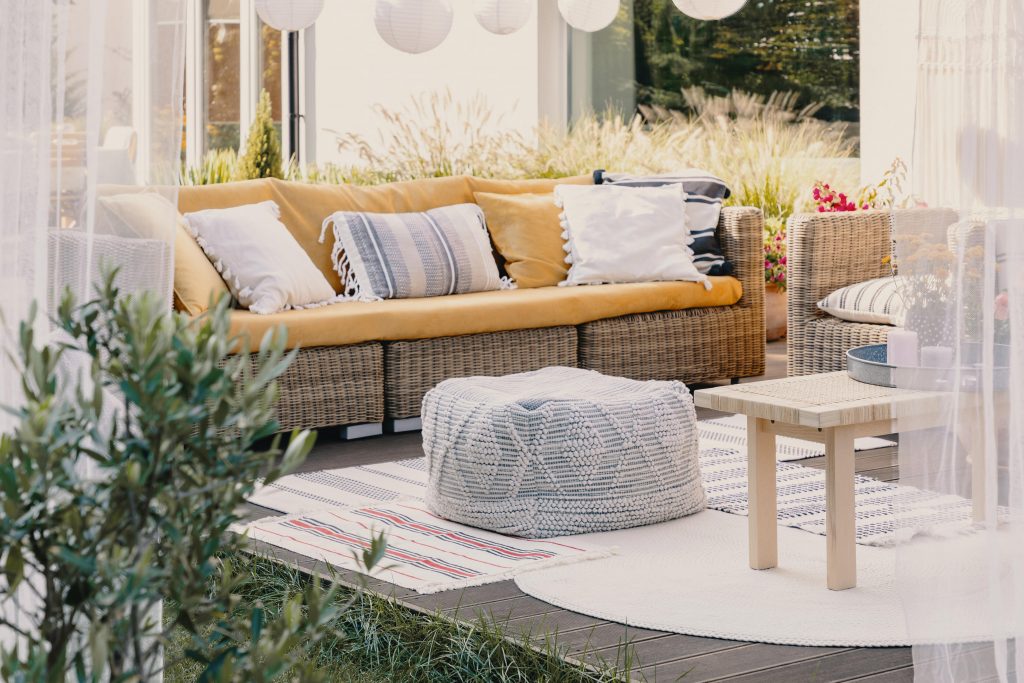
Beautify Your Deck and Spruce Up Your Backyard!

Creating the perfect outdoor space is easier than you think! If you’re looking to spruce up your backyard and beef up your home’s curb appeal, your deck and its surrounding space is the best place to start. But there are a lot of different ways to bring your vision for your outdoor living space to life. That’s why we recommend you stick to a simple formula for remodeling your home’s backyard space. Simple deck design ideas work best – especially when combined with new doors and stone accents!

Fresh Decks Let You Live Your Best Life Outdoors!

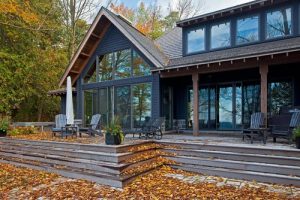
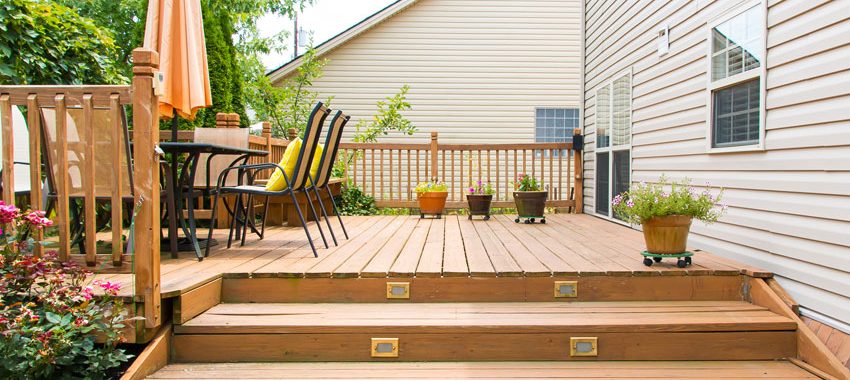
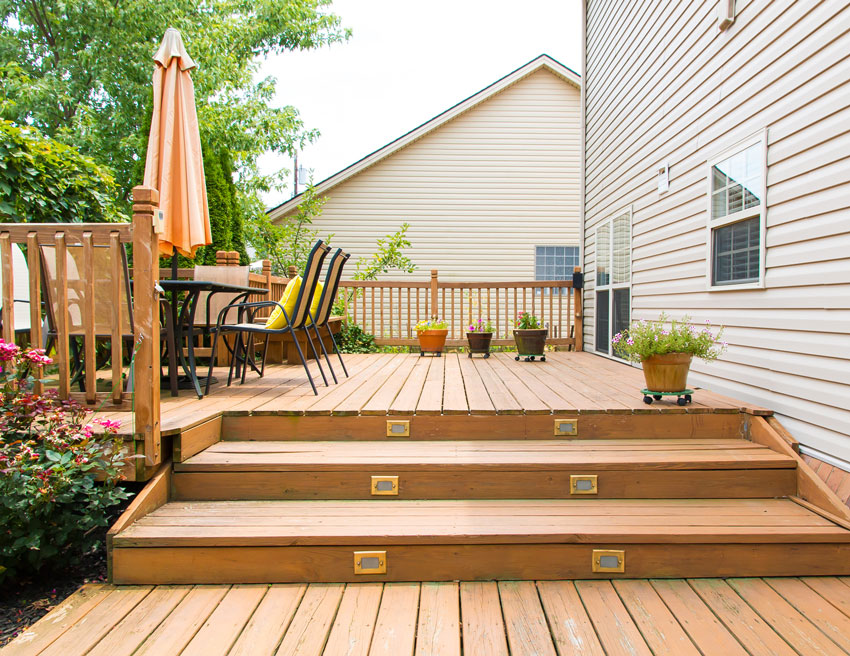
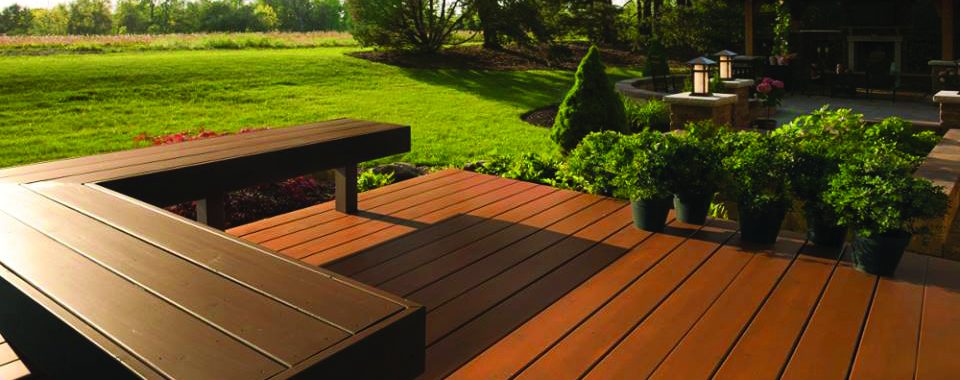
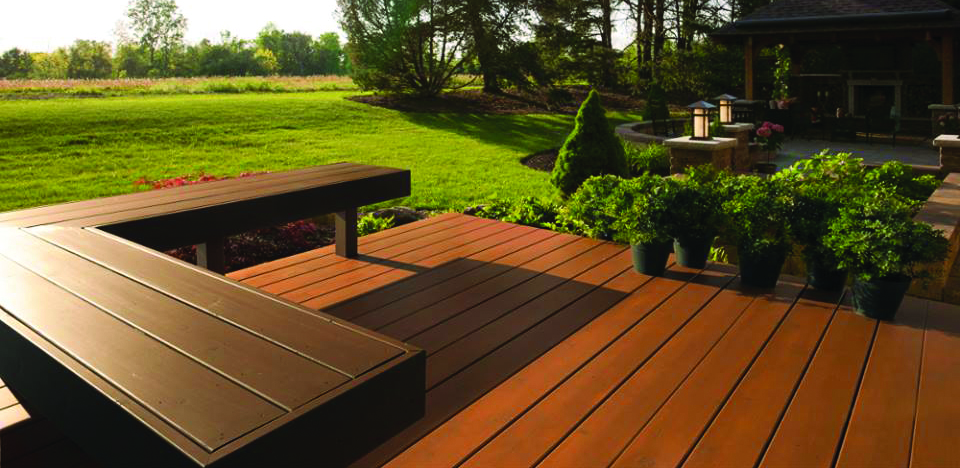
When you’re designing (or redesigning) your deck, you should choose products that seamlessly blend simple designs and tech. The ideal decking product is durable, easy to install, and looks sharp no matter the deck’s style. Whether you’re completing the project yourself or hiring out a contractor, the material should work within your design! Products such as Timbertech AZEK decking provide the best variety of colors, wood grains, and widths to bring any design to life.

We recommend you start by deciding on color – after all, your deck’s hue should speak to you! From there, you can decide on specific color combinations, shades, and even special wood grain patterns. By changing your decking’s highlights or lowlights, you can create a wide range of coloring. From there, it’s time to decide on your boards’ width. You don’t have to feel pigeonholed into “standard” sized boards anymore, either! Nowadays, wider boards are very trendy – and narrower boards can give your deck a coastal vibe. Don’t be afraid to mix and match board sizes either, the right combos can give your deck a uniquely modern look!

Once you’ve designed your deck around these simple ideas, don’t forget the railing! The right rail makes the perfect pairing to a deftly-designed deck. Before you add railing, we recommend considering these factors first:

  • Consider the architectural style and color story of your existing home. Which decking and railing combos would best complement them?
  • If you’re planning for a deck with an adventurous design, have you found a contractor that has experience with complex builds? If you’re DIYing – do you feel comfortable doing it yourself?
  • When it comes to railing, are you looking to keep your views unobstructed with something minimal or make a bold style statement?
  • Which railing profile do you prefer: classic millwork, modern and minimalist, or a sleek drink rail?

After you’ve answered those questions, you’re ready to build that deck!


Perfect Views with Sliding Glass Doors

Adding sliding doors to your deck is great for accenting your backyard and improving your outdoor panoramas!  Massive openings are possible with sliding doors. They open up your home and create a stronger connection to nature and the outdoors. Large openings are also perfect for high traffic areas like the passageway leading to a patio during a backyard get together. Even better – furniture and other household items can be placed near a sliding door.

If you’re looking for a sleek, sharp, and simple look – try Marvin’s black sliding door patio series! This modern, yet subdued tone works well with many different shades of exterior siding and decking. Or, if you’re looking for something more upbeat and contemporary, try their urban patio series. These sliding doors offer defined lines and urban style for any home!


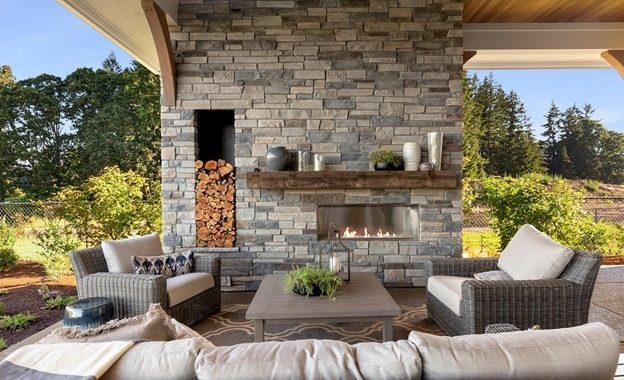
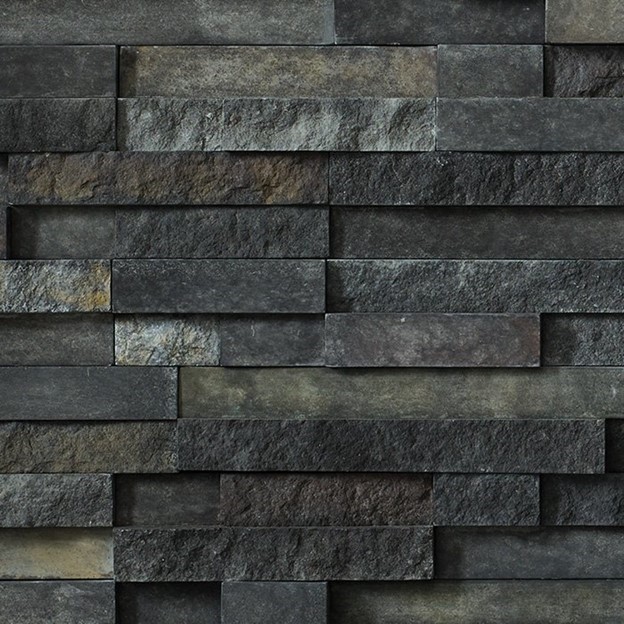
A Completed Cultured Stone Look

Once your deck and doors are taken care of, there’s one last simple design idea to tie your backyard space together! A stone pathway or even a stone firepit are the best “last touches” for your outdoor getaway. But don’t worry about feeling tied to natural stone, which can be costly and difficult to work with. Manufactured stone veneers, such as Cultured Stone, are the perfect alternative! These products mirror the look and feel of natural stone, with superior performance and versatility.

Once you’ve customized your space, the details add all the warmth and togetherness it needs. And nothing imbues your outdoor space with comfort quite like a fireplace. Signature fireplace surrounds or pit designs can tie your whole backyard together. Tastefully-designed pathways add simple elegance and make wandering your outdoor space a dream!


Though redesigning or remodeling your home’s backyard space can seem daunting – it really isn’t! By taking it one step at a time and having a defined plan with simple, versatile designs, you can get it done. If you need help getting your design started, or need to find the best supplies, contact our helpful team!

Tell Your Home’s Story with Cultured Stone

Add Metro Mojo with Cultured Stone 
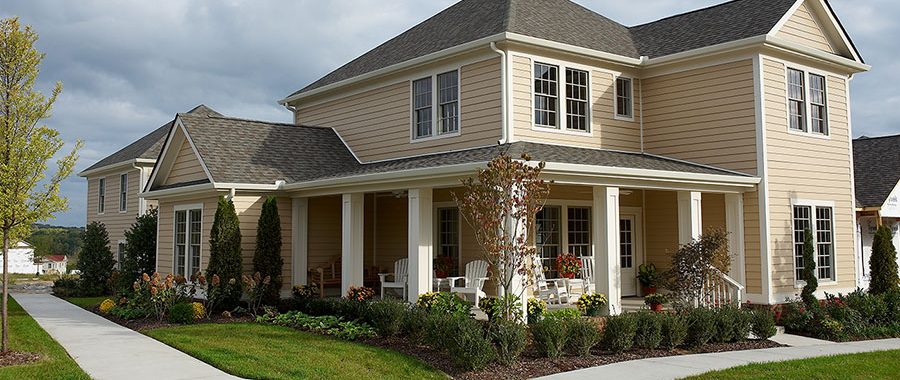
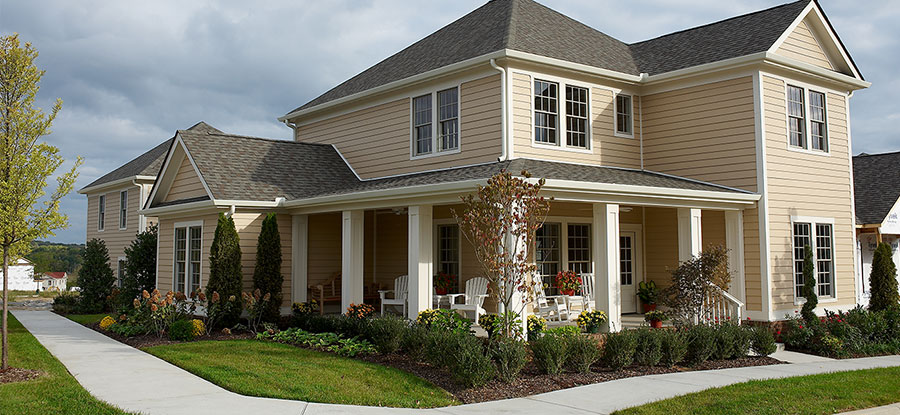
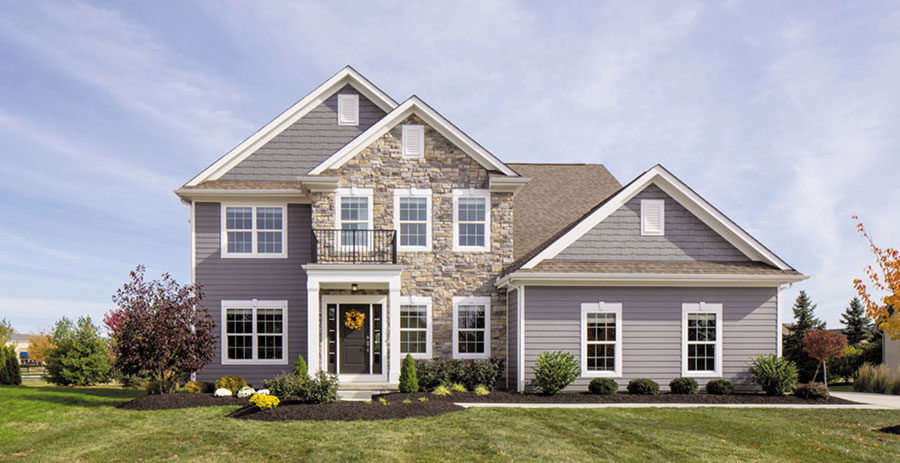
Whether you’re moving into a new space or adding onto your current home, improving its aesthetics is key. It’s important to end up with a look and style you love, but it all has to tell your home’s unique story!

Simplistic spaces evoke calm feelings, but the opposite approach has its own benefits. One of the hottest trends in home design nowadays is “Maximalism”. From a design standpoint, it means more is more!

Mastering Maximalist design involves more than using quirky art or wild colors. But incorporating this style lets you get bold and creative as well! Your own design journey should be personal and evocative.

If you’re looking to add a touch of Maximalist metro mojo, using Cultured Stone is a great place to start! These cleverly crafted cultured stone veneers are a great way to give your home an impressive and stylish look.

Make Your Home Your Own

Cultured Stone Maximalism

When you start designing, the first thing to consider is what you want the finished product to look like. What inspires you? Are there important details that you wish to display? What tells the story of your life and your creativity in the most elaborate way possible? The beauty of Maximalism is that it allows your space to be as unique and expressive as you are.
 
This is your chance to add those interesting design ideas that you’ve dreamed about! You’ve always wanted a cheetah print couch and a funky cobalt blue accent wall? Do it! This style works at its best when you combine traditional elements with funky pops of color. The end result is a room that is the personification of “you”!

Creating Trendy Together Spaces

Trendy spaces

There’s something magical about the communal component of urban living – no matter where. It’s time for your fireplace surround to soar like a within a historic brownstone home. Your wall between the den and the kitchen can function as an indoor window. There are many little touches that can bring any space together in a modern and stylish way. Cultured Stone makes it simple to recreate any urban and trendy looks! Even better, these manufactured stone veneers can be colored to match whatever the tone of whatever room you’re adding onto.

Embrace Your Outdoor Space

Cultured Stone Veneers Outdoors


Whether your home has a rooftop escape or not, you should make the most of your outdoor space too. In addition, you can do it with any sort of space – even if it’s shared with neighbors!

You can spruce up your outdoor space with floral arrangements, in pots if needed. We also recommend adding murals or other artwork that reminds you of city parks. You can even add strand lights to help enhance that hip metro feel. If your backyard isn’t shared and you have extra space, you have an even better option. Try building a secret garden to give you a “private” feeling to remind you of other secluded gardens. Personal walkways or garden walls with Cultured Stone are the perfect final touch!

Don’t forget to make sure your outdoor space is fit for entertaining guests! A backyard getaway or rooftop escape is the perfect place to gather after sundown. Make it great for an evening under the stars by creating a conversation space. Be sure to equip it with lovely seating options around a Cultured Stone firepit or firebowl. With all the sizes and styles available, you can craft your own magical space to make lifelong memories!

Wherever you call home, whether it’s urban, suburban, or something more – it should match the needs of you and your family. By adding onto your home with Cultured Stone, you can create a warm and personalized space for anyone. Contact our talented team today to learn how we can help improve your home!


Source: Cultured Stone

Replacement Windows

5 Signs That You Need Replacement Windows

Keep Your Windows Up to Date

Replacement Windows

Your windows should help keep your home feeling comfortable and looking its best. As time goes on, your windows’ performance gradually begins to fade. Weather stripping is damaged, the seals begin to fail, and the various parts of your windows get brittle and break. So, how exactly do you know when it’s time to finally replace your windows? While some of the signs are obvious, others are harder to catch before it’s too late. Thankfully, there are 5 telltale signs that let you know that it’s time to invest in replacement windows for your home. 

The Pets Always Know 

We’ll start with one of the most obvious signs you need new windows: How comfortable the climate in your home is. If one or more rooms in your home are overly hot in the summer or frigid in the winter, it’s likely that your windows are one of the largest factors. Aside from yourself, pay attention to your pets as well! If even Fido needs a blanket every time the temperature drops outside, it’s time to start looking into replacement windows. New windows, especially versatile and resilient vinyl windows, are made of stronger materials than older windows, and can help keep your home feeling comfy and cozy – no matter the season. 

Appearances Aren’t Always Deceiving 

Minor aesthetic damages usually aren’t anything to be concerned about in terms of the state of your windows. However, significant physical damages usually point to failing windows. For example, if your windows constantly have foggy panes, that’s a sign that gas is escaping from between the panes and condensation has formed inside. Over time, that heat and water can loosen the seals on your windows. Similarly, chipping paint and an inability to hold a new coat of paint can mean water damage has set in. This water damage can also lead to moldy smells, another sure sign that your windows need replacing! 

Bills, Bills, Bills 

If your windows aren’t performing at their best, doesn’t it make sense that your energy bills would go up?  It’s true – leaking or inferior windows lead to your heat and air conditioning filtering outside, reducing their efficacy inside and wasting your energy. Even if you can afford the extra money, heating and cooling the outdoors is wasteful and consumes more natural resources than is necessary. If you’re not sure what your fuel and electricity bills should be, ask your neighbors what they pay. If their house is built like yours and their family is a similar size, their bills should be roughly the same. 

Open Sesame 

Even though it may seem obvious, if your windows are either too hard or too easy to get open/through, they’re probably at the end of their shelf life. And replacement windows aren’t just there for quality-of-life improvements, they can keep you safer as well. Windows that are too hard to open are a safety hazard, especially in the event of a natural disaster or other emergency. On the other hand, windows with weak seals, gaps in the caulking, holes, etc. allow bugs and other pests easier entry into your home – it’s one of the many reasons why new windows are so helpful! 

Tune Out the Noise 

There’s a lot more people in the world now, and a lot more noise to be heard, especially in crowded neighborhoods. Another sign of failing windows is more of that noise creeping into your home. Windows that are improperly sealed or are older can let in much more outside noise, and that means more difficulty sleeping or holding a conversation indoors. Thankfully, modern windows can be fitted with three panes of glass and special laminations – so you don’t have to shout to be heard anymore. 

Even if you’re just looking to upgrade your windows and give your home a new look, we encourage you to get out and do it! Let us help you find the best choice so you can increase your home’s curb value and save on your energy bills. 

Outdoor Siding with Ladder

Design Smarter with LP SmartSide Exterior Home Siding!

Experience High Performance Siding with Less Maintenance!

Outdoor Siding with Ladder
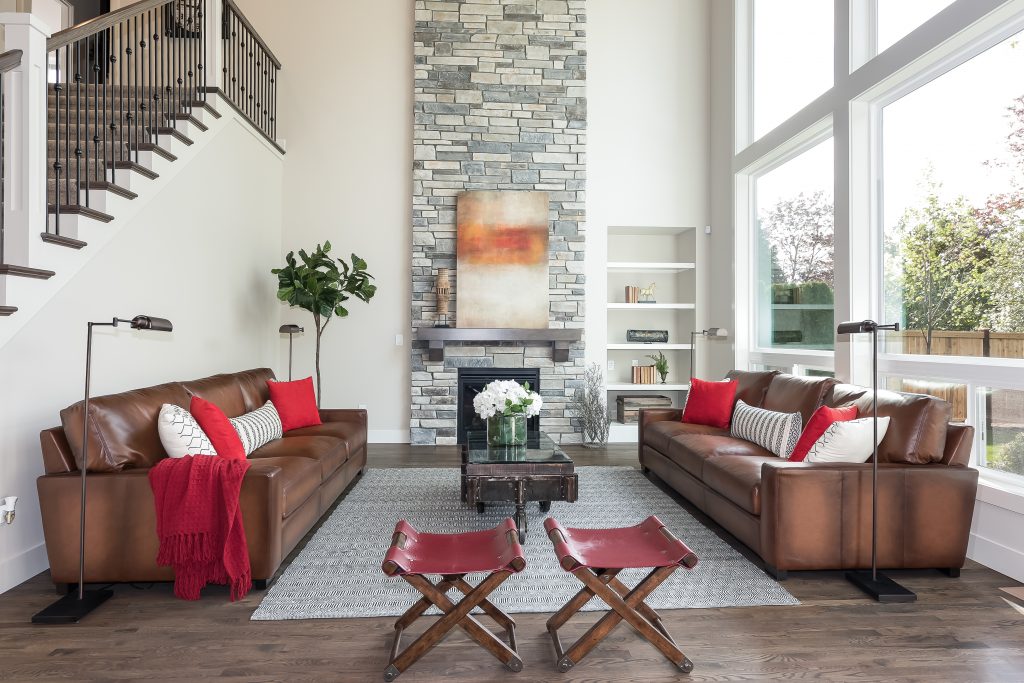
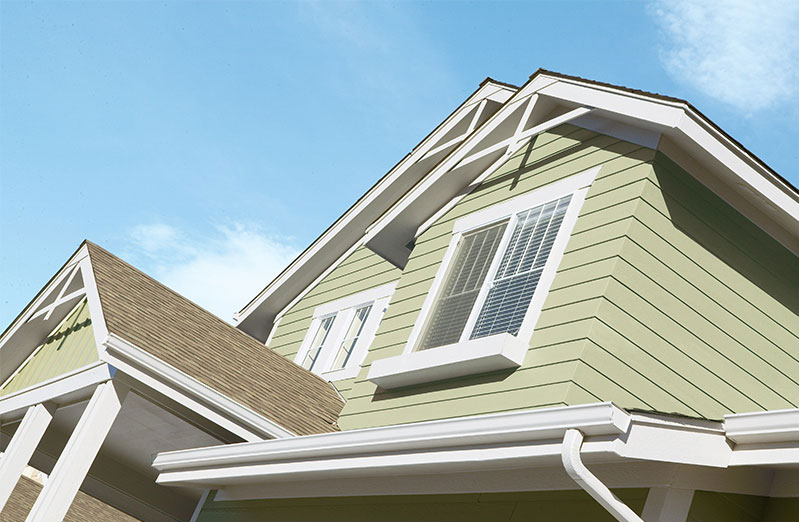
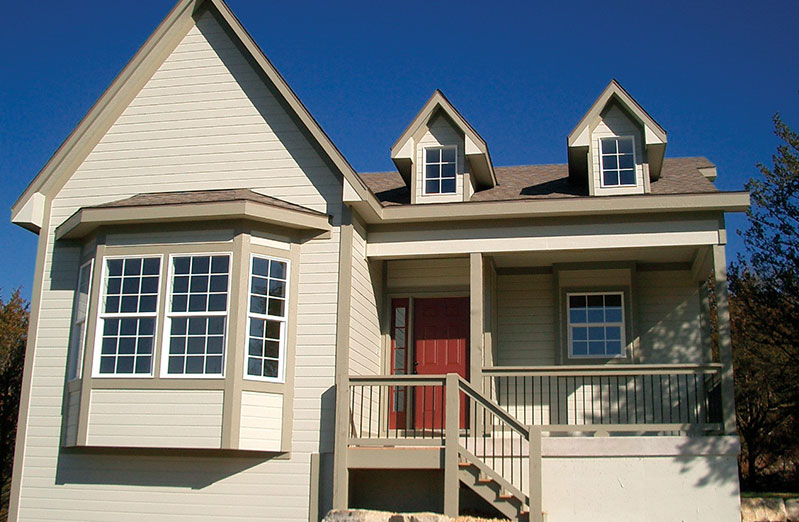
It’s always important to keep a close eye on your home’s exterior siding! If you’ve noticed any leaks, cracks, chips, or any other visible problems that have developed over the years – it may be time to replace or restore your siding! But not all siding is created equal, and some siding is more difficult to keep looking beautiful without extensive maintenance on your part. Thankfully, there is a siding option that is not only high-performance, but also requires only basic upkeep! LP SmartSide Siding is the perfect engineered wood siding to improve your home’s curb appeal while requiring little maintenance!

Let It Shine with Basic Cleaning Techniques

Taking care of your home, siding included, should be a year-long effort. Even taking the time to do an annual visual home inspection can pay dividends for you in the long-term. We recommend taking a yearly inventory of your home’s exterior and siding to check for any stains, mildew, or mold that may have cropped up over the last year. You can keep your home’s exterior and LP SmartSide Siding looking beautiful by performing some basic periodic care and maintenance. Follow these tips to keep your home free from mildew, dust, dew, and other environmental damages:

  • Dust and dirt can build up on your home’s exterior siding, no matter where you live. If you want to keep your home looking its best, we advise using a soft cloth, sponge, or light brush along with a mixture of mild soap and water to wash and clean the surface of your siding. You can then lightly rinse off with water from a garden hose – be sure not to pressure wash, as this can damage your siding and increase your risk of damaging or discoloring the paint on your home.
  • For mold, we recommend using a lighter solution of three-parts water to one-part white vinegar to safely remove any intrusive mold or mildew stains. This can help remove pesky discolorations without risking any damage to your paint or wood stains!

Simple Monthly Maintenance

In addition to basic maintenance to keep your home siding free from stains and mildew, you should also take note of any chips, wears, or tears within your siding. Thankfully, small imperfections like these are easily fixed – especially with LP SmartSide Siding! For any small chips or cracks in the paint finish your home’s exterior siding, you can simply touch them up with matching paint. We recommend that you don’t paint over existing paint or try to blend the paint out into existing paint – and that you allow at least 24 hours for the paint you use to dry. When checking your siding, it’s also key to check on your gutters and sprinklers. Make sure your gutters are draining properly and your sprinklers aren’t exposing your siding to water spray – issues with either of these can lead to irreparable damage to your exterior siding.

If you notice any damage to your siding’s caulking, it’s best to contact a professional contractor to help repair it. They’ll know how to replace caulking around LP SmartSide siding that has cracked, hardened or lost its seal.

Responsibly Made, Environmentally Committed

Choosing LP SmartSide Siding not only improves the curb appeal of your home, it’s also great for the environment! All LP SmartSide Siding products are made with renewable wood, grown and gathered under strict Sustainable Forestry Initiative (SFI) standards. These standards include responsible forestry practices that protect water quality, biodiversity and wildlife habitats. All wood used by companies participating in the SFI program must come from legal and responsible sources, whether the forests are SFI-certified or not. These standards ensure forest products remain a sustainable resource now and for generations to come.

By adhering to these standards, all LP SmartSide Siding products benefit your health by using:

  • Low-emitting binding agents and resin – Volatile Organic Compounds (VOCs) are chemicals found in many products we use to build and maintain our homes, including siding. The binding agents and resins in LP SmartSide products release low levels of VOCs, which may decrease some people’s risk of health problems.
  • No added formaldehyde – Formaldehyde is a common chemical used to make building materials. It irritates the airways and is known to cause cancer. No urea-formaldehyde is added during the manufacture of LP SmartSide products.

Your home’s siding should do more than improve its looks – it should also protect it against the elements and keep your energy costs down! If you’re looking to replace or restore your home’s siding, be sure to reach out to the talented team at GNH Lumber. We can help you find the best siding for your home and ensure it’s installed successfully!

How to Choose Replacement Windows

How to Choose Replacement Windows

How to Choose Replacement Windows

The autumn season is the perfect time to swap out drafty old windows with new energy efficient ones. Investing in replacement windows now will equal savings on heating costs all winter long—and beyond. But how do you choose replacement windows in the first place?

One shortcut is to visit your local GNH Lumber to discuss your window replacement project with our seasoned experts.

Click here to get started now.

To help you choose just the right windows for your home and budget, we recommend considering some common cost-saving options and answering a few common questions beforehand:

1) PLANNING

Start by considering which windows you want to replace. Do you want to replace all of them, one floor at a time, or just individual units that will save energy and add convenience to a particular room in your home?

2) BUDGET

Prepare a preliminary budget. This will help you determine how many windows you can replace with the styles, features, and materials you want. Pay particular attention to the window’s thermal performance since this will factor into the cost. Windows that qualify for tax rebates may cost more initially but these costs are offset by rebates and greater energy savings over time!

3) APPLICATION 

What do you want your new windows to do? Are they architectural design features or will they provide specific functionality? Do you want the windows to open and close? How they should operate? Vinyl windows like Smarter Windows from GNH Lumber will provide lower maintenance, greater convenience, and higher energy performance than most wood windows.

4) ENERGY EFFICIENCY 

Finally, discuss energy-efficient window options (like standard insulated glass and low-e glass) with the knowledgeable staff at GNH Lumber. Don’t forget to work the additional cost of these features into the context of estimated savings on your heating and cooling bills. Do the expected savings justify the extra cost? Vinyl window frames are less expensive and do provide more insulation qualities.

Sources: http://www.smarterwindows.com/Page/How_to_Buy_Replacement_Windows

Snow Removal Tips

Top 9 Snow Removal Tips for Your Home

Snow Removal Tips

One of the most frustrating parts of winter is the need to shovel snow. You might just want to wait until springtime and just let it all melt. However, the effort must be given.

If you’re tired of wasting time and effort on removing snow every winter, it’s time to use these 9 snow removal tips for your home to get the job done easier, more effectively, and better than ever before.

Top 9 Snow Removal Tips:


1. Use Tall Stakes Around Driveways and Walkways

In Upstate New York, we’re pretty used to the snowfall. So, when we suggest putting large stakes around your driveway and other walkways, you should use that advice. It’s helpful whether you hire a snowplow company, shovel yourself or use a snow blower. While you may think you’ll know exactly where your driveway is, it’s not as easy to locate with a couple of feet of snow.

2. Use a Good Shovel

Shoveling snow during the winter is annoying as it is. If you don’t have a quality shovel to work with, you’re just making it harder on yourself and your back. While it might be tempting to buy a cheap shovel when you’re making your decision, it’s wiser to not be a penny-pincher. Spend more money on a heavy plastic or aluminum blade shovel that will get the job done easier.

Also, be mindful that large shovels aren’t always the best. Large shovels can cause back pain and arm stiffness. If you’re looking to find a shovel for heavy snowfalls, you should buy a s-blade shovel. C-blade shovels are better for lighter snowfalls.

3. Avoid Placing Snow Near the Foundation

This is a mistake that a lot of homeowners simply don’t consider when they’re removing snow. Whether they’re removing snow from a roof, from a deck, or from the driveway, you should avoid piling snow next to the side of your house. This will only lead to issues such as frozen pipes and even potentially cause cracks in your home’s foundation.

4. Be Safe

Shoveling snow can be a grueling activity, especially as you get older. If you don’t plan to hire a snow removal service, then it’s best that you follow these safety tips.

  • Bend your knees and lift with your legs.
  • Keep the blade close to you as you lift the snow.
  • Switch between shoveling left-handed and right-handed to avoid overstraining one side of the body.
  • Periodically switch your grip between overhand and underhand.
  • When the snowfall is heavy, don’t try to clear the entire depth at once; only do half at one time.

5. Shovel Often

Whenever you’re removing snow, the reality is that it needs to be done frequently. The snow doesn’t seem to stop, but if you do you just make your job harder the next day. If you leave removing snow until the next day, the snow will start to stick to ground and might even freeze. This makes your job ten times harder.

6. Invest in a Snow Blower

If you’re just done with shoveling snow in the winter, invest in a snow blower. Snow blowers can take away a lot of the tedious parts of removing snow in the winter, but you’ll still need a shovel for your deck. While it’s a faster method of removing snow, it’s also a more expensive option as snow blowers can cost up to $500.

7. Shovel Flat Roofs

If you have a flat roof that is easily accessible, you can shovel your roof, but it’s important that you don’t damage your roof covering. Also, you should always consider your own personal safety before attempting to shovel your roof.

8. Use Roof Rakes for Sloped Roofs

It may be possible to remove snow and ice from a sloped roof using a roof rake, which is a long-handled tool that is specifically designed for this reason.

9. Consider the Impact of Ice Melt

There are a bunch of different options you can use to eliminate a slippery driveway and even a walkway such as salt (sodium chloride), calcium chloride, calcium magnesium acetate, and urea. Learning about the potential consequences of using each form of ice melt is important because these items can end up damaging plants, damaging flooring in your house, or harm your pets.

Snow Shovel


Snow storms and colder temperatures always seem to be on the horizon, but being prepared and following the guidelines above will make snow removal easier so that you can protect and preserve your home.

Stock up on everything you need to battle the winter weather at at GNH Lumber!

How to Prep Your Deck for Stain - Newly Stained Deck

How to Choose the Right Deck Cleaning Product

How to Prep Your Deck for Stain - Newly Stained Deck

If your wooden deck is faded, grey or stained, a bit of washing with the proper deck cleaner and a fresh coat of stain will completely transform your outdoor space! Plus, it will protect your deck from the elements and help extend its life.

Get your deck or porch project started!

Choosing the right cleaning product beforehand will ensure that your newly stained deck will looks its best and last the longest.

Strip the wood on your deck

Use an exterior wood stripper on all exterior wood that has been previously treated or stained. Wood Strippers will remove stains, paint, mildew, mold, algae, and dirt. Using a wood stripper will prepare your deck for priming, painting or resealing. Use a paint brush or pump-up sprayer to apply the stripper and allow to sit for 15-20 minutes.

Brighten the wood on your deck

After stripping the wood surface, apply a wood brightener which helps neutralize the wood and open wood pores so that the stain can penetrate the surface. Apply with a pump-up sprayer, and allow to sit for 15-20 minutes. Rinse with a garden hose. You should wait a few days for the brightener to dry before staining.

If needed, clean the wood on your deck

Exterior Wood Cleaner is intended for older decks. Wood cleaner is used to remove foreign matter from wood, including oxidized (failed) coatings, dirt, grease, oil, pollen, algae and surface stains caused by mildew. Apply with pump-up sprayer, and allow to sit for 15-20 minutes. Rinse with a garden hose. Use a scrub brush for tough stains and repeat process if necessary.

How to Prep Your Deck for Stain - Rinse Cleaner


How to Harmonize Your Home Exterior’s Color Palette

Outdoor entertaining season is in full swing! Delight your guests with siding that creates eye-pleasing symmetry and utilizes harmonious color combinations. According to LP Siding, there’s no reason your siding can’t be the true focal point of your home’s exterior, with landscaping and other outdoor elements supporting its aesthetic.

The best part? Creating a colorful and dramatic home exterior and backyard doesn’t have to be an expensive endeavor! It’s easy to re-side your home on a budget. Just ask the experts at GNH Lumber for more information.

Here are some tips and tricks from LP Siding to ensure your home’s exterior and outdoor elements complement each other perfectly this summer:

Tip #1: Go for Greens, Browns or Beiges

How to Harmonize Your Home Exterior's Color Palette - Greens
The greens, browns and beiges of nature are colors that are easy to integrate with outdoor focal points like a garden, shed or fencing.


Tip #2: Muted Tones are More Versatile

How to Harmonize Your Home Exterior's Color Palette - Muted Colors

Grays and muted colors are more versatile than pure pastels and bright hues. You don’t have to exactly match plant and paint color with these subtle shades. Fence and shed colors should also be muted.


Tip #3: Keep Undertones Together

How to Harmonize Your Home Exterior's Color Palette - Undertones

Keep color undertones together. A “cool” house color like blue, green or purple works well with cool plant colors and complementary fence and shed colors. Conversely, “warm” house colors like light yellow, pink or apricot harmonize with “warm” outdoor elements.


Tip #4: Use Caution with Complimentary Colors

In some cases, you can match colors that are on opposite ends of the color wheel (like red and green), but they need to be muted shades accented with gray. Otherwise, your home may stand out for all the wrong reasons (and end up looking too much like Christmas).

How to Harmonize Your Home Exterior's Color Palette - Curb Appeal

Source: https://lpcorp.com/blog/4-tips-to-harmonize-your-home-s-exterior-and-outdoor-color-scheme

Spring is here! That means it’s time to start your gardening projects in time to have delicious, fresh veggies and herbs, or a bountiful flower garden all summer long! Not enough space in your backyard for a big vegetable or flower garden? Raised garden beds are the perfect solution for gardeners with limited space! In this blog, we’ll run through a step-by-step guide on how to create a raised garden bed for vegetables or flowers. 1. Choose Your Materials Select your bed frame materials. This can be as simple as regular 2x4’s or even patio retaining wall blocks. The size is up to you! The height of the bed should be at least 6 inches high, which gives the plants’ roots plenty of room to grow. Check out some great YouTube videos on how to build wood raised garden beds.   2. Mark the Perimeter Once you’re done putting together your raised garden bed, it’s time to select a sunny spot ideal for growing and relocate the frame. Remember, if you’re growing vegetables, you need to find an extra sunny spot with plenty of late date sunlight. Using an edger or spade, mark the ground around the perimeter of the frame.   3. Prepare the Soil Now that you’ve created the frame and marked the perimeter, set it aside so you can start preparing the soil. Use a sod cutter or grub hoe to skim away the grass layer, if one exists.   4. Anchor the Raised Garden Bed Once you’ve leveled it out, dig a 5- to 6-inch deep hole for each of the corner posts. Then sink each post into the ground, using a 4-foot level to level it out.   5. Add a Layer of Hardware Cloth to Keep Out Pests Gophers and moles can sometimes be an issue with garden beds. To keep them out of your garden, add a layer of hardware cloth before you pour in your planting soil. Rake an existing soil at the bottom of the bed to level it out. Then smooth it out. Line the bed bottom with hardware cloth, making sure the cloth is flat against the bottom of the bed and touching each side. Secure the cloth by stapling it to the sides of the bed.   6. Add Your Soil Fill the bed with a 50/50 mixture of planting soil and compost. Once the bed is full, rake the soil smooth and moisten it with a slight spray from the hose.   7. Plant! Now it’s time to plant your vegetable, flowers and herbs! Plant anything you like that works in your area.   7. Water Regularly Don’t forget to water your plants often! After all, you’ve spent a long time putting together your garden bed, so you want to make sure you are taking good care of your vegetables and flowers.   Now get started on your spring garden bed project and start enjoying fresh fruits and vegetables and gorgeous flowers and plants!     Click Here to find everything you need to create your beautiful garden with help from GNH Lumber. And contact us if you have any questions about your garden or landscaping project!

DIY: Painting or Staining Outdoor Wood Furniture

DIY Painting Outdoor Furniture

With smart planning, painting and staining your outdoor furniture can take place in less than a weekend.

There are many different types of outdoor furniture types—wicker, wrought iron, aluminum and plastic—but wood is by far the most popular. Whether you go with an opacity that allows your wood furniture’s natural grain to show through or opt for an opaque solid in your choice of 3,500+ colors, a fresh stain on outdoor furniture will yield a great new look.

Staining and painting outdoor furniture is a lot easier with expert advice from Benjamin Moore to guide you. Follow these steps to achieve the best results. And, when in doubt, don’t forget to ask the paint and stain experts at GNH Lumber for guidance and tips!

Get your painting project started!

Step #1: Prepare the Surface

The first step in staining or painting outdoor furniture is to make certain that the wood is absolutely dry and free of mold and mildew. Be sure to check the undersides, too.

If the old surface has stains from mold or mildew, you can properly prepare the surface by using a premium cleaner like Benjamin Moore® Clean (318). For mild cases, you can mix up your own solution using one part of household bleach to three parts water (it’s best to do this outdoors or in a well-ventilated area.) Be sure to rinse the furniture and allow it to completely dry before applying the stain.

If the weather is cold, move the furniture indoors to dry; in milder weather, it’s enough to place the furniture in a garage, carport, or other shelter from the rain. Don’t cover the furniture with plastic or a tarp, as that will not allow enough air circulation for thorough drying.


Step #2: Sand

The next step is to sand the surfaces to be stained. If the old finish is in fairly good condition, it’s enough to just roughen the surface. Start with coarse-grade sandpaper, working with the grain. An orbital hand sander is the perfect tool for this job, if you have one. If the old finish is in bad condition, you may choose to remove all the old finish down to the bare wood. This can be accomplished with a quality wood stain remover such as Benjamin Moore® REMOVE (315).


Step #3: Prime

If the old painted or stained surface is still intact after sanding, you can skip priming. However, if you’re going to apply a lighter color over a dark one, if the wood is exposed, if there are knotty sections, or if any stains remain, you should use a high-quality primer formulated for outdoor use, such as Benjamin Moore’s Fresh Start® High-Hiding All Purpose Primer (046) or Arborcoat Oil Primer (366).

For all priming, brush on the primer working with the grain using a high-quality Benjamin Moore Nylon/Polyester brush.


Step #4: Stain

If you are staining outdoor wood furniture, consider a product that’s strong enough to protect decks: ARBORCOAT® Exterior Stain. Formulated to protect against the harshest weather conditions as well as UV rays, ARBORCOAT offers a range of colors and opacities, including:

If you’ve primed the surface, one coat of stain will be enough. If you skipped the primer, you may want to apply a second coat. Let the furniture dry in a clean, dust-free, well-ventilated area. Don’t leave it outside to dry, as wind and air may deposit dust and particles onto the wet surface.

Once the furniture is dry, you’re good to go. Situate your furniture where it won’t be under a drip line from a roof or tree limb. An occasional light wash with dish detergent and warm water will help you enjoy your outdoor furniture for years to come!


Source: https://www.benjaminmoore.com/en-us/interior-exterior-paints-stains/how-to-advice/exteriors/painting-outdoor-wood-furniture

Repair, and Protect Gutters

DIY: How to Clean, Repair, and Protect Gutters

Repair, and Protect Gutters

Making sure that your home’s gutters are clear of debris after the autumn leaves have fallen is an easy way to prevent potentially significant water and ice damage later. Since your homes gutters work to control the flow of water, and help to prevent damage to the exterior of your home, it’s vital that you keep them in proper working order.

Here are six steps to getting those gutters in tip top shape:

 
Cleaning Gutters

Step 1: Clean Out the Gutters

 
Begin by removing the debris and leaves that collect in your gutters. Most find that handheld blowers or even wet/dry vacuums are effective tools for removing debris. If the debris is dry, you’ll find it easier to remove. Blow out as much loose debris as possible and collect it into yard bags.

If you find that the plant matter is really packed in, use a gutter scoop to remove the compacted debris. Simply attach a bucket to your ladder and then scoop out the debris and place it in the bucket. Begin at the downspouts and work your way over. Do not push debris over, rather scoop it out.

You will also need to check out the downspout. Clogs often occur here. Generally, a garden hose on full blast will manage to dislodge the clog quickly.


Step 2: Fully Inspect Gutters

 
Always take the time to inspect your gutters. This will let you know if they’re in need of repair, and help you assess the scope of work ahead of you. If your gutters show any signs of corrosion, make sure you look for holes or leaking joints and check for loose, missing or even bent gutter hangers. A great tip is to use masking tape to mark where a problem area so you can go back to it quickly when you get the supplies needed to make repairs.


Repair GuttersStep 3: Repair Small Holes and Cracks

 
You’ll want to repair small holes or cracks in your gutters and downspouts with a gutter patching kit from your local GNH Lumber store.

It’s always easier to fix small issues early on as opposed to making costly repairs later (such as replacing your gutters altogether). Gutter patching kits are easy to use, and can help prolong the life your gutters and prevent damage to your home.


Step 4: Replace Sections with Large Leaks and Tears

 
Sometimes parts of your home’s roof gutter may be damaged to the point of no return. This can happen if they are not properly installed, or if they have been damage over time because of weather and wear. These sections are best replaced to keep the gutter functioning properly.


Step 5: Adjust Pitch of Gutters

 
More than likely when your gutters were installed, they had a pitch of about 1/16.” You’ll want to measure the pitch and make adjustments if necessary. This is very important because improper pitch can equal poor or no drainage.

Any high or low spots can often be corrected by slightly bending the hangers that support the gutter itself. You may need to add additional gutter hangers to raise or lower the slope of the gutter at any given point also.


Install Gutter Guards
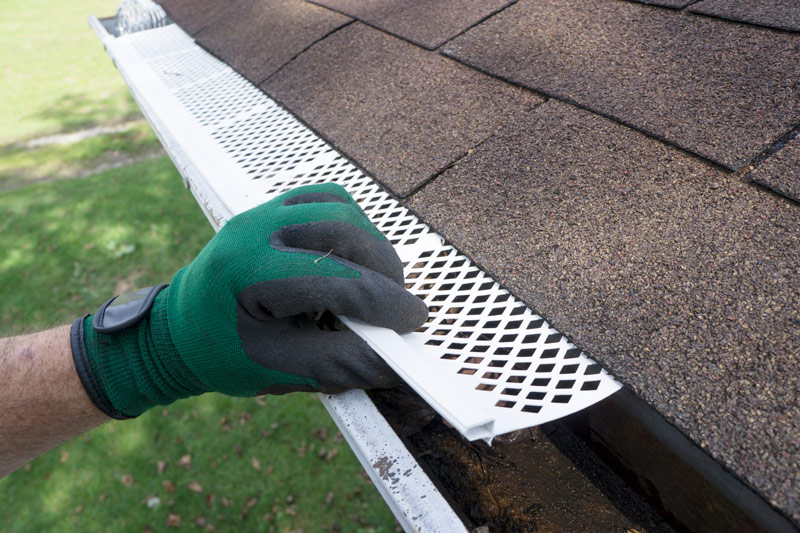
Step 6: Install Gutter Screens or Guards

 
Once your gutters have been cleaned and fully repaired, you’ll want to keep them that way! One way to prevent gutters from filling with leaves and other debris is to install metal gutter screen or an aluminum gutter guard. Gutter guards simply extend across the entire width of the gutter blocking debris but still allowing water to enter. It helps to prevent clogs and makes cleaning out your gutters much easier.


By following this step-by-step guide for cleaning, repairing and protecting your home’s roof gutters, you can rest assured that they will work without clogging during the worst of rainstorms, protecting your home from the elements, and prolonging the life of your siding and foundation.


Home Exterior Maintenance Project


Questions or concerns about your home exterior maintenance projects? Stop in to your local GNH Lumber! We’re always glad to offer guidance, tips or suggestions, or point you in the right direction for just the product needed to get the DIY project done.