4 Creative Kitchen Design Ideas to Try

4 Creative Kitchen Design Ideas to Try

4 Creative Kitchen Design Ideas to Try

Want to completely transform the way your home looks and functions this year? Because the kitchen is the most dynamic, gathering-oriented and useful room in the home, a kitchen redesign is an easy way to create a big impact. And did we mention that it increases your home’s resale value?  It’s a win-win!

No matter the budget or style, there’s a great kitchen solution waiting to fit your family’s tastes and needs. Consider these creative kitchen design ideas when planning your kitchen remodel. And, when in doubt, don’t forget to ask the kitchen design experts at GNH Lumber for guidance and tips. Schedule a free consultation.

So, what are some unique ideas for a fresh kitchen design? Here are our top 4 picks:

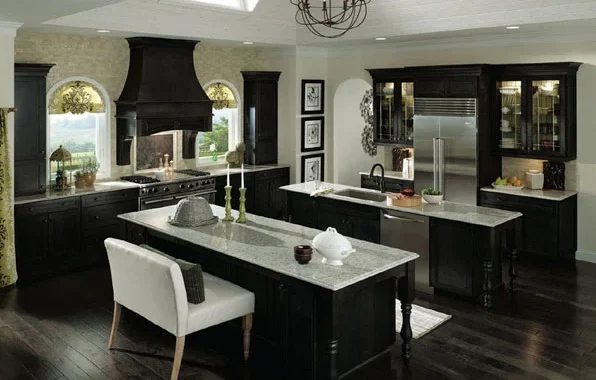
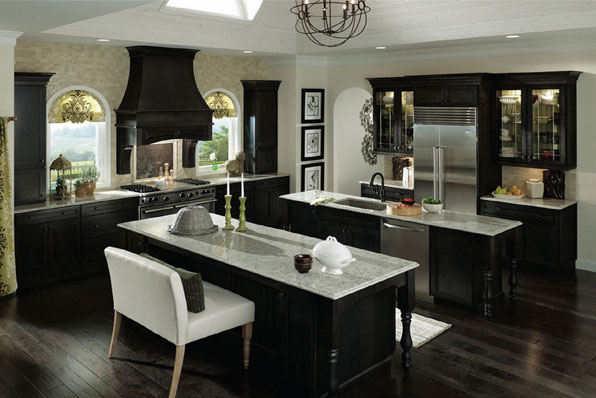
1. Two Distinct Counter Islands

Creative Kitchen Design Ideas - Two Counter Islands
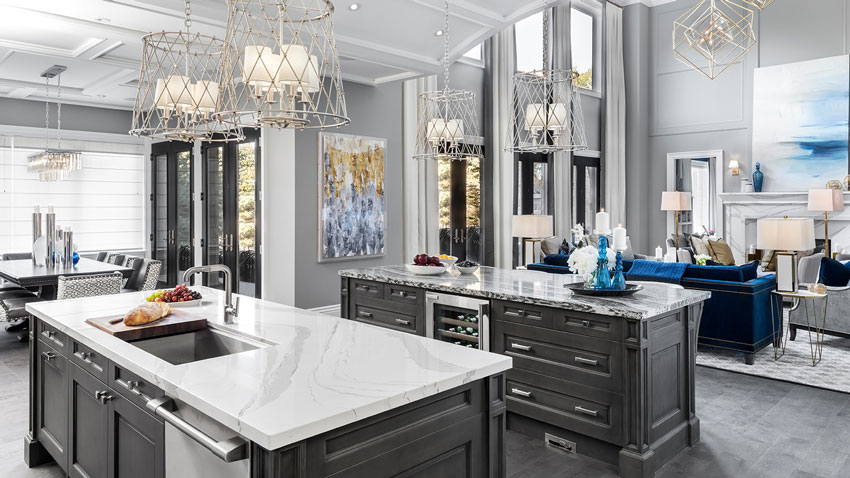
Two distinct islands featuring Cambria Brittanicca™ and Roxwell™ pair with black cabinetry and gray hardwood floors.  (Image source: Cambriausa.com)

When it comes to kitchen islands, sometimes more is more. According to Cambria, if your kitchen is large enough to accommodate this design, “a double island layout may be the answer to all your prep, entertaining, and family dining needs.”

Double islands are functional and stylish, and a good alternative to one large island. They can help you create distinct zones for food preparation and dining, as well as facilitate traffic flow. Typically, in a double-island kitchen, the outer kitchen island is reserved for seating while the inner kitchen island is optimized for prep with a sink, cooktop, or both. If your friends and family spend a great deal of time in the kitchen, double islands may be for you. Having two distinct stations makes it easier to entertain a large group, create a meal together as a family, or gather for games.

In the image above, the Brittanicca island is used for food preparation, while the Roxwell island is designed for casual dining. Roxwell’s shimmer is accentuated with metallic hardware and lighting. A matching Brittanicca fireplace in the living room carries Cambria’s luxury design throughout the home.


2. Chic Meets Rustic

Creative Kitchen Design Ideas - Chic Meets Rustic

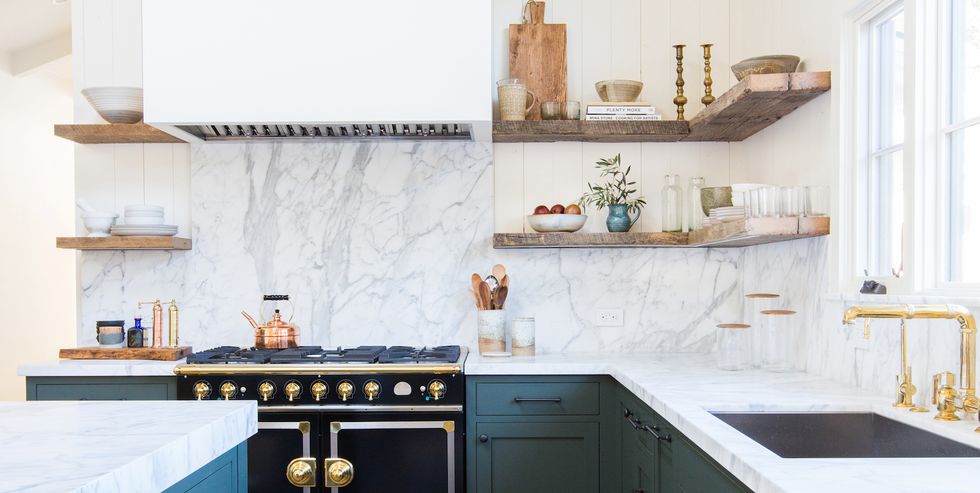
Highlight your kitchen’s focal point, like this stunning gold and black range, by opting for rustic open shelving.  (Image source: AmberInteriorDesign.com)

The black and gold range is a glamourous focal point, which is accented well by rustic, wood open shelves. Their neutral tones and minimalist design ensure that they play a supporting role to the more dramatic features in the kitchen. They also provide an interesting counter-balance to the colorful cabinets below.

When planning your kitchen redesign, think about which appliance, structural feature or other glamourous element of the kitchen you wish to highlight or make a focal point. That way, you can plan accordingly so another aspect of the kitchen design doesn’t steal away its thunder.

When trying to “de-emphasize” a kitchen design element, a good practice is to make use of neutral tones, simple patterns and less flashy textures.


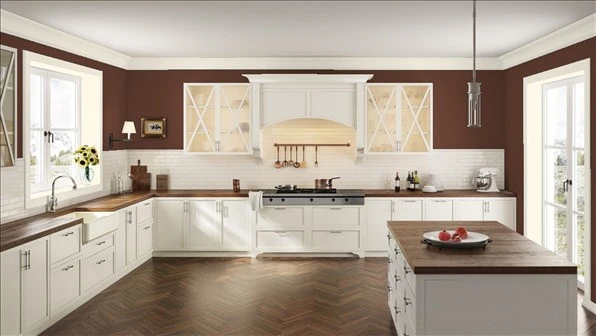
3. Create a Working Style Kitchen

Creative-Kitchen-Design-Ideas---Working-Kitchen-Style

(Image sources: BenjaminMoore.com and Omegacabinetry.com)

As prepping and cooking becomes more and more a part of the entertaining process itself, restaurant-style kitchens are enjoying a rise in popularity. These kitchens often feature vast countertop surfaces, several large, deep-basin sinks, and industrial-style lighting fixtures in metallic finishes.

Get creative and add whimsical elements like rustic chalkboards for making quick recipe notes, large wooden cutting boards on display, exposed kitchen knives attached to accent walls with magnet strips. Then bring the look together with open-shelving that displays potted herbs, jars of seasonings and infused oils to help create a utilitarian feel.

You can go even farther by establishing separate work zones for prep work, sautéing, baking and clean-up.


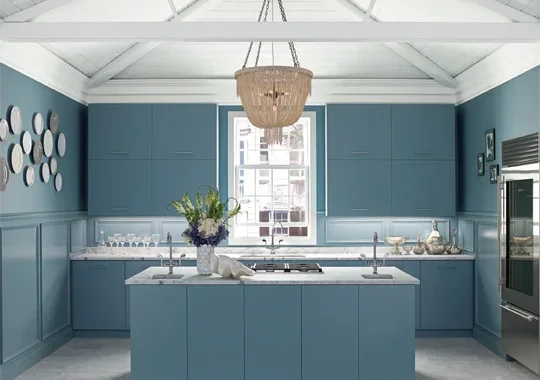
4. Use Color in Unexpected Places

Creative Kitchen Design Ideas - Color in Unexpected Places

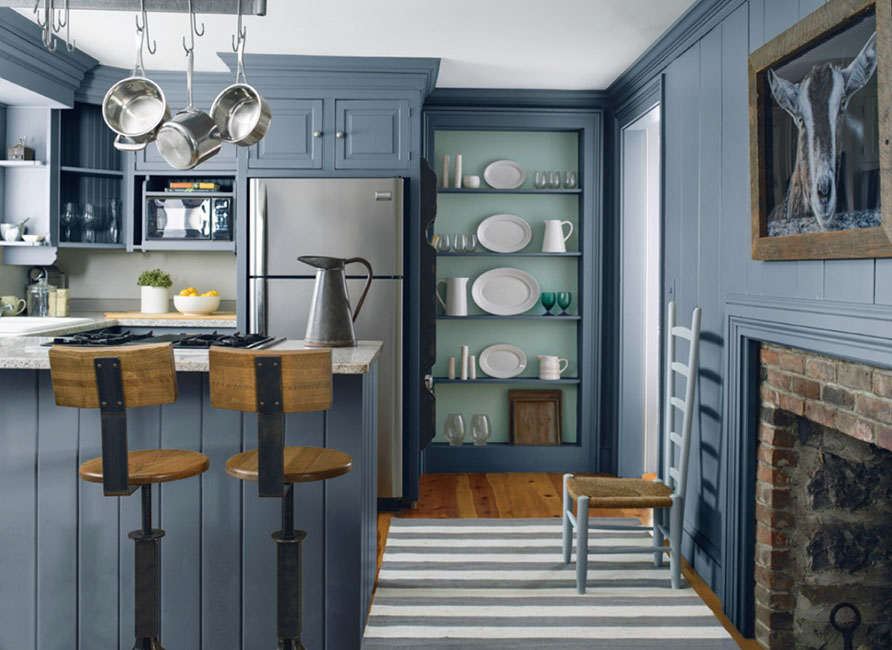
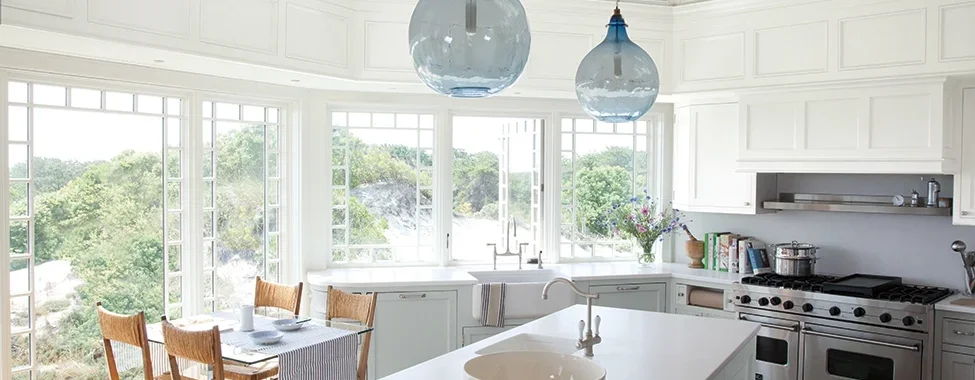
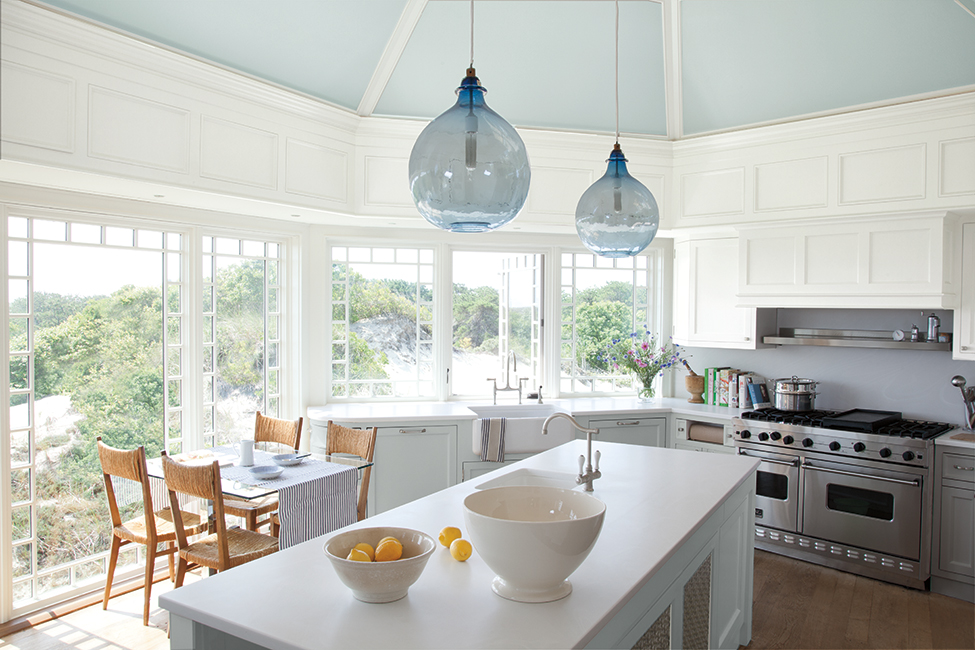
(Image source: BenjaminMoore.com)

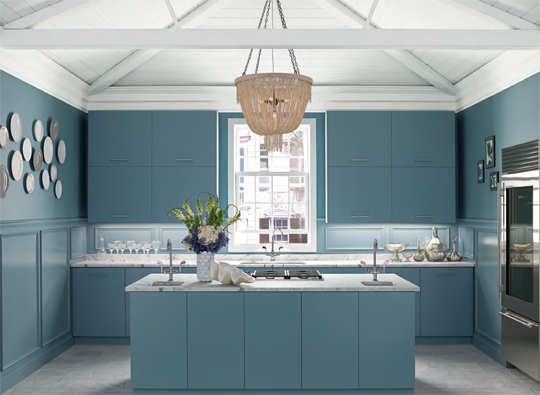
The best way to change up your kitchen with a relatively small investment? Consider a well-placed coat of paint! The creative use of paint goes a long way towards redefining a space. Paint the back of your cabinets a fun color, like teal, to help them stand out from the wall, and brighten up your kitchen.

For a long time, white has dominated kitchen design. But, according to Benjamin Moore, “it may have to share the trend spotlight as pale or muted gray, blue and green cabinet colors shake things up a bit.

“If you’re not ready for a complete cabinet overhaul, consider a fresh coat of paint on lower cabinets or highlight an island with a different color. This will add some visual interest and a layer of detail, especially when the primary cabinet color is white and you use a deeper color on an island, desk area or banquette.”

Sources: https://www.benjaminmoore.com/en-us/project-ideas-inspiration/interiors/kitchen-ideas-inspiration/kohler; https://www.benjaminmoore.com/en-us/project-ideas-inspiration/interiors/kitchen-ideas-inspiration; https://refineanddefine.cambriausa.com/5-cambria-combinations-we-love/; https://www.housebeautiful.com/room-decorating/kitchens/g2190/open-shelving-roundup; https://refineanddefine.cambriausa.com/top-5-kitchen-layouts/

Creating a Kitchen that You – and Your Wallet – will Love!

Creating a Kitchen that You – and Your Wallet – will Love!

 Creating a Kitchen that You – and Your Wallet – will Love!Kitchen Designers are “Creative Problem Solvers”

When you embark on a kitchen design collaboration with Keri at GNH Lumber, you quickly discover that she is like a seasoned guide leading you through the difficult terrain of design choices, options and considerations. You have a specific destination in mind, and your designer’s job is to get you there with as few mishaps as possible.

Keri likes to think of designers as ‘creative problem solvers,’ and her first task at hand, when working with a client, is to gather information about your “project, lifestyle, and overall design taste.” Always, her emphasis is on listening:

“You can achieve a lot through listening and asking the right questions, communication is a large part of my occupation. I then build the design around what I know of my client and their needs, as opposed to simply creating something that I like. This makes all the difference.”

Download our free kitchen planning guide.

Continue reading

subway tile backsplash

DIY: How to Install a Subway Tile Backsplash

subway tile backsplash
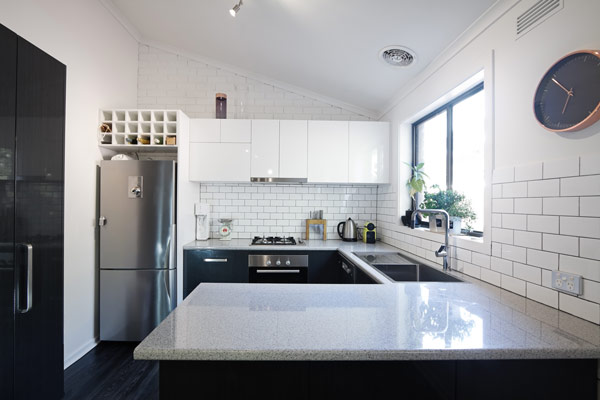
Subway tile backsplashes are a growing trend in kitchens and baths and can make for a gorgeous, clean finish.

By taking on some of the work yourself during your kitchen or bath remodel, you can save money and have fun in the process! Installing a subway tile backsplash is a simple project for any DIYer.

Download our free kitchen planning guide.

In this DIY, we’ll help you learn how to install a kitchen or bath subway tile backsplash in 7 simple steps:

Materials & Tools

  • Subway tiles
  • Tile spacers
  • Tile saw
  • Grout
  • Grout sealer
  • Wall tile mastic or adhesive
  • Notched trowel
  • Squeegee or tile float
  • Sponge
  • Level


7 Easy Steps to Installing a Subway Tile Backsplash

Step 1: Apply the Mastic

Cover the surrounding area to protect adjacent surfaces.

Begin by applying the thin-set adhesive or mastic to the wall using a notched trowel while tilted at about a 45-degree angle, moving in the same direction. Use a thinner notch with this adhesive so you don’t have build-up and unevenness behind the tile itself. Create consistent ridges of the adhesive on the wall. Only apply as much adhesive as you can cover in 10 or 15 minutes.

Smooth over or knock down the thin-set to get rid of the comb marks. Otherwise, you’ll see the comb marks through the tile. The trick is to do this without changing the depth of the thin-set on the wall. Use spacers to make sure the tiles are set in a uniform pattern.


Step 2: Set the Tile

Set the tile into the adhesive. Install any border tile first, then position the sheets of subway tile on the wall next to the border. Align your outer lower tile flush with the edge of the countertop and press into the mastic. Work horizontally, placing your second tile next to your first and adding 2 tile spacers in between them.

Clean out any mastic that was squeezed in between the tile (a toothpick or a knife will work). This will make it easier for you in the long-run.


Step 3: Cut Your Tile

Once you are done with the first row, you’ll start on the second row. Remember, you’re installing subway tile so you’ll want them to be staggered. You can cut your tiles in half using your tile saw.


Step 4: Tackling an Obstacle

When you’re working around an obstacle such as an outlet, measure the distance between the electrical outlet and the last laid tile. Subtract the length of your space (most likely 1/8 of an inch), and then mark a tile for cutting.

Cut the tile along your marked line. A tile wet saw makes this project much quicker and easier with better results than other tile cutting methods. You’ll want your tile to be hidden under the switch plates, so make your tile as close the electrical outlet as you can. Use a level to make sure you’re on track and tiling in a straight line.

Step 5: Let it Sit

Once the tiles are installed, let the mastic set up overnight.


Step 6: Add the Grout

Once the mastic has dried completely, remove the tile spacers. It’s now time to add the grout!

Tape off any edges you don’t want grout to go, including cabinets, outlets and walls.

Mix the grout according to the package. The consistency should be similar to peanut butter.

Using a tile float, apply the grout to the backsplash. Use the same 45-degree angle to work the grout into all the crevices. Work in 2-feet to 3-feet spaces.

When you spread the grout on with the float, you’ll want to apply pressure into the tile spaces themselves so you are squeezing the grout completely into the spaces to prevent cracking and flaking over time. Run the grout line in multiple directions.


Step 7: Sponge Off the Grout

Once you have applied the grout to the tile spaces, it’s time to sponge off the grout from the tile themselves. Wet the sponge with water and ring out most of the water.

Begin wiping down the grout with the sponge. It’s a messy job, so you’re going to have to ring out the sponge quite a few times.

Get the tiles mostly cleaned of grout and then let it sit. Once the gout has dried completely, you’ll be able to totally clean the tiles. Make sure you let it sit before completely wiping off the grout or else you will begin to pull the grout out of the tile spaces!

Use the terry cloth side of your sponge for your final wipe-down before allowing the grout to dry completely. You’ll want to wipe down your grout about 5 times before letting it dry completely.

Step 8: Admire Your Hard Work

Now that you’re done, step back and admire your hard work!

Allow at least four hours for the grout to cure.

Congratulations! You’re an expert at installing subway tiles! Now get to work and make your kitchen or bathroom look gorgeous.


kitchen cabinets uplighting

8 Ways to Bring Your Kitchen Cabinets to Life

kitchen cabinets uplighting

Is your kitchen bland and uninspired? Do you want to update the look of your kitchen quickly and without a major renovation?

Well, you’re in luck! There are a variety of simple ways to improve the look and feel of any kitchen space without breaking the bank with a full redesign. Choose from one or several of the methods below, to create a unique space that’s functional — and beautiful.

Download our free kitchen planning guide.

Here are a few suggestions to help you bring your kitchen cabinets to life!

Continue reading

KITCHEN PAINTING MADE EASY

Kitchen Painting Made Easy: 7 Easy Steps

1142189-pa1340-1142190-pa3314

If the idea of painting your kitchen sounds intimidating to you, then read on! Refreshing your kitchen with a beautiful coat of paint is much easier than you think – and fun, too! The truth is, you really can save the cost of hiring a professional painter while achieving the same great results. Here’s how:

Follow these 7 easy steps to get your kitchen looking fresh and new without breaking the bank!

  • Step 1: Cleaning.

    Clean the ceiling and wall surfaces that you plan to paint using water, a mild dish soap, and a cellulose sponge. Removing all dust, dirt and grease spots ensures a smooth finish!

  • Step 2: Prepping.

    Remove all electrical switch and outlet covers, wall sconces, picture hangers, and any other wall fixtures or attachments. Tip: Keep track of outlet screws by taping them to the covers as you go, something that I have learned the hard to do the hard way!

  • Step 3: Taping Off.

    Start with the ceiling. Use painter’s tape to mask around windows and woodwork such as baseboard, ceiling moldings and door frames. Once you apply the tape, run a plastic tool or putty knife along the tape to secure it firmly at its edges, and keep the paint from seeping underneath.

  • Step 4: Cutting In.

    Once you have masked everything you don’t want to paint, it’s time to “cut in.”  This means using a brush to cover the areas you can’t reach with a roller. Starting at the corner of the room, use a 2-inch or 2.5-inch trim brush to “cut in.”  Apply a three-inch wide strip of paint around the perimeter of the room where the wall and ceiling meet.

  • Step 5: Painting the Ceiling.

    Using a roller, you will now begin to paint your ceiling. Remember to remove any excess paint on the roller by slowly rolling it back and forth over the ridges of your paint tray. Begin painting in a corner of the room, blending the paint into the line you created in step 4. Paint across the width of the ceiling rather than the length of the ceiling.  Tip: Avoid straining your back and neck by rolling with a motion across your body (left to right).

  • Step 6: Painting the Walls.

    Once your ceiling is dry, you can begin to paint the walls.  Return to the same corner where you started to paint the ceiling.  Use a trim brush to carefully cut in along the wall-ceiling line. Extend that line two to three inches out from any windows, doors, or moldings. Once you’ve cut in around an entire wall area, use a roller to fill in the field. Tip: For efficiency, start in the corner of a wall and roll on a three-by-three-foot W pattern, then fill it in without lifting the roller. Continue in 3-foot sections until you’re finished, and only paint one wall at a time.

  • Step 7: Painting the Trim.

    Once the walls are completely dry, apply painter’s blue tape where the trim meets the wall. Paint the moldings, baseboard and the door and window frames with a two-inch angled brush. Paint the tops of the doors and windows first and work your way down so that you can remove any runs as you go. Baseboards should be painted last.

It’s that simple!  Remember to take your time throughout this process and enjoy your new kitchen color!

painted kitchen

Transform Your Kitchen or Bath with Color

painted kitchen

If you’re considering an updated kitchen or bath for your home, but are working within a limited budget, consider how colors can transform your kitchen or bath without requiring any major renovations.

Bright, vivid walls of color can add impact, set a mood, create a focal point, enlarge a space, or make it feel more cozy. You can also use neutral or restrained colors to create a tranquil environment, or accentuate artwork and fixtures. Paints can also harmonize with your cabinetry (see blue kitchen image at right), or contrast against an architectural feature.

Get your painting project started!

This month, GNH Lumber is highlighting Benjamin Moore Natura paints, a healthier interior paint with zero VOC, zero emissions, and zero harsh fumes, making it a safer paint for your family and the environment, all without compromise to performance or color selection.

If you’re thinking about applying a fresh coat of paint to your kitchen or bath, consider these color schemes:

Southern Charm:

IA_int_bath_kohlersoutherncharm_540x395
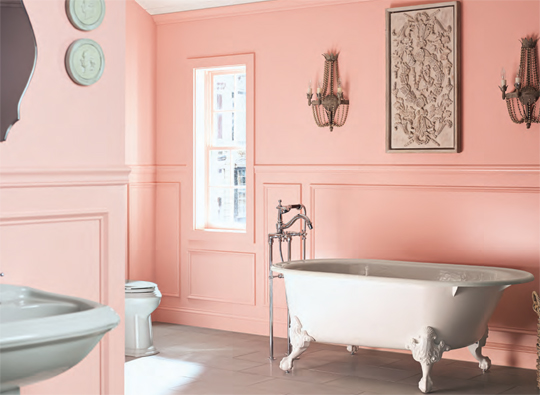
Inspired by the rich, distinctive architecture of historic southern towns, this elegant design palette pulls together soft pinks, saturated blues, and cloudy grays—along with sparkling details for a sophisticated look that can be customized for any home.

In this bathroom, the walls and panels are painted in Fruit Shake 2088-60 using Aura® Bath & Spa.


Eastern Mist:

eastern mist bath
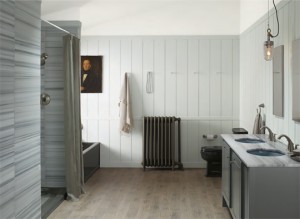
Inspired by the swelling blend of misty blues that line the sea and sky along the eastern seaboard, this beautiful palette features pale greens and blues. Light earthy tones add to the fresh, tranquil feel. In this bathroom, the walls are painted in Wickham Gray HC-171 using Aura Bath & Spa. The ceiling is painted in Frostine AF-5 using Waterborne Ceiling Paint.


Northern Roots:

IA_int_ktch_kohlernorthernroots_540x395
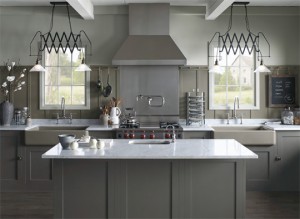
Inspired by the wondrous beauty of a well-worn, wind-beaten farmhouse, this palette features rich grays and taupes along with deep, complex neutrals. In this kitchen, the walls are painted in Stonington Gray HC-170 using Aura Interior in a matte finish. The cabinets are painted in Iron Mountain 2134-30 using ADVANCE® in a satin finish.