How to Keep Your Summer Lawn Healthy and Green

How to Keep Your Summer Lawn Healthy and Green

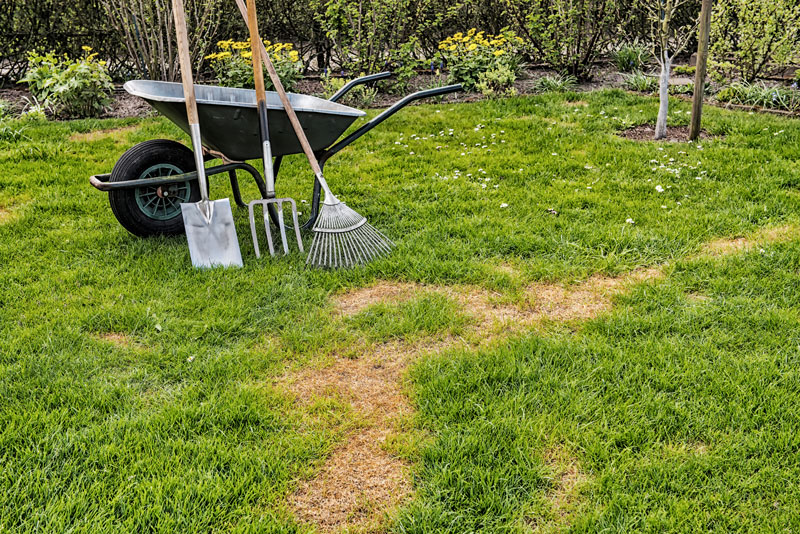
Are weeds, insects and pets taking a toll on your lawn?

Are there patches, holes or bare spots breaking up your rich green landscape?

How can you keep your summer lawn healthy and green despite all of these obstacles?

Relax! There are a few easy steps you can take to restore your lawn, no matter the size of the project. And there are suitable Scotts Lawn Care products available at GNH Lumber to help you get started!

So, whether you need to repair a few bare patches or complete a total lawn makeover, here’s what you need to know:

Patching 101

Even with regular feedings and proper maintenance, your lawn may occasionally need to be repaired. Bare spots in your lawn are common but easy to fix. Repairing bare spots not only makes your lawn lush and more enjoyable, it also helps prevent bigger problems, like weed invasions, from happening later.

To repair bare spots in your lawn, choose a patching product like Scotts® EZ Seed® Patch & Repair, which is specially designed for patching bare spots in the lawn. Rake the ground to remove any debris (like dead grass and weeds) and loosen the soil to help the tiny seedlings take root once they sprout.

Apply the product so that the bare spot is mostly covered but the ground beneath is still visible. Thoroughly water the newly seeded area until no more water is absorbed. Continue to water daily (or as needed) for at least 2 weeks or until the seedlings are 2 inches tall.

Lawn Before Lawn Repair

Complete Lawn Overhaul

According to the lawn experts at Scotts.com, “Sometimes a lawn will simply reach the point of no return. If your lawn is showing signs of significant damage, a lawn renovation project might be the best way for you to get a green, thick lawn to enjoy.”

Clear the area by killing any remaining poor-looking grass and all weeds with a non-selective herbicide about 2 weeks before you want to seed your lawn. After everything is dead, rake the area to remove the debris.

If your soil is really compact, now is a great time to core aerate the area. After aerating, use a rake to level out any uneven areas and loosen the top ¼ inch of soil. Then add a 1-inch layer of lawn soil evenly across the entire area.

Select your grass seed. Choose a Scotts® Turf Builder® Grass Seed that’s right for your location. Be sure to take into consideration the growing conditions in your area: How much sun? How much rain? How much wear and tear from children and family pets?

Once your soil is prepped, it’s time to seed. Just fill up your spreader with grass seed and apply. After spreading the grass seed, you should water daily. Proper watering is a critical step to seeding success. Keep the soil surface moist by watering daily or as needed until the seedlings reach at least 2 inches tall.

Next, feed your young lawn with a product like Scotts® Turf Builder® Starter® Lawn Food for New Grass to give developing seedlings needed nutrients so they can develop a deep root system faster.


And there you have it! You are now on your way to a beautiful green lawn!

Source: https://www.scotts.com/en-us/library/grass-grass-seed/seeding-solutions-all-your-lawn-care-needs

Raised Garden Bed

DIY: How to Create a Raised Garden Bed

Raised Garden Bed

Spring is here! That means it’s time to start your gardening projects in time to have delicious, fresh veggies and herbs, or a bountiful flower garden all summer long!

Not enough space in your backyard for a big vegetable or flower garden? Raised garden beds are the perfect solution for gardeners with limited space!

In this blog, we’ll run through a step-by-step guide on how to create a raised garden bed for vegetables or flowers.

1. Choose Your Materials

Select your bed frame materials. This can be as simple as regular 2×4’s or even patio retaining wall blocks. The size is up to you!

The height of the bed should be at least 6 inches high, which gives the plants’ roots plenty of room to grow.


2. Mark the Perimeter

Once you’re done putting together your raised garden bed, it’s time to select a sunny spot ideal for growing and relocate the frame. Remember, if you’re growing vegetables, you need to find an extra sunny spot with plenty of late day sunlight.

Using an edger or spade, mark the ground around the perimeter of the frame.


3. Prepare the Soil

Now that you’ve created the frame and marked the perimeter, set it aside so you can start preparing the soil. Use a sod cutter or grub hoe to skim away the grass layer, if one exists.


4. Anchor the Raised Garden Bed

Once you’ve leveled it out, dig a 5- to 6-inch deep hole for each of the corner posts. Then sink each post into the ground, using a 4-foot level to level it out.


5. Add a Layer of Hardware Cloth to Keep Out Pests

Gophers and moles can sometimes be an issue with garden beds. To keep them out of your garden, add a layer of hardware cloth before you pour in your planting soil. Rake any existing soil at the bottom of the bed to level it out. Then smooth it out. Line the bed bottom with hardware cloth, making sure the cloth is flat against the bottom of the bed and touching each side. Secure the cloth by stapling it to the sides of the bed.


6. Add Your Soil

Fill the bed with a 50/50 mixture of planting soil and compost. Once the bed is full, rake the soil smooth and moisten it with a slight spray from the hose.


7. Plant!

Now it’s time to plant your vegetable, flowers and herbs! Plant anything you like that works in your area.


7. Water Regularly

Don’t forget to water your plants often! After all, you’ve spent a long time putting together your garden bed, so you want to make sure you are taking good care of your vegetables and flowers.


Now get started on your spring garden bed project, and start enjoying fresh produce and gorgeous flowers!

Lawn Before Lawn Repair

DIY: Lawn Repair 101 – How to Fix Bare Spots

Lawn Before Lawn RepairAhhh! A lush lawn of perfect green! It’s what we all dream about when it’s summertime. The soft, rolling green backdrop to our cookouts, ballgames, BBQs and entertaining. That said, if you have a lawn with bald or bare spots, it can be frustrating to diagnose and fix.

Do I Need Lawn Repair?

It’s not uncommon to encounter bare spots at some point or another throughout the summer season. Take heart! There are easy ways to diagnose and repair these unsightly patches of yellow, brown and beige, and restore your lawn to its true GREEN GLORY.

A few common causes for those bare spots and patches in your lawn:

  1. Not enough water
  2. Over-fertilizing or spilled chemicals
  3. Lawnmower damage
  4. Grubs or other insects
  5. Pet damage or foot traffic

Depending on the type of damage, there are different solutions to your lawn’s bare spots. However, most involve adding new grass seed, lawn food and water (see steps below). Considering the unusually rainy spring and summer we’ve had so far in upstate New York, it’s doubtful that your lawn has bare spots due to dryness. But if there is a dry spot, it’s an easy fix – just be sure to water frequently, in addition to reseeding to improve thickness.

If the bare spots are due to overfertilizing or lawnmower damage, you will see them appearing uniformly across the lawn. For damage caused by overfertilizing, reseed the bare spots and do not add additional fertilizer until the lawn heals itself. For lawnmower damage, be sure your lawnmower blades are sharpened regularly, and keep the blades raised high enough from the ground when you mow.

Grubs or other insects can wreak havoc on your lawn, as well. Grubs, curling white worms, are a common problem in mid to late summer, and most easily identified when your sod easily pulls back from the ground like a carpet. More than ten grubs per square foot can cause lawn damage. Grub control products are available at your local GNH.

Pet or backyard animal urine can create bare spots of yellowed-grass with a brighter ring of green around them. These can be repaired following the steps below, but to prevent future damage you will want to train your pets to do their business elsewhere. Likewise, foot traffic must be redirected to allow these spots in your lawn to heal.

How to repair bare spots in your lawn the quick and easy way:


Supplies & Tools:

  • Grass Seed (we recommend Scotts® Turf Builder® seed varieties)
  • Topsoil or compost
  • Fertilizer (we recommend Scotts® Step-3 Lawn Fertilizer)
  • Small gardening trowel and rake

1. Break Up the Bare Spot and Reseed.

Use a small gardening shovel or rake to break up the dry spot on your lawn. Remove any rocks, leaves or debris. Choose the appropriate grass seed for the spot’s shade density (such as Scott’s Turf Builder seed varieties, available at GNH) and cast the seeds over the turf. Spread about a half an inch of compost or topsoil on the strewn seeds.

Tip: To get good seed-to-soil contact, gently rake the seeds and soil into the grass.


2. Water Generously at First, Less Later

Water the area immediately, and then continue to water lightly three times a day for 7-10 days. When you can see the new grass sprouting, reduce watering to once daily.

Tip: After the new grass emerges, less is more. A good, thorough soaking rather than a quick watering ensures that the water gets down to the root system. This helps roots grow strong and deep for a thick, more drought-resistant lawn.


3. Feed Your Entire Lawn to Nourish It

To encourage the new growth, and keep your whole lawn looking its best, add a gentle lawn fertilizer to the spot, like Scotts Step-3 Lawn Fertilizer, available at GNH!  Tender seedlings, as well as existing grass, need nutrients to help grow thick and strong.


4. Kick Back & Enjoy the Results!

Repairing bare spots in your lawn is a quick and easy project that reaps many rewards. It’s the perfect weekend task that you can finish in no time, so you can get back out in the hammock and enjoy the results! Don’t forget to improve the lushness and color of your whole lawn (and reduce the chance of future damage) with regular feeding and proper maintenance.

Lawn After Lawn Repair

For more on bare spot lawn repair, check out this helpful video from Scott’s Lawn: https://youtu.be/rI4WhxUq4zM

https://www.todayshomeowner.com/how-to-identify-the-cause-of-brown-spots-in-your-lawn/, http://www.planitdiy.com/how-to/lawn-garden/lawn-repair-fix-a-bare-spot/, https://www.scotts.com/en-us/library/grass-grass-seed/how-repair-seed-bare-spots-lawn, http://www.hgtv.com/design/outdoor-design/landscaping-and-hardscaping/how-to-repair-bald-spots-in-your-lawn  

garden oasis stone path

How to Create a Garden Oasis

garden oasis stone path
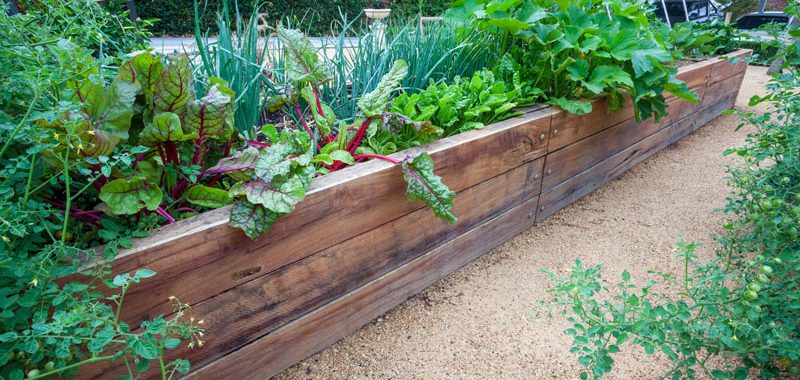
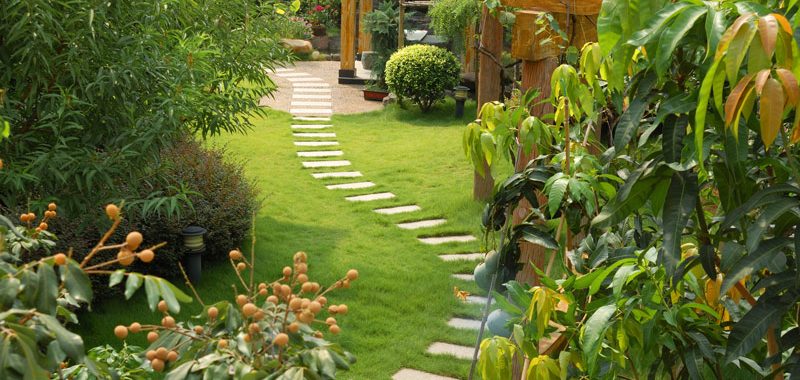
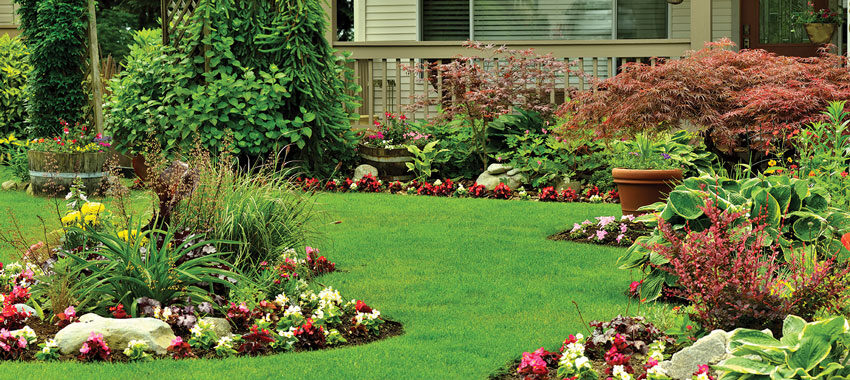
An inviting yard provides a calm atmosphere, a tranquil retreat and a relaxing place to entertain.

With springtime in full bloom, it’s time to start creating a detailed game-plan for your spectacular garden oasis! Remember, with a little bit of work and planning now, you can create a garden sanctuary to enjoy all season long – and one that your neighbors will envy, too.

Here are 7 ideas for creating a garden oasis that you can use to escape, relax and even entertain:

1. Add a Bird Bath

Adding a bird bath will attract birds to your garden, which are not only fun to watch but will help control pests. Place the bird bath in a relatively open area in your yard, so that birds can scan for predators. To keep your bird bath in tip-top shape, clean it approximately twice a week.

You can also put out nectar to attract hummingbirds and other pollinators. Hummingbird feeders also need to be cleaned out regularly to ensure mold doesn’t build up, which can be harmful to the birds.

garden oasis water feature

2. Create a Water Feature

There’s nothing more relaxing than the calming sound of a natural stream or waterfall in your garden. Turn a decorative pot into a waterfall feature, or create a built-in waterfall or stream element with large, stepped stones. A closed circuit of water can also act as circulation for a pond, serving dual purposes.

If you really want to go all-out, you can create a koi pond. While these are more costly to install and maintain, koi fish are mesmerizing to watch and they eat mosquito larvae.

Whatever you choose, a water feature is a dramatic touch that provides soft tranquility.


3. Hang Wind Chimes

Wind chimes are a quick and easy way to create a relaxing vibe in your garden. There are lots of designs and sounds to choose from, whether you prefer a softer, wooden sound, or something light and metallic.


4. Incorporate Natural Stone

Natural stone accents, like stepping stone paths, are great features to add to your garden oasis. Natural stone is an easy accent feature to incorporate into your backyard and can be inexpensive, depending on the stones you purchase.


5. Install Solar Lights

Solar lights increase the function and versatility of your garden. Add them along your stone path or hang them in your pergola to create a space you can keep using after dusk.

5. Add a Bench

Place a bench in view of your water feature or bird bath to create a tranquil spot where you can enjoy your oasis.

garden oasis large leaf plants

6. Get a Pergola

Pergolas are a great way to get more use out of your yard. Perfect for entertaining guests, you can set up patio furniture beneath them, plant vines that grow on them and hang solar lights to keep the party going after dark. During the day, they provide a nice shady place to keep cool and enjoy your garden.

7. Surround Yourself with Plants

Let plant life create the outdoor retreat of your dreams! By selecting tall, large-leafed plants, you can simulate a tropical rainforest experience.

Adding vines to fencing, trellises, benches and other structures in your yard will create a soothing retreat with added privacy. Creeping vines that flower such as clematis, honeysuckle, trumpet vine, and morning glories will provide a pop of color against all the green vegetation as a lush backdrop.

Adding a few of these simple features to your backyard will go a long way towards creating your tranquil retreat. A garden oasis is fun to create, and will provide a great place to decompress after a long day or even entertain your friends and family. Now get a head start on designing your garden oasis!

yard cleanup

5 Things to Include on Your Yard Cleanup List

yard cleanup
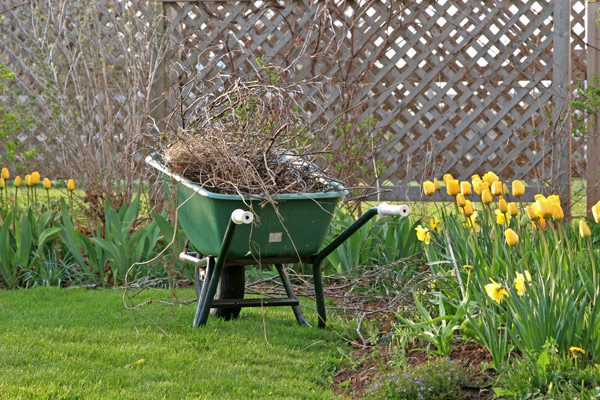
Can’t wait to get back out into the garden? Well, here’s the good news! It’s time to get a head start on your spring cleaning checklist, and that includes taking care of your yard and garden beds.

To look and feel its best after the harshest winter months, your yard and gardens require spring cleaning the same as the inside of your home. Taking a weekend to clean up as the weather begins to warm will save you time later, and it helps prevent some problems further down the road in summer.

First, look over your yard before creating a specific checklist of what needs to get done to be ready for the season.

To help you get started, don’t forget these 5 things when cleaning up your yard this spring:

1. Clean Up Around Plants

To help your plants and shrubs get ready for new growth, clean up any debris left over from the winter months. Make sure you rake out fallen leaves and dead foliage, since this can smother your plants and help foster disease. Don’t forget to cut down any mums or other fall-season plants that you haven’t had a chance to cut down due to the snow and ice.

Toss your yard waste into a wheelbarrow for easy disposal and cleanup (ideally, this is done after the threat of frost has passed). Next, you’ll want to remove existing mulch to set the stage for a new layer after spring planting. You’ll also want to push heaved plants back into flower beds and borders. To encourage new growth, you can also spread a pelletized fertilizer tailored towards your existing plantings onto the soil’s surface. Spring rains will then carry these nutrients to the root systems.

2. Prep Your Lawn

The first step to a gorgeous lawn all spring and summer long is a good feeding now. Fertilizing your lawn with Scotts STEP-1 Crabgrass Preventer Plus Lawn Food can improve a lawn’s ability to absorb water & nutrients. Apply to your lawn for a fast green-up after winter. It also controls crabgrass for up to 4 months!

Apply in early spring, anytime between February and April when temperatures are still cool (under 80° F). Step-1 prevents crabgrass before it can germinate. It also feeds to green up a winter-weary lawn, too. Learn more about the Scotts Program.

In mild climates that experience little to no snowfall, winter lawn damage is usually minimal. However, that’s not the case for us here in the Catskill Region. As a rule, it’s best to avoid walking on soggy areas of the lawn until they are dry so the grass doesn’t become damaged. But there is usually some damage from snow removal, ice prevention, shoveling and the mud of thawing.

Remove any turf damaged by salt, plows, or disease to prepare for the seeding that should follow in a few weeks. Resume mowing once the grass grows to 4 to 5 inches tall and only trim it back to 3 to 4 inches. But don’t start mowing too early! Mowing too early in spring, or trimming your lawn too low, results in weak grass that is more prone to summer damage during dry periods.

3. Clean Walkways and Patios

yard cleanup 2

The early spring is a perfect time to neaten up your hardscape surfaces, too. This includes both walkways and patios.

Make sure to rake escaped gravel back into your walkways and patios, and purchase more gravel to spread if needed. Refill joints between flagstones by sweeping in new sand or stone dust; water with a hose to set it, then repeat. Use a pressure washer with a low-pressure tip to remove any algae spots or leaf stains.

4. Replace and Paint Worn Wood

Remove badly rotted or damaged pickets or boards in your fencing, then scrub the wood clean by mixing water, bleach, and liquid soap. Once you’ve fully cleaned it, allow it time to dry before continuing. You can patch rotted sections with wood epoxy, and subsequently install new wood as needed.

Check to make sure that you don’t have any wobbly fence posts that need to be replaced. You should also scrape off old paint, sand the wood, and apply a new finish coat. Once temperatures go above 50° F, brush on a new coat of paint or stain.

5. Prune Dead and Damaged Branches

Many non-flowering shrubs, trees and woody plants respond well to spring pruning, which cleans up their appearance. Prune back to live stems if damaged, and shape hedges with hand pruners rather than electric shears. Electric shears have the tendency to cause a thick outer layer of growth, which prevents sunlight and air from reaching the shrub’s center.

How to Grow Grass in Shaded Areas

How to Grow Grass in Shaded Areas

How to Grow Grass in Shaded AreasHave you tried to grow grass in shaded areas of your lawn without success? Many lawns have shady spots where grass seed just doesn’t want to sprout and grow. Maybe pet or insect damage has complicated the process, making new grass growth that much harder. So, how do you successfully grow and maintain healthy grass even in the darkest spots of your lawn?

Here are 3 easy tips from Scotts to help turn shady spots into havens of thick turf!

1) Evaluate the Amount of Sunlight – According to Scott’s, “The rule of thumb for even shade-tolerant grasses is that they need at least three to four hours of direct sun, or four to six hours of dappled sunlight, per day.” If the spot on your lawn gets less sunlight than this, try pruning back nearby trees or shrubs to allow for more light.

2) Find a Grass Seed Specifically for Shade – There are certain grass types that are designed to thrive in shade. For those of us living in the Northeast, a hearty fescue blend, like Scotts® Turf Builder® Dense Shade Mix will work well.

3) Plant, Water and Watch – First, prep the area with a rake to loosen the soil then spread your grass seed at the proper rate and cover with quality soil to help your grass seedlings get off to a great start. After that, you water, watch and wait. Keep your new shaded grass moist by watering once or twice daily, until you see it grow tall enough to mow. Then cut back to a normal watering schedule.

*Remember: when you plant grass seed around trees, the trees are hungry and thirsty, and will compete with grass for available water and nutrients. Be sure to regularly feed the grass around trees and water generously.

Sources: https://www.scotts.com/en-us/library/grass-grass-seed/how-grow-grass-shaded-areas

3 Summer Lawn Care Tips from Scotts

3 Summer Lawn Care Tips from Scotts

3 Summer Lawn Care Tips from Scotts
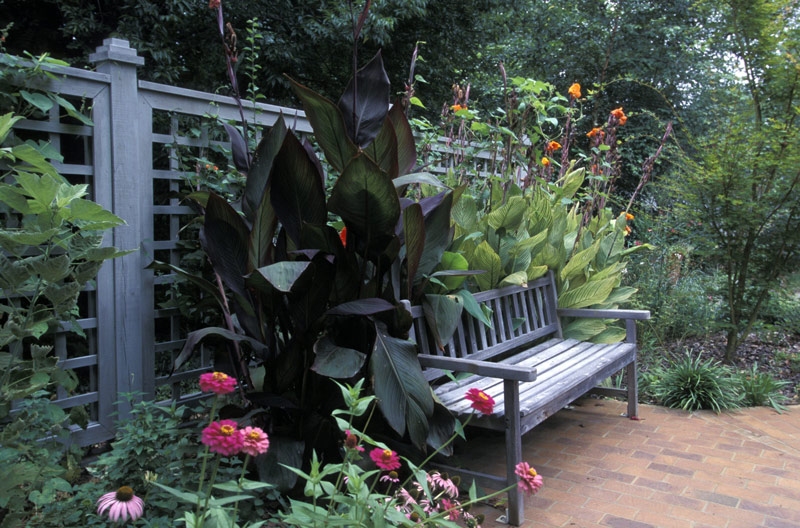
One of the best parts about summer, is spending time on the lawn barefoot! There’s nothing quite like the feel of healthy green grass between your toes, especially when it’s cool and lush. So, how do you protect that gorgeous green carpet from the ravages of heat, drought, mowing and malnourishment? The key is in proper lawn and garden care, and that’s more than just using the right tools! Here are 3 quick summer lawn care tips from Scotts to help you keep your lawn looking and feeling its best!

Summer Lawn Care Tip #1: Mow High

According to Scott’s, “Gorgeous summer lawns start with long, deep, healthy roots that snake through soil to find moisture.” Encourage deep roots by mowing as high as you can for your grass type. Also, sharpen mower blades at least once a season to ensure a clean cut on individual blades of grass, which helps reduce moisture loss. Not only will this keep your lawn looking uniform in terms of length, it’ll ensure that your grass can grow back properly and stay healthy.

Summer Lawn Care Tip #2: Water

To keep grass green, healthy, and growing, provide at least 1 inch of water per week, either through irrigation or rainfall. Time irrigation for early morning (between 6 and 10 a.m.) to minimize water loss to evaporation. Be sure to avoid overwatering when irrigating, as this is an easy way to damage your grass and decrease its aesthetic value. To avoid damage from heavy rains, we recommend adding a rain garden to your lawn! A rain garden is a specially designed garden that features plants that need and can handle absorbing more water. You can also use special soil mixes that feature a high concentration of sand to better absorb excess water. This allows more of the heavy rainfall to be absorbed into your rain garden and keeps your lawn looking and feeling better!

Summer Lawn Care Tip #3: Feed

All grass types benefit from summer feeding. Grasses grow most actively during summer heat, so feeding helps fuel and sustain the intense growth. We recommend Scotts STEP 3 Lawn Food With 2% Iron for a great green-up. It also strengthens the lawn against heat and drought. Simply apply with a spreader to a wet or dry lawn! If temperatures are consistently exceeding 90 degrees F, water immediately to reduce stress on your lawn. The final result should be a lovely, lush lawn that not only looks gorgeous, but feels delightful to walk on!

If you’re looking to work that green thumb this season but aren’t sure where to start – we can help! Our knowledgeable team will answer your questions and help you find the right supplies to beautify your entire lawn and garden.

Sources: Scotts Step 3 Lawn Food 2% Iron; Scotts Seasonal Guide for Lush Lawn

Spring is here! That means it’s time to start your gardening projects in time to have delicious, fresh veggies and herbs, or a bountiful flower garden all summer long! Not enough space in your backyard for a big vegetable or flower garden? Raised garden beds are the perfect solution for gardeners with limited space! In this blog, we’ll run through a step-by-step guide on how to create a raised garden bed for vegetables or flowers. 1. Choose Your Materials Select your bed frame materials. This can be as simple as regular 2x4’s or even patio retaining wall blocks. The size is up to you! The height of the bed should be at least 6 inches high, which gives the plants’ roots plenty of room to grow. Check out some great YouTube videos on how to build wood raised garden beds.   2. Mark the Perimeter Once you’re done putting together your raised garden bed, it’s time to select a sunny spot ideal for growing and relocate the frame. Remember, if you’re growing vegetables, you need to find an extra sunny spot with plenty of late date sunlight. Using an edger or spade, mark the ground around the perimeter of the frame.   3. Prepare the Soil Now that you’ve created the frame and marked the perimeter, set it aside so you can start preparing the soil. Use a sod cutter or grub hoe to skim away the grass layer, if one exists.   4. Anchor the Raised Garden Bed Once you’ve leveled it out, dig a 5- to 6-inch deep hole for each of the corner posts. Then sink each post into the ground, using a 4-foot level to level it out.   5. Add a Layer of Hardware Cloth to Keep Out Pests Gophers and moles can sometimes be an issue with garden beds. To keep them out of your garden, add a layer of hardware cloth before you pour in your planting soil. Rake an existing soil at the bottom of the bed to level it out. Then smooth it out. Line the bed bottom with hardware cloth, making sure the cloth is flat against the bottom of the bed and touching each side. Secure the cloth by stapling it to the sides of the bed.   6. Add Your Soil Fill the bed with a 50/50 mixture of planting soil and compost. Once the bed is full, rake the soil smooth and moisten it with a slight spray from the hose.   7. Plant! Now it’s time to plant your vegetable, flowers and herbs! Plant anything you like that works in your area.   7. Water Regularly Don’t forget to water your plants often! After all, you’ve spent a long time putting together your garden bed, so you want to make sure you are taking good care of your vegetables and flowers.   Now get started on your spring garden bed project and start enjoying fresh fruits and vegetables and gorgeous flowers and plants!     Click Here to find everything you need to create your beautiful garden with help from GNH Lumber. And contact us if you have any questions about your garden or landscaping project!

DIY: Painting or Staining Outdoor Wood Furniture

DIY Painting Outdoor Furniture

With smart planning, painting and staining your outdoor furniture can take place in less than a weekend.

There are many different types of outdoor furniture types—wicker, wrought iron, aluminum and plastic—but wood is by far the most popular. Whether you go with an opacity that allows your wood furniture’s natural grain to show through or opt for an opaque solid in your choice of 3,500+ colors, a fresh stain on outdoor furniture will yield a great new look.

Staining and painting outdoor furniture is a lot easier with expert advice from Benjamin Moore to guide you. Follow these steps to achieve the best results. And, when in doubt, don’t forget to ask the paint and stain experts at GNH Lumber for guidance and tips!

Get your painting project started!

Step #1: Prepare the Surface

The first step in staining or painting outdoor furniture is to make certain that the wood is absolutely dry and free of mold and mildew. Be sure to check the undersides, too.

If the old surface has stains from mold or mildew, you can properly prepare the surface by using a premium cleaner like Benjamin Moore® Clean (318). For mild cases, you can mix up your own solution using one part of household bleach to three parts water (it’s best to do this outdoors or in a well-ventilated area.) Be sure to rinse the furniture and allow it to completely dry before applying the stain.

If the weather is cold, move the furniture indoors to dry; in milder weather, it’s enough to place the furniture in a garage, carport, or other shelter from the rain. Don’t cover the furniture with plastic or a tarp, as that will not allow enough air circulation for thorough drying.


Step #2: Sand

The next step is to sand the surfaces to be stained. If the old finish is in fairly good condition, it’s enough to just roughen the surface. Start with coarse-grade sandpaper, working with the grain. An orbital hand sander is the perfect tool for this job, if you have one. If the old finish is in bad condition, you may choose to remove all the old finish down to the bare wood. This can be accomplished with a quality wood stain remover such as Benjamin Moore® REMOVE (315).


Step #3: Prime

If the old painted or stained surface is still intact after sanding, you can skip priming. However, if you’re going to apply a lighter color over a dark one, if the wood is exposed, if there are knotty sections, or if any stains remain, you should use a high-quality primer formulated for outdoor use, such as Benjamin Moore’s Fresh Start® High-Hiding All Purpose Primer (046) or Arborcoat Oil Primer (366).

For all priming, brush on the primer working with the grain using a high-quality Benjamin Moore Nylon/Polyester brush.


Step #4: Stain

If you are staining outdoor wood furniture, consider a product that’s strong enough to protect decks: ARBORCOAT® Exterior Stain. Formulated to protect against the harshest weather conditions as well as UV rays, ARBORCOAT offers a range of colors and opacities, including:

If you’ve primed the surface, one coat of stain will be enough. If you skipped the primer, you may want to apply a second coat. Let the furniture dry in a clean, dust-free, well-ventilated area. Don’t leave it outside to dry, as wind and air may deposit dust and particles onto the wet surface.

Once the furniture is dry, you’re good to go. Situate your furniture where it won’t be under a drip line from a roof or tree limb. An occasional light wash with dish detergent and warm water will help you enjoy your outdoor furniture for years to come!


Source: https://www.benjaminmoore.com/en-us/interior-exterior-paints-stains/how-to-advice/exteriors/painting-outdoor-wood-furniture

Get Barefootable Grass

Get “Barefootable” Grass! Fertilize Your Lawn Regularly

Get-Barefootable-Grass-Scotts
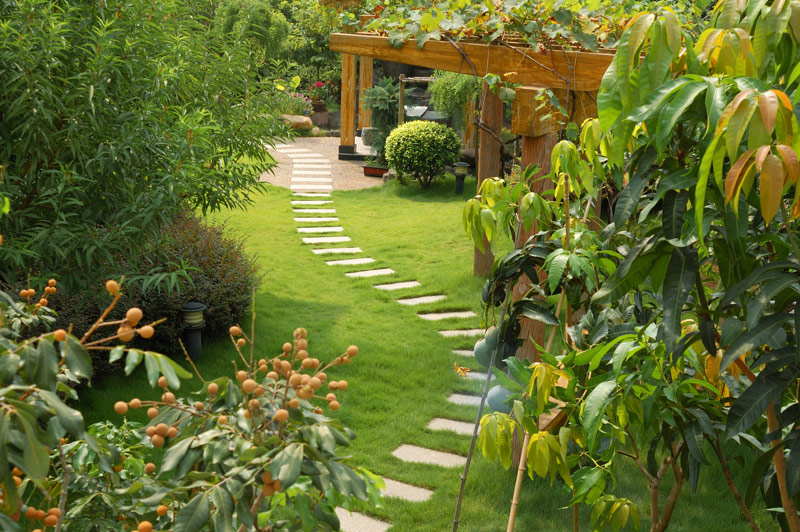
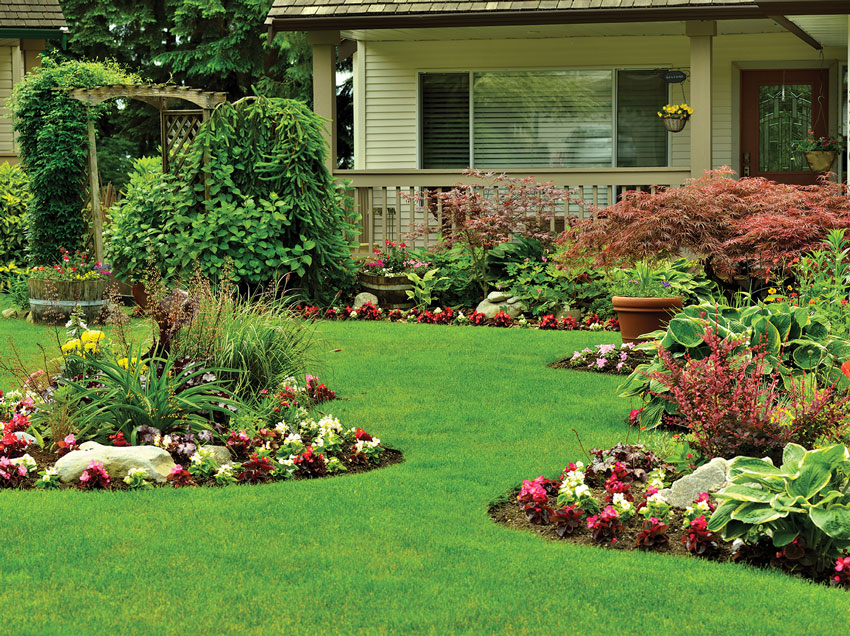
The secret is out: feeding your lawn is the fastest, surest way to a lush, barefoot-worthy lawn. Summer equals outdoor time, so it’s important to keep your lawn green and gorgeous for maximum enjoyment all season long.

Feeding with Scotts Step-3 with 2% Iron is an important part of your summer lawn care regimen! It creates green-up, adds strength, and protects from drought. 

There are many reasons to maintain a healthy lawn, and a few may surprise you! A lush lawn…

Keeps You Cooler: Plants, including grass, help keep outdoor living spaces cool. In cities, where there are fewer lawns and trees, the temperature can be between 2 and 22 degrees warmer than surrounding areas that have lawns and wooded areas. A healthy lawn can buffer the heating effects of the sun, helping to keep your home cooler—and your electric bill lower.

Helps Fight Allergies: Some people are allergic to the pollen produced by common lawn weeds. Thick, healthy grass leaves little room for weeds. Water the right amount at the right time, feed your grass on a regular schedule, and mow at the correct height, and your weed problems may just become a thing of the past.

Improves Air Quality: When your yard is covered by lush grass rather than patchy weeds and bald spots, the air quality will be improved. Simply put, lawns trap dust, pollen, and other floating particles so you can breathe easier.

Get-Barefootable-Grass-Family-on-GrassDecreases Stress: Multiple studies have shown that spending time in, or even just looking at, nature (think grass, trees, water) naturally decreases stress hormones. In an ever-connected, screen-focused world, just looking at a lovely lawn can cause you to breathe easier, sleep better, and feel calmer.

Provides a Quieter Living Space: A lawn acts like soundproofing for your living space, helping to absorb noise from neighbors, cars, and maintenance vehicles. The result is a quieter, more serene environment.

Gives You Somewhere to Have Fun: It’s so important to take a bit of time away from work and other obligations to kick back and relax, and a beautiful lawn is just the place to do that. Lounge in the hammock, set up a croquet game, or just play with your kids in the grass—whatever brings you happiness.  

Boosts Curb Appeal: When you’re trying to sell your house, one of the first things on the to-do list is usually to improve the look of your lawn and landscaping. That’s a wise choice, as attractive, well-maintained landscaping can add 10 to 15 percent to the value of your home or property. In other words, all that time spent keeping your lawn looking gorgeous is time very well spent.

Are you ready to maintain a lush, green lawn for optimal living? A healthy lawn begins with regular feeding. Here are some of the benefits of fertilizing your lawn:

1) “Barefootable” Grass

barefootable-grass-kids

Backyards and barbecues. Trampolines and kids. Neighbors and friends. They’re everything thick, green lawns were made for. Regular feedings provide the nutrients your lawn needs to look its best and withstand the stresses of weeds, heat, drought and family activity.

2) Worry-Free Lawn

barefootable-grass-family

Regular feedings are the fastest, most affordable way to care for your lawn, keeping problems out of your yard and off your mind. Feeding your lawn two or three times a year gives grass plants the nutrients they need for deep roots and strong, full blades. One bag of Scotts® Turf Builder® feeds an average-size lawn and goes down easily in about 15 minutes. That’s all it takes to grow stronger, greener grass that can crowd out weeds and stand up to heat, sun, stress and play.

3) A Breath of Fresh Air

barefootable-grass-better-breathing

Grass is living, breathing nature right outside your door. And like all living plants, it needs food and water. While you and Mother Nature can easily take care of the watering, grass plants simply cannot thrive without proper nutrients. That’s where regular feedings become critical.


Regular Feedings Are Key

Like your teeth or your health, it’s easier to keep your lawn at its best with an ounce of prevention. Just feed your lawn every 6 to 8 weeks to keep it looking nice and worry-free.

Sources:https://www.scotts.com/en-us/library/lawn-food/benefits-fertilizing-your-lawn, https://www.scotts.com/en-us/library/lawns-matter/how-healthy-lawn-can-benefit-your-lifestyle

Canning versus Pickling

Canning Versus Pickling: What’s the Difference?

Canning versus Pickling

Ball Canning Jars
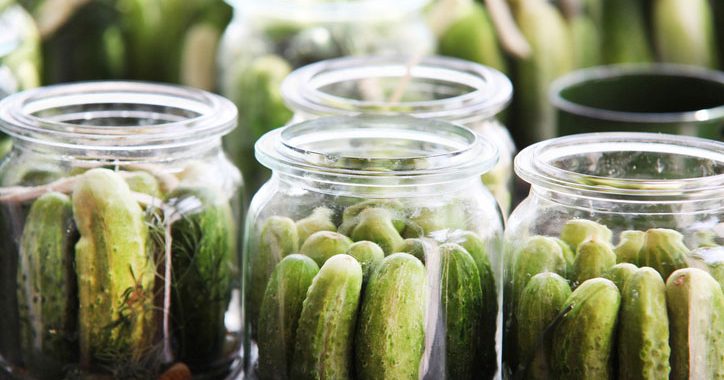
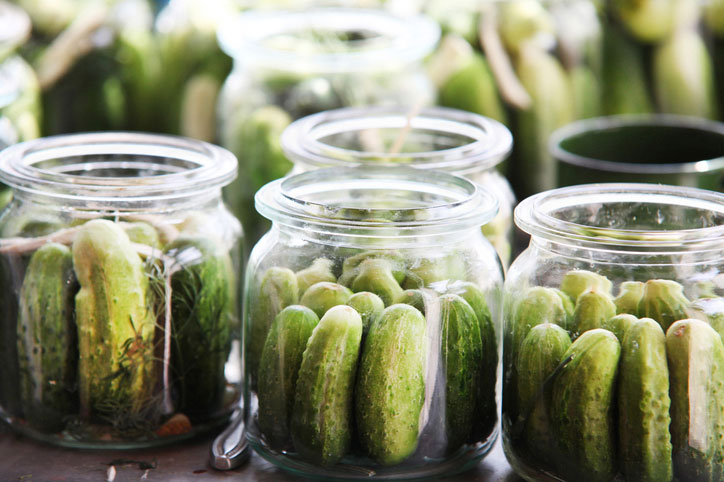
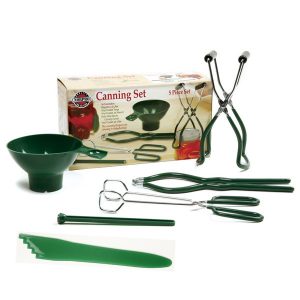
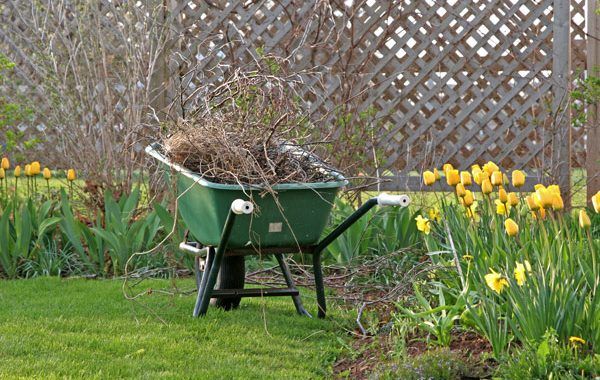
Have you ever wondered how to preserve all that food in your garden? Learning about canning and pickling foods is a valuable tool. Not only can you create opportunities to store foods from your garden, you can also stock up on things from the store and can or pickle them!

Pick up Ball canning jars and other Ball supplies at GNH Lumber!

Before you jump in and get started, here’s a little information about each process and what makes them different.

What is Canning Anyway?

Before we start, here are the basics. Canning is a method of preserving food by processing the fruits or vegetables and then sealing the fresh foods in airtight containers.

Canning Jars“Processing” is a method of cooking the food before sealing it in glass jars. The process of canning effectively sterilizes the bacteria that normally can cause spoilage. This means you can store the food for up to five years in proper conditions which is far longer than it would keep in the fridge!

There are two processes for canning foods at home. The first involves either boiling the preserved food, or boiling it under pressure. Respectively these are known as the “Water Bath Method” and the “Pressure Method” of canning. The second is “Pickling.”


Water Bath Canning

Water bath canning is a system of “processing” the jars for a set period after they’ve been filled to kill off any bacteria present. It’s done with boiling water after the lids have been place on the jars. You often see this type of canning when making jams, jellies, and sauces.


Pressure Canning

For foods that have low-acid levels like meats, vegetables, beans and chili, it’s vital to make sure that all the bacteria are dead to prevent against botulism. Pressure canning ensures this result, by sterilizing and sealing your canned goods inside a very high-temperature pressure cooker.


Pickling 

The process of pickling is a subset of the water bath method. Pickling preserves food using a “brine” to anaerobically ferment the food. The process produces lactic acid which prevents spoilage of the food.

Storing the food in an acetic acid, better known as vinegar, causes the food to “cure,” thus making it safe for consumption at a much later date.

It’s important to note: pickling food involves “cold packing” and then covering foods with boiling hot brine. This method works for a wide variety of foods! For pickles, the cold pack method works easily (you can even put sliced cucumbers in your old jar of pickle juice and stick them in the fridge for instant pickles in 2 weeks!).

However, when it comes to fruit and other acidic foods that are not stored in vinegar, the hot-pack method must be used or you’ll retain bacteria.


Resources: The Old Farmer’s Almanac

Canning Set

Is your garden overproducing? Stock up on canning supplies and kits at GNH Lumber!