Having an occasional lazy day indoors is relaxing, but if you’re stuck inside because of the cold, why not be proactive? There are a variety of easy projects you can take on during the winter that you will appreciate thoroughly when springtime rolls around again… So, why not make the most of the next winter storm?
If you’re feeling the winter blues, here are 7 DIY home improvement projects to lift your spirits:
1) Painting
Did you know that cold weather is ideal for drying paint? The dryness of the winter months makes winter the perfect time to paint the interior, so crack a window, and start painting. Select a bold color and paint an accent wall in your living room. Or add dimension to your bedroom by painting the ceiling.
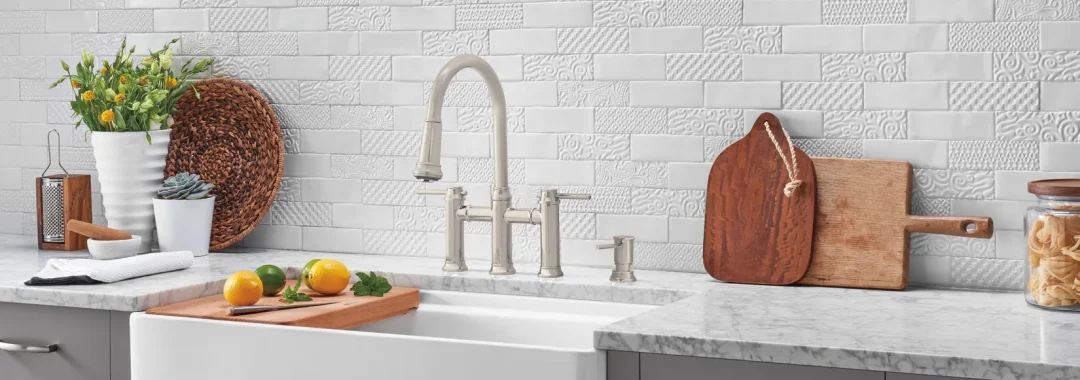
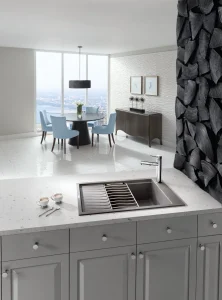
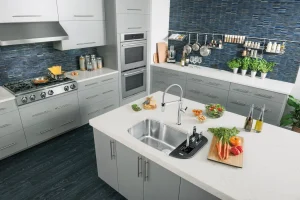
2) Add a Backsplash to Your Kitchen
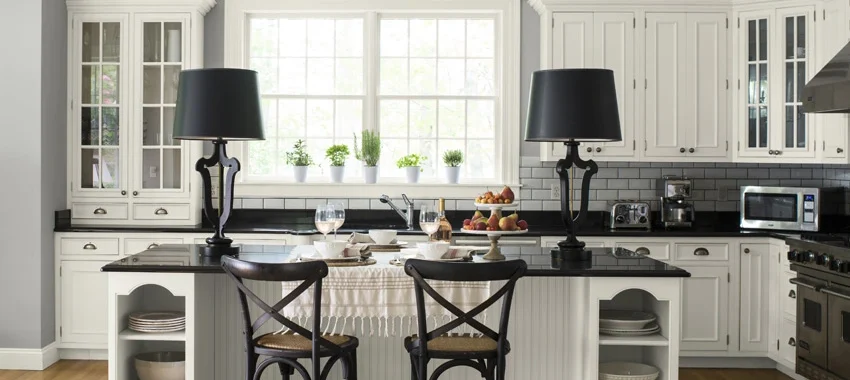
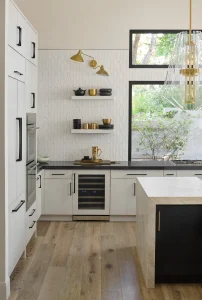
Backsplashes are important to adding personality to your kitchen. For a kitchen that needs some life, a flashy or textured tile can wake it up. For a kitchen that already has personality, a sleek, neutral tile can add unity to the room’s look.
3) Add More Lighting
What better way to brighten and warm your spirits in the winter than with new lights, lamps or ceiling fans. Not to mention it’s an easy and affordable way to update the style of any room.
LED-style lights, which come in contemporary and bold styles, also provide a money-saving option. Installing dimmers in areas like the family room or dining room saves money, while allowing homeowners to customize the ambiance.
4) Make Your Closet More Organized
Is organization on your list of resolutions? Kick off the year by tackling your closet.
If you create a place for everything, you’ll be a lot more likely to put things away. There are so many things you can do to customize a closet for your needs. You can install shelving, purchase a shoe rack, create drawers and dividers, and much more. You can even try designing your own Modular Closet.
Remember, you’re only limited by your imagination.
5) Remodel Your Bathroom
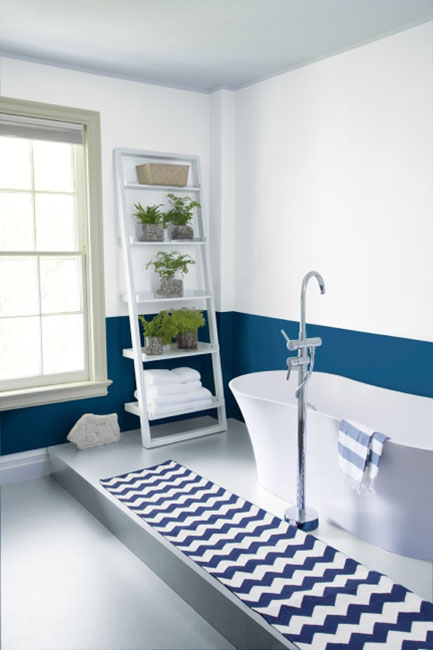
There’s no better time than the winter to spice up your boring bathroom. While replacing a faucet, tile, or repainting are relatively easy for the DIYer, more ambitious jobs like replacing the tub or adding tile floor might be better left to a professional. Though a complete remodel will be a bigger investment, it’s worth considering.
6) Refurbish Your Doors
Interior doors can have a lot of visual impact on your home. The good news is you can virtually “replace” all of your doors without spending excessively.
You can easily refurbish your interior doors by painting them, changing the doorknobs, and even adding moulding.
7) Change Your Light Bulbs
You won’t regret replacing your bulbs with energy-efficient ones. It’s a great way to go green and save money. On average, an Energy Star qualified light bulb will save between $30 and $80 in electricity costs over its lifetime, so don’t let the upfront cost of these bulbs scare you away from making the purchase.
By focusing on the inside of your home while the weather is cold, you’ll have a lot more time to tackle the warm-weather stuff when spring rolls around. And, as you begin your project, stop by GNH Lumber for all the supplies you’ll need, including tips and guidance!
The holiday season is upon us again! As the days grow shorter and the occasional snowflake swirls through the air, you may be inspired to create a magical environment for family gatherings this year.
Perhaps you want to create a warm and cozy bedroom, a festive winter wonderland in your living room, or a unique color combination for your dining room. Whatever the mood you’re trying to set, a touch of paint can help you transform your home in dramatic fashion. Here are some ideas to give you inspiration:
And you don’t have to paint the whole wall to create a big impact. “Pops of color can be great ways to add interest to a room in a subtle way,” says Benjamin Moore’s Director of Color and Development, Andrea Magno. “The inside of a bookcase, behind glass cabinets, an accent piece of furniture, or even the inside of a closet or a door—the key is to bring in a pop of color in a location that makes sense with the space.”
2. Winter Wonderland
Another great way to add a festive touch to your home is by transforming a room into a winter wonderland. A fresh coat of white or off-white paint with silvery-gray or blue trim is an excellent starting point. You can also paint your fireplace in stunning white to help set off your holiday decorations. Plus a big bonus is a white fireplace works well all year-round.
3. Colorful Combinations
Looking for a unique holiday color combination?Here’s a great tip from HGTV.com: “Take a color cue from holiday gift bags. Incorporating several colors into a space is often a stumbling block for many do-it-yourselfers. By simply perusing the gift bag aisle, you’ll find exciting and unusual combinations that are often easily transferable to your space.”
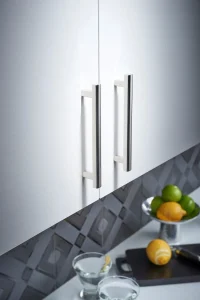
Using decorative hardware in your kitchen or bathroom is a great way to accent your design. Top Knobs’ Morris Collection offers classic designs with a timeless twist. This versatile collection pulls inspiration from various styles including farmhouse chic, modern industrial, transitional, contemporary and grand millennial.
With five different styles of pulls and knobs to choose from, you can mix and match to your heart’s content.
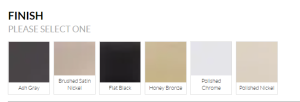
Each piece of hardware comes in 6 different finishes. Appliance pulls are also available.
What’s Trending this Season
Thinking of sprucing up your kitchen this fall? Whether you’re looking to do a complete remodel or just jazz it up with a fun backsplash, keep these trends in mind as you transform your kitchen.
Artistic Designs
A fun and visually-appealing pattern can really make a difference in your kitchen!
Unique Textures
Similar to artistic designs, adding unique textures can really draw the eye and add depth to your kitchen.
Bold Backsplashes
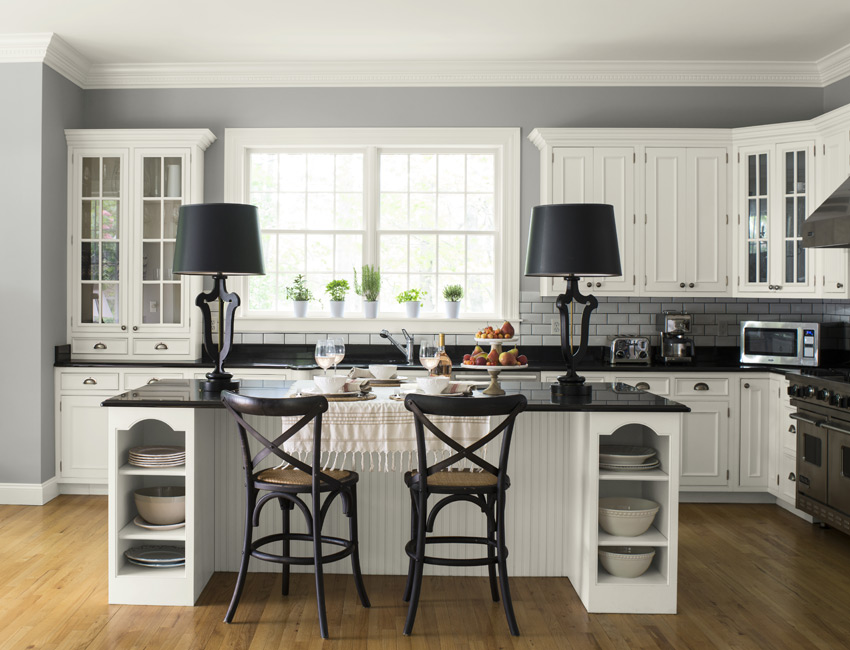
Take advantage of a mostly-white kitchen by adding a bold backsplash. The high contrast makes the kitchen counters pop!
Warm Highlights
You’ll love the way the light glints off your bronze hardware, fixtures and furniture. It really warms up the space and makes it more inviting.
Neutral Palettes
Neutral palettes are a great foundation for kitchen design because they go with almost anything! With this artistic freedom, you can find hardware that blends seamlessly into your design, like the example below, or make a statement with something bold.
Accessories to Match
Take your design full circle by making your hardware, light fixtures and even dinnerware match your kitchen’s color scheme.
Find Your Style
With so many different styles of knobs and pulls in countless finishes, it can be hard to decide what will look best in your space. Fortunately, Top Knobs’ Find Your Style tool makes the process easy from the comfort of your own home!
The tool is essentially a visual quiz, where users are asked 9 questions and matched with the hardware that best matches their style.
Based on your answers to the questions, the tool will generate a list of recommended knobs and pulls. You can save or share your results, or better yet bring them with you to GNH Lumber to pick out your new hardware!
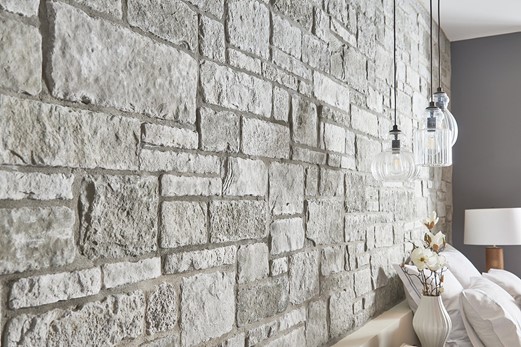
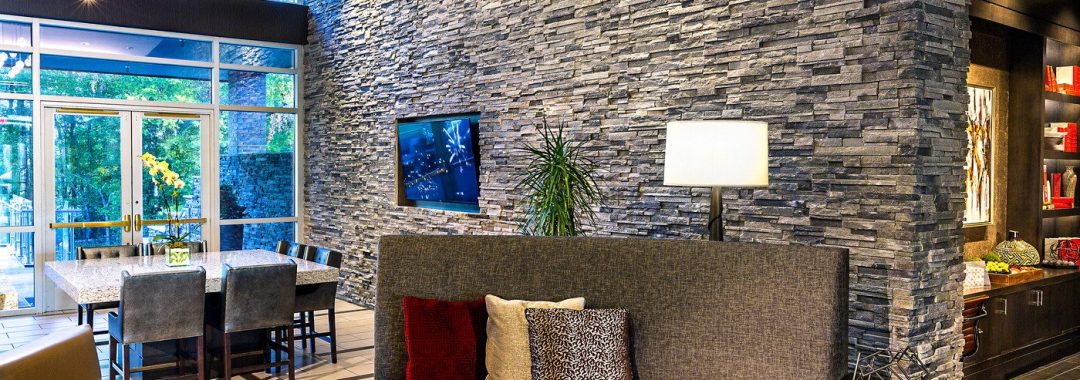
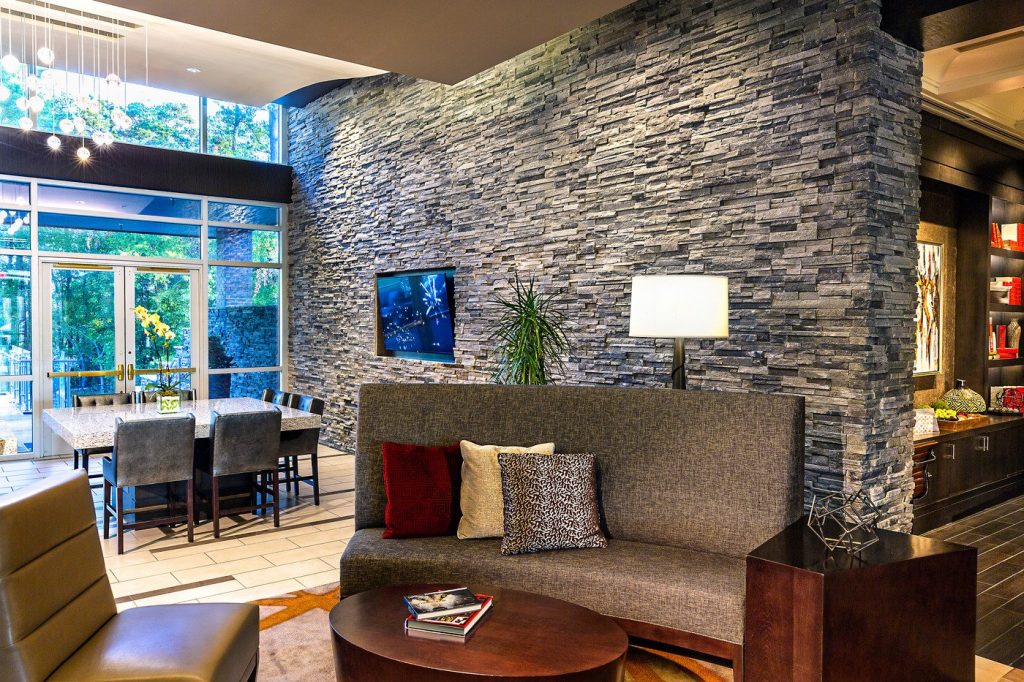
It’s no secret that some of the most beautiful and memorable structures in the world are made with stone.
Whether it’s a grand work of art or an average office building, stone is a material that has shaped our lives. Nowadays, stone has its place in redesigning your home’s interior as well. According to a recent Zonda Media report, manufactured stone veneer (MSV) ranks number two nationally for providing high ROI. Only garage door replacement ranked higher on this list! If you’re looking to improve your home’s curb appeal, try Cultured Stone veneers.
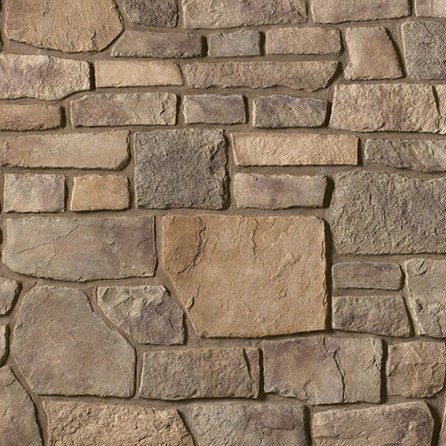
What Are Cultured Stone Veneers?
Cultured Stone veneers are a type of manufactured stone. They’re made in flexible molds using a concrete mixture. Afterwards, they’re hand-colored with iron oxide pigments to resemble natural stone. The result is a versatile and lightweight material that adheres to most surfaces. It comes bearing the best credentials as well. Every veneer produced meets AC-51 criteria – the strictest requirements in the industry. As long as you see that CSV® stamp, you can rest assured that you’re getting the highest quality material.
Less Weight, Less Problems!
CSV® offer both the home DIYer and the expert many advantages over natural stone. Due to its unique composition, it is almost one-quarter the weight of natural stone. A standard box of CSV® weighs about 10 pounds, and comes pre-sorted for variations in size and color. This means that once you’ve got your stone veneers on hand, you can spend less time moving material around!
This makes the entire installation process easier as well. Natural full-bed stone puts a tremendous amount of strain on surfaces. This means that even the most expert stonemason can only make so much progress each day. That’s not the case with CSV®! Its lightweight properties let you work more with less physical strain. Anyone working with this material is sure to be upright at the end of the day and have a spring in their step.
A Variety of Choices
Touching up your firepit? Adding some extra beauty to your home exterior? Then there’s a CSV® in whatever color or style you need! You don’t have to feel confined to standard shades of brown or gray either. A wide variety of the options available are modern, trend-setting, and much newer to the market.
Whether you’re going DIY or hiring an expert, the range of customization is almost endless. CSV® is the perfect material for artistic expression and creative layouts. Working with material like this means the only limit on any of your projects is your imagination!
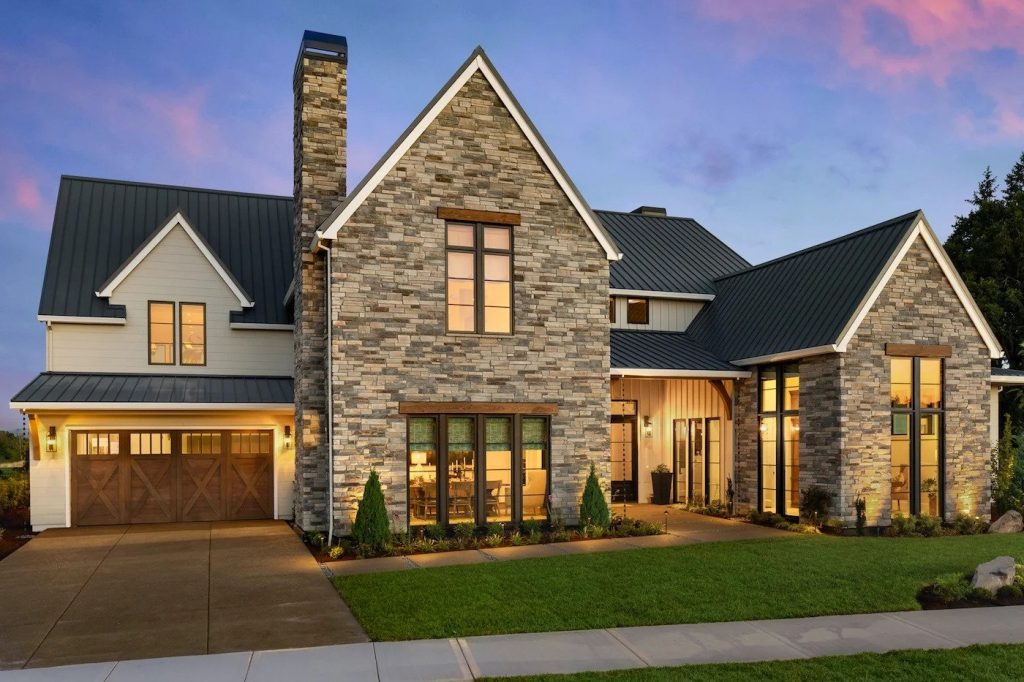
For example, if your home exterior needs a new look, why not give it a CSV® makeover? This Sculpted Ashlar is modern-meets-classic, with just the right amount of warmth. It looks great both inside your house and out!
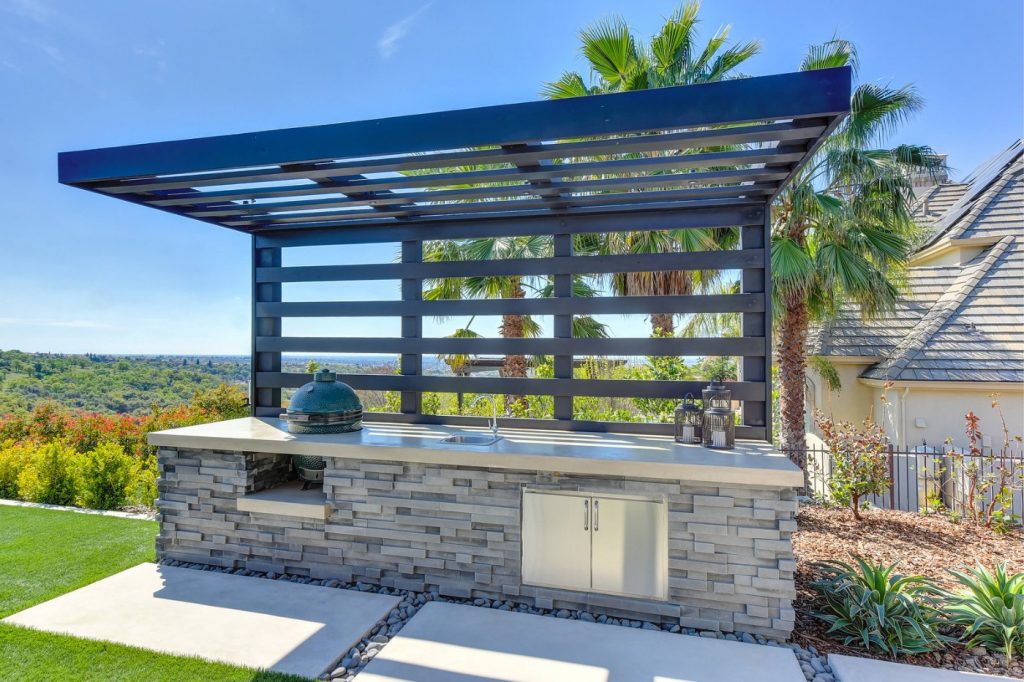
There’s no better time than now to get that firepit or outdoor bar looking its best for the warmer months! Add beauty and value to yours with this Pro-Fit Alpine Ledgestone. Give your backyard get-togethers the feel of a Northern Ski Lodge!
Using CSV® for your next project gives you the timeless look and feel of stone, at a much better value! Get in touch with the team at GNH Lumber today for any advice and guidance you need with your next home project.
Looking to add the perfect complement to your living room? Or maybe you need the right accent piece to add to your den? If so, Cultured Stone veneers are a great choice! Whether it’s residential or commercial, large-scale, or small, there’s a Cultured Stone veneer that will work for you. Even better – these natural-looking and customized manufactured stone veneers are straightforward to install inside your home.
Materials Needed
Before you begin the interior installation process, make sure you have the following tools and materials on hand:
• Cultured Stone manufactured stone veneers
• Flashing (if finished product will be exposed to water)
• Jointing tool
• Masonry brush
• Water resistant barrier (WRB)
• Grout sealer
• Pointing trowel
• Notched trowel
• Welded wire lath complying with ASTM C933
• Corrosion resistant fasteners (staples, roofing nails, etc.)
• Mortar (scratch coat, setting bed, and pointing)
• Drop cloths and cleanup supplies
Set up your worksite, removing all tripping hazards and setting down your drop cloth to make cleanup easier!
Wall Prep
If your project has metal or wood framing, begin by applying two layers of WRB as independent layers, lapped in “shingle” fashion. Evenly install your flashings across the primary layer. Make sure that your primary WRB meets all building codes and manufacturer requirements, depending on your project.
After installing the primary layer, apply the second “sacrificial” layer of WRB, to allow incidental water to drain down and out. Lap each material 2” horizontally and 6” vertically, fasten with WRB-approved fasteners.
Make sure that any contact with doors or windows are flashed properly. Head flashings and drip screen will help resist water damage.
Lath Application
Depending on whether you use expanded metal, woven wire, welded wire, or alternative lath, it needs to transfer cladding load to your framing. Make sure your fasteners penetrate the framing and are spaced evenly. Typical applications would have fasteners 16” on center, spaced a maximum of 7” vertically.
When placing lath, always end lap joints over framing and fasten them there. Any that does not land on framing will need to be wire laced. For all overlaps, use at least 0.5” horizontally and 1” vertically and at end laps. NEVER end your laps at a corner, as this creates sharp edges and breaks in the barrier.
Once the lath is installed, check for roughness. This will tell you the direction of the cups and determine which direction to apply the mortar. Follow the same path as the cups, using consistent pressure to ensure mortar completely fills the lath. Whether your mortar is pre-blended or created on-site, make sure it meets NCMA standards.
Mortar Application
Aim for at least a 0.5” to 0.75” layer of mortar, as anything less than 0.5” inches is too thin and runs the risk of cracking. Cover all lath at your target thickness, keeping at eye out for thin spots. You may need to apply a second layer to achieve desired thickness and levelness.
After letting the mortar cure for a few hours, it’s time to texture the surface with a scratch coat. Use your notched trowel in even, horizontal strokes across the mortar. This will allow your Cultured Stone to connect easier to the walls or surfaces. Allow at least 24-48 hours for the mortar to cure completely.
Setting the Stones
Before installing the stones, check the back of each and remove any dust or debris. Then, gently dampen the scratch coat and stone units with clean water. Make sure both look saturated, but not shiny with water.
Apply your setting bed mortar onto a few square feet of the prepared surface with your trowel. Then apply a thin “back butter” of mortar to the entire back of the stone unit. Press the stone into the setting bed mortar on the wall. Leave enough space for joint gaps, and then leave the stone be.
Clean out mortar droppings as you go along and check stone bonding periodically. If a stone needs to be re-mortared, remove all original mortar first before re-applying and re-setting.
Be aware that if you’re setting stones in corner layouts, that flat stones can be nested and alternated to create a uniform look.
Joint Treatment & Wrap-Up
With your stones placed and spaced appropriately, you’re now ready to fill in your joint gaps. Make sure the mortar you use is smooth enough to flow easily through a grout bag. Carefully remove any excess setting board mortar from the joints before filling.
Fill in each joint gap evenly with mortar, being careful not to disturb the stones as you go along. Once filled in, wait until the mortar is thumbprint hard, then you can tool the joints as needed. Depending on your desired look, use either a tooling joint or a wooden stick to shape them.
After the mortar has had time to set, be sure to go over it with a masonry brush to remove any additional debris.
From here, it’s just a matter of cleaning up your worksite and letting your new wall set. For more information on installing Cultured Stone veneers in your home, be sure to contact our talented design team!
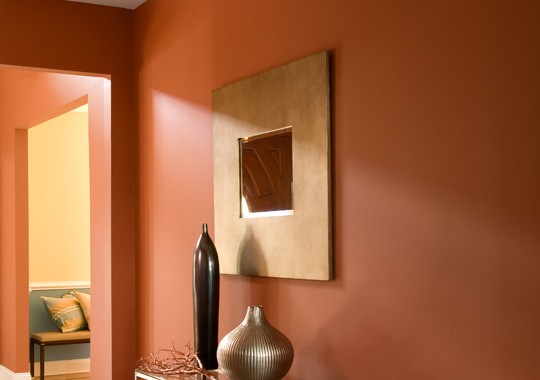
Did you know that picking the right paint for your interior painting project involves more than just color selection –
You also need to choose the right paint finish. Didn’t even think about the finish, did you? That’s ok! A lot of people underestimate the role paint finish plays in the appearance of your newly-painted room.
Choosing the right finish for your interior project will affect the look, durability, and ambiance of the room. Understanding the basic differences between paint finishes will help guide your selection process.
The most common interior paint finishes are: flat, matte, eggshell, satin, and semi-gloss. Let’s take a closer look at these 5 options:
Flat
Flat finish is only available in latex paint. It’s clean, opaque qualities make it a great choice for walls and ceilings. It is also the least shiny finish available. Unfortunately, it doesn’t clean well. So don’t use it for kitchens, bathrooms, or children’s bedrooms. The only way to get rid of drawings and fingerprints on a flat-finish wall is to paint over them!
Matte
Matte finishes are also low-shine. It’s perfect for busy areas such as hallways, family rooms, and kids’ rooms. It’s easy to apply, washable, and hides existing wall colors well.
Eggshell
Eggshell finishes are used for decorative finishes because it provides a low shine. It cleans up better than a flat finish would, but probably not as well as you would want in a kitchen or bathroom.
Satin
The most popular paint finish is the satin finish. It has more sheen than eggshell, and cleans better too! This finish is a good choice for woodwork, walls, doors, and hallways. It’s also great for bedrooms and dining rooms. While this finish is washable, it’s not “scrubbable,” so this is another one to skip if you’re painting a playroom.
Semi-Gloss
A semi-gloss finish will give your room a subtle shine. It’s scrubbable without being too shiny. This makes it perfect for moldings, doors, windows – and little Picasso’s bedroom, too. However, because Semi-gloss finishes reflect light, imperfections in your walls are more noticeable. We recommend that you prep your walls and make them super smooth before applying paint.
Choosing the right paint finish is as important as picking a color. Not only does it impact the appearance of your room, it has a big effect on how well you will be able to clean and maintain your walls!
Now that you know which finishes to use, you are ready to pick out paint for your next project. Still not sure or need more help? Ask a GNH expert in our Greenville or Windham locations. They can help you make the best choice for your home improvement project.
Want to give your living room or hallway a fresh and modern look? Maybe you want your kid’s bedroom to look as fun, vibrant and full of personality as they are. It’s easy to create a dramatic effect by painting a bold accent wall! And the best part about this DIY project is that it’s fun and inexpensive!
Painting the interior rooms of your home can have tremendous impact, and it’s a great autumn project with a modest price tag.
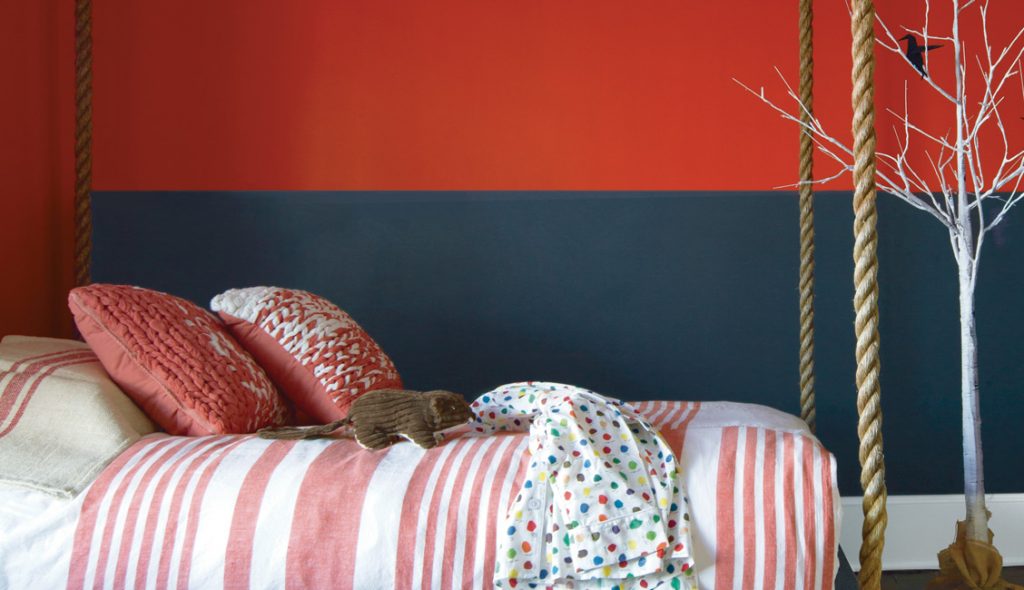
Want to make a bold, unique statement? Stripes that go up-and-down make a room with low-ceilings look taller, where horizontal stripes give a smaller room a more spacious feel. And remember, the thinner the strips, the busier the pattern, too.
Here are a few tips to paint level, even stripes on your walls.
Step 1
Paint your base color across the entire wall using the lighter and flatter shade of the two colors you picked. Let it dry for at least 24 hours.
Step 2
Figure out your stripe spacing. Choose a stripe width that can be evenly divided into the wall’s width or height. Generally, 4-12 in. is a good width. For vertical stripes, measure the width of the wall and for horizontal stripes, measure the height of the wall.
Quick Tip: Paint an odd number of stripes on your wall. This makes sure you’ll get a solid strip at the edges of the wall or ceiling.
Step 3
Create your outline. If using a level and pencil, mark your stripe widths across the wall. With your level, draw a light line continuously across, making sure the level is straight.
Step 4
Mark an “X” where you want your solid stripes to be.
Quick Tip: Create a guide the exact width of your stripes and use it to make your marks
Step 5
Apply the right FrogTape® product for your surface
Quick Tip: Place your tape on the outside of your pencil line so the paint will cover up any markings.
Step 6
Burnish or seal the edges of the tape. Run a plastic toll along the tape’s edge so paint can’t bleed through.
Step 7
Pull the tape off when the paint is still wet at a slow, 45-degree angle backward toward the wall. Don’t forget to control the end of the free tape so it doesn’t drag along the freshly painted stripes.
Painting stripes takes time and patience. Just follow these steps to prepare the space and you’ll be sure to make your stripes look crisp and straight.
One of the easiest ways to transform the look and feel of your bedroom is with a fresh coat of paint! Creating signature style in your master bedroom starts with you. What colors, textures and elements make you feel most relaxed and cozy?
Don’t forget that inspiration can come from anywhere! Think about fabric, wood, stone, or artwork. Whatever gives you restful comfort at the end of the day and helps you wake up energized in the morning is all that is required.
Finding sanctuary at the end of the day is something we all crave. Creating a personal retreat in your bedroom is easier than you think! Strive for a balance of textures and colors, and don’t be afraid to ask the experts at GNH Lumber for guidance and tips along the way.
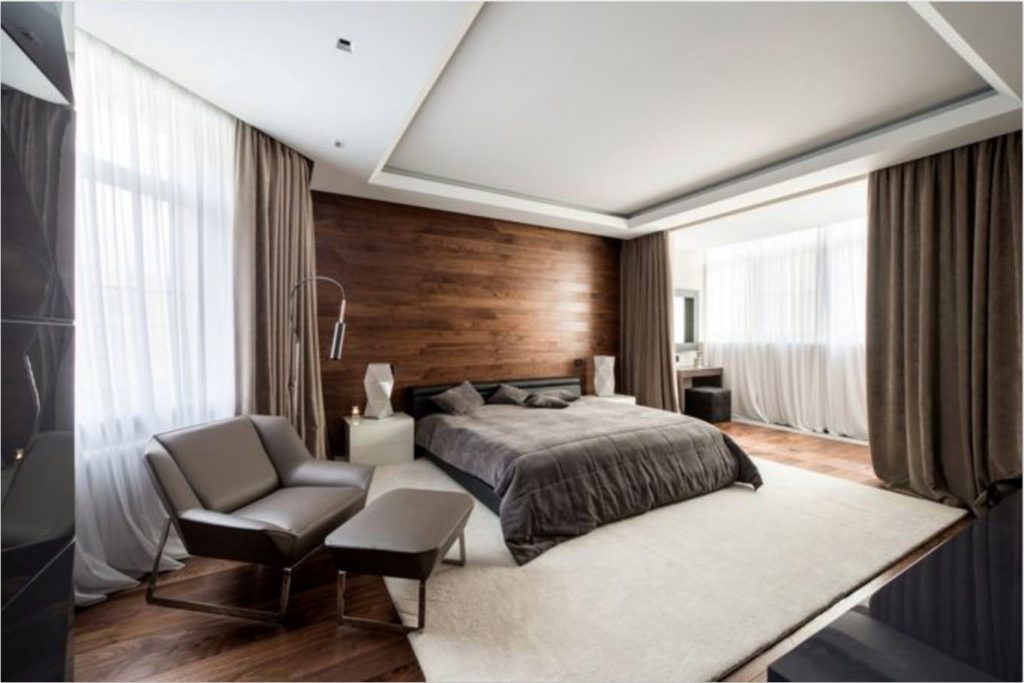
Contemporary design is less ornate but bold in color and design.
Create some drama with dark tones, natural elements and cream accents. This earthy sanctuary incorporates natural oak floors and a wood accent wall behind the bed. The color pallet is derived from the tones found in the wood. Smokey neutral hues provide the foundation for the subtle drama of dark and light tones in the fabric and the ceiling.
If you have a tray ceiling layer, use light, medium and dark tones to add interest and depth to the architecture. This color pallet uses Benjamin Moore Barren Plain in the center. Keep the ceiling and the tray edges white and tape off a shadow line with Scotch Blue painter’s tape to create a darker border about 1.5-2” wide in Wildwood Crest. This will create that dark inner edge that adds depth to the ceiling tray.
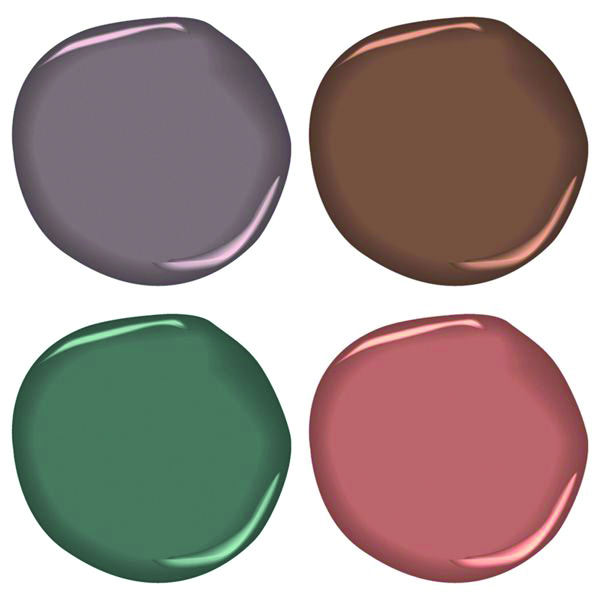
Benjamin Moore Colors used in fabrics, furnishings and walls:
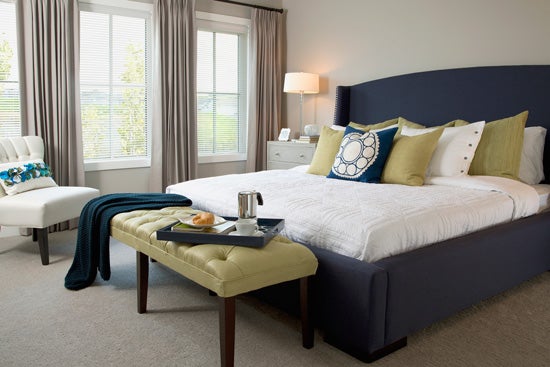
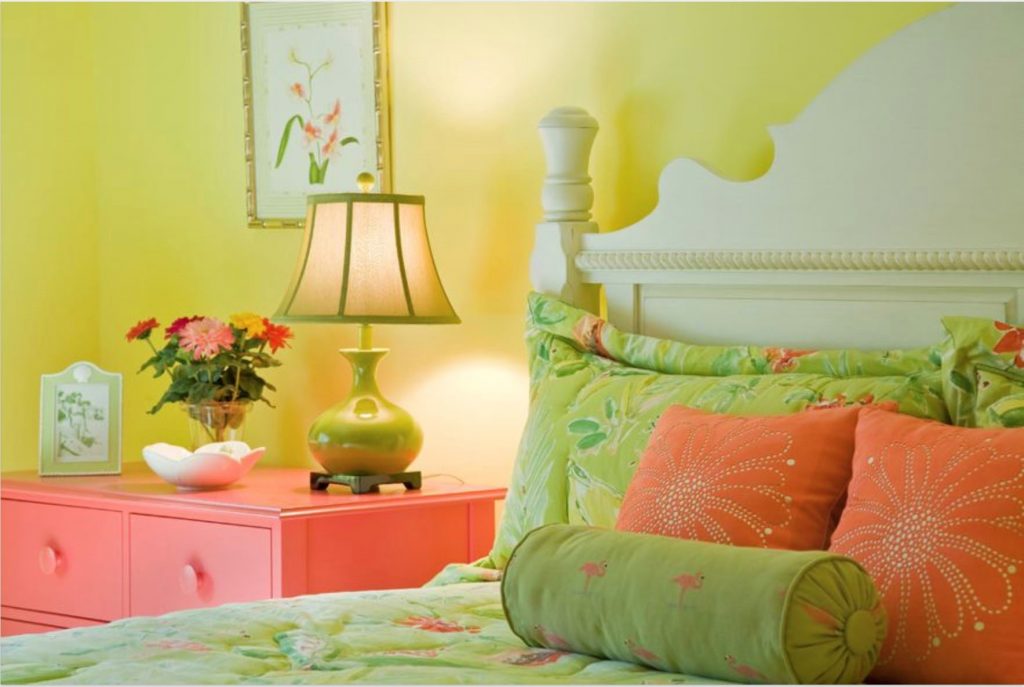
Bold color stories create a vibrant environment that makes even the darkest winter day feel like springtime!
This bedroom achieves its sunny, tropical vibe by using a vibrant green fabric to create the color story. Pulling greens and yellows from the inspiration fabric dictates a lively color palette. Try painting three yellow or pale yellow-green accent walls to add vibrancy. Get clean painting lines by taping off the corners and edges with Scotch Blue painter’s tape.
If you’re feeling adventurous, you could do a Strié finish using the contrasting color over the three yellow walls, or just the bed wall. Strié is a popular form of faux painting using glaze and paint brushes to create a soft natural striped texture. Here’s how to do it:
Tape off the corners, ceiling line and the baseboards with Scotch Blue painter’s tape.
Add some glaze at a 2:1 ratio to the paint and apply it in 2’ wide sections.
Drag a wall paper brush or a long bristle Strié brush through it from ceiling to floor to create subtle stripes.
Practice this technique first, you may need to go over it multiple times to achieve the effect you are after. It works best done over eggshell paint to extend the working time.
You may need to use a smaller soft brush at the ceiling and baseboard to smooth it out. And don’t limit yourself to just painting the walls: a brightly-painted side table pulls this scheme together nicely!
Benjamin Moore Colors used in fabrics, furnishings and walls:
Walls: Hibiscus 2027-50, Flower Power 398; Table: Orange Nectar 2013-20.
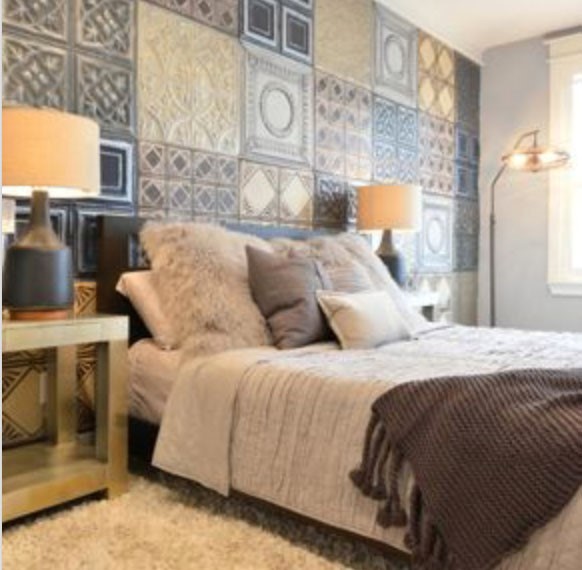
The use of unique materials can be transformed by paint. It redefined the tin or textured wallpaper panels on this wall.
This look was achieved by painting these wall panels alternately with a base coat of Summer Harvest and Blue Heron, then employing additional colors to help accent and contrast the textures. The other neutral walls allow the bed wall to make a huge statement.
Don’t forget to be creative! Instead of covering the entire wall, you can frame out an oversized headboard area to fit 9 of these tiles for a scaled down effect. Frame the area out with wide mitre corner boards painted Hearthstone Brown.
Benjamin Moore Colors used in fabrics, furnishings and walls:
Ceiling & Walls: Seapearl 961; Tin/Textured Tiles: Gingersnaps 1063, Hearthstone Brown 2109-20, Summer Harvest 2016, Blue Heron 832.
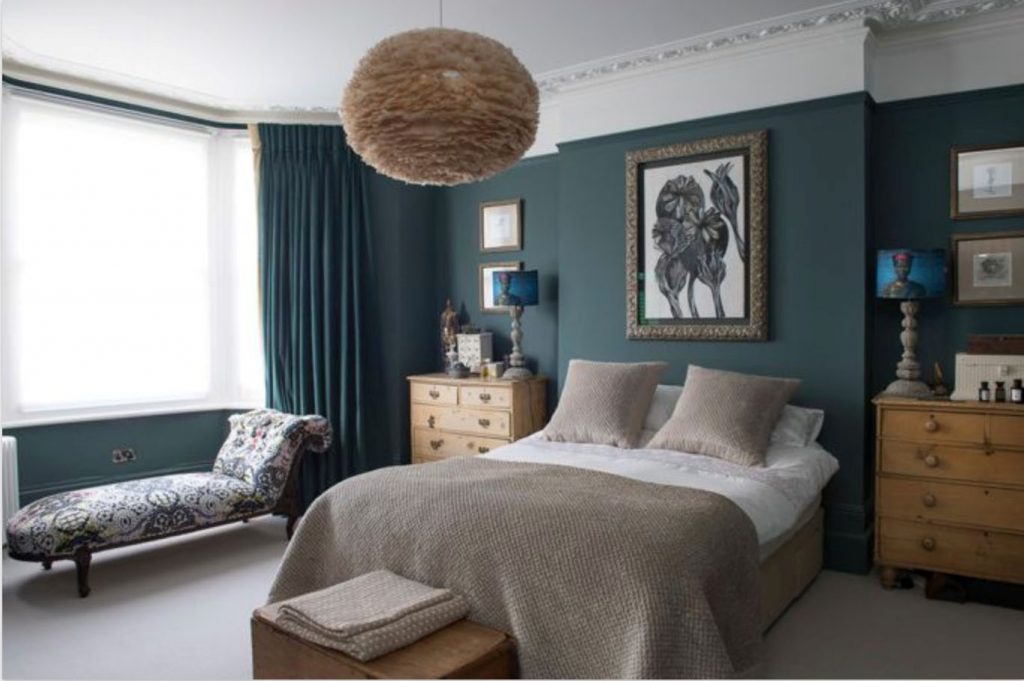
Dark tones are very tranquil and relaxing in a bedroom.
Darker colors absorb light, creating a womb effect to induce deep relaxation. Creating contrast with soft neutrals makes this space feel comfortable and welcoming.
Painting the wall behind the bed a slightly lighter shade of Bella Blue will provide subtle contrast to the remaining darker walls defined by Salamander. The trim is a shade of gray with the ceiling a lighter tone of gray. To keep the lines clean, tape off the trim with Scotch Blue painter’s tape.
This room has a very sophisticated use of color with simple clean lines, which gives the moldings and artwork center stage.
Benjamin Moore Colors used in fabrics, furnishings and walls:
Bed Wall: Bella Blue 720; Rest of Walls: Salamander 2050-10; Trim: Timber Wolf 1600; Ceiling: Heaven 2118-70.
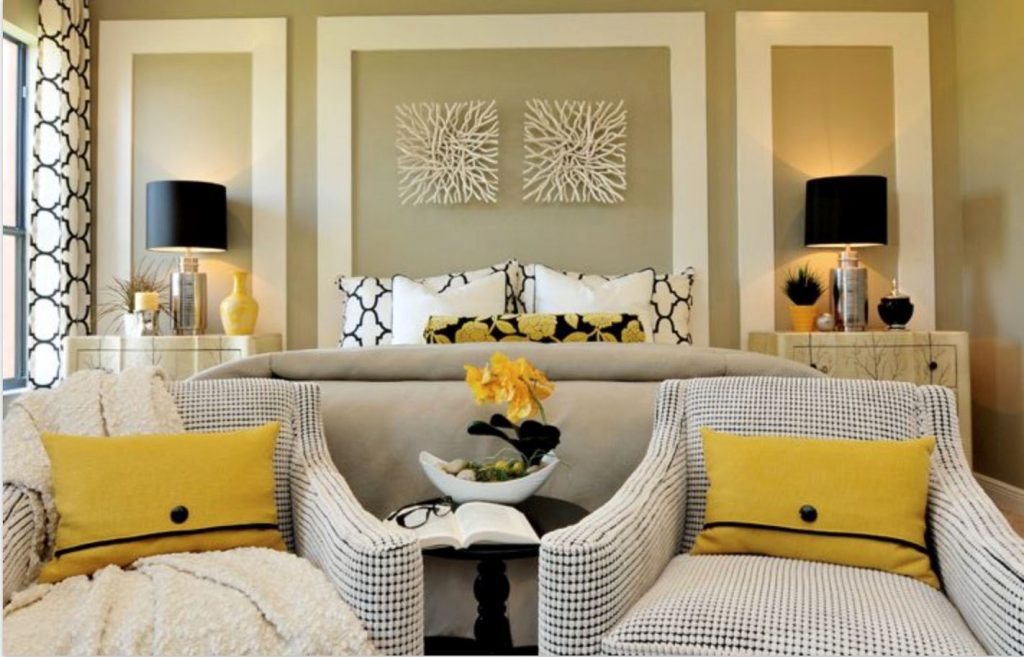
Creating architecture with color and simple moldings gives this room a modern feel.
The walls are painted a Natural Linen tone. Tape off the simple rectangles with Scotch Blue painter’s tape to approximately 6” wide, or use mitered wood painted Alabaster. Paint the inside color (above the lamps) with the darker shade of Aged Bronze to provide some contrast and interest against the dark lamp shades. Black is a strong modern component in the fabric design, lamps, accent tables and upholstery.
Providing a neutral backdrop gives the design elements a chance to be seen. It has been said that every room should have black to ground the design. That is very true of this room.
Benjamin Moore Colors used in fabrics, furnishings and walls:
Walls: Natural Linen 966; Wall Molding/Blocks: Alabaster 876; Inside of Wall Molding/Blocks Above Lamps: Aged Bronze 231; Side Table: Black 2132-10.
If you’re a true DIYer and looking for a fun project to tackle indoors, your kitchen is a great place to start! One of the best things about the kitchen is that you can give it an entirely new look simply by adding fresh paint. We recommend focusing on one of the focal points of your kitchen – the cabinets. Think about it, you and your family see and use them every day, so shouldn’t they help your kitchen’s look come together? A great way to accomplish this is to add two-toned painted cabinetry to your kitchen – whether by painting it yourself or choosing from Wellborn Forest Cabinetry’s extensive line of finishes.
What Are the Benefits of Two-Tone Painted Kitchen Cabinets?
Two-tone painted cabinets can fit any design style out there, which makes it a snap for you to craft the kitchen of your dreams in just a few steps. Plus, the color mixing options are endless, so you have even more design options available. Having two-toned cabinets can also improve your kitchen’s aesthetic, increase your home value, and can create an illusion of more space in a smaller home. So, no matter if you’re staying or selling, two-toned kitchen cabinets are the perfect choice for improving your home!
Choose Your Colors
Painting your kitchen cabinets isn’t the same as painting the walls of your home, so you’ll want to use the right paint for the job. Most household paints are prone to chipping and cracking on surfaces like cabinetry. Instead, look for enamel paints, which will look better over time and can withstand wear and tear. Trusted brands like Benjamin Moore have entire lines of special alkyd enamel paints, like their ADVANCE Paints. These even feature a special self-leveling formula, so when you apply your paint, it will leave a smoother finish!
Additionally, WF Cabinetry can match paint colors from Benjamin Moore. You can even have a sample door made so you can see how your preferred color will look in your kitchen.
Why Are Complementary Colors the Best Choice?
The colors you pick are just as important as the type of paint you use. Whatever color you decide on, make sure it complements your kitchen and appliances. If you have a lot of black appliances in your kitchen, try a rich dark brown to create a flowing, uniform look. Whereas, if you have an abundance of almond appliances, painting the cabinets a similar light sand color will work perfectly. Stainless steel appliances are even more versatile in terms of complementary color options, and the only limit is your imagination!
Stock Up on Supplies
Your painting project will go much smoother if you have a few other essential supplies and tools. Disposable paint trays are a great investment, as you can place your “real” tray in one for a firm roll, then simply throw out the plastic tray when you’re done! Purchasing extra brushes and rollers can help make your clean up easier as well, especially if you use any oil-based paints that can gum up the bristles. Perhaps the most important tool of all is the canvas drop cloth. We advise using at least two that you can move around the room as needed just in case any drops make their way to the floor.
Prep Your Kitchen
With all your paint and tools assembled, now’s a good time to get any moveable hardware or appliances out of the way. Then, remove any hardware from your kitchen cabinets, including knobs, hinges, and screws. It’s helpful to keep all this cabinet hardware organized while you’re painting. Try labeling each door by number underneath the spot that the hinge goes in the frame. Then, label a plastic baggie filled with that specific door’s hardware with the same number. You can place a piece of painter’s tape over the number on the door, so when the painting is finished, you can remove the tape and see the number.
Paint Away
Now we get to the best part – painting those cabinets! When painting, we recommend starting with the cabinet bases and the backsides of the doors first. This gives them more time to dry and really set, as they’ll be seeing the most action from the opening and closing of the doors. As with many other paint projects, it’s best to use light coats of paint to avoid drips. Don’t forget to add a topcoat of polyurethane either. This can help add an extra layer of protection and seal the finished look in beautifully.
With the weather warming up and the days growing longer, it’s the perfect time to spruce up your home exterior! Whether you’re building a backyard retreat (complete with firepit!) or looking to give your home exterior a new look, one product stands out. Cultured Stone veneers are a stylish and versatile option that are great for many projects. What’s more, they’re the right tool for anybody – DIY or contractor, for jobs big and small. The installation process is simple and can be completed in just a few days.
Materials Needed
Before you begin the exterior installation process, make sure you have the following tools and materials on hand:
• Cultured Stone manufactured stone veneers
• Safety equipment (N95 mask, safety glasses, work boots, etc.)
• Flashing
• Rain screen
• Jointing tool
• Masonry brush
• Spacers
• Water resistant barrier (WRB)
• Grout sealer
• Pointing trowel
• Notched trowel
• Welded wire lath complying with ASTM C933
• Corrosion resistant fasteners (staples, roofing nails, etc.)
• Mortar (scratch coat, setting bed, and pointing)
• Drop cloths and cleanup supplies
Job Site Setup
Before beginning your project, start by storing all your materials out of the way, but still convenient to application. Be sure to eliminate any trip hazards and keep your Cultured Stone veneers protected from any worksite dust or inclement weather. Use your drop cloths to protect any landscaping.
Wall Prep
If your home exterior project has metal or wood framing, begin by applying two layers of WRB as independent layers, lapped in “shingle” fashion. Evenly install your flashings across the primary layer. Make sure that your primary WRB meets all building codes and manufacturer requirements, depending on your project.
After installing the primary layer, apply the second “sacrificial” layer of WRB, to allow incidental water to drain down and out. Lap each material 2” horizontally and 6” vertically, fasten with WRB-approved fasteners.
Make sure that any contact with doors or windows are flashed properly. Head flashings and drip screen will help resist water damage.
Adding Your Rain Screen
For any home exterior projects that involve adding Cultured Stone veneers to your walls, adding rain screens adds an extra layer of protection against water damage. This physical airspace behind the cladding provides a larger path for drainage, using a ventilation drying effect. Standard building codes allow for just a single layer of rain screen, but be sure that it is at least 60 minute building paper or equivalent.
Lath Application
Depending on whether you use expanded metal, woven wire, welded wire, or alternative lath, it needs to transfer cladding load to your framing. Make sure your fasteners penetrate the framing and are spaced evenly. Typical applications would have fasteners 16” on center, spaced a maximum of 7” vertically.
When placing lath, always end lap joints over framing and fasten them there. Any that does not land on framing will need to be wire laced. For all overlaps, use at least 0.5” horizontally and 1” vertically and at end laps. NEVER end your laps at a corner, as this creates sharp edges and breaks in the barrier.
Mortar Application
Once the lath is installed, check for roughness. This will tell you the direction of the cups and determine which direction to apply the mortar. Follow the same path as the cups, using consistent pressure with your trowel to ensure mortar completely fills the lath. Whether your mortar is pre-blended or created on-site, make sure it meets NCMA standards.
Aim for at least a 0.5” to 0.75” layer of mortar, as anything less than 0.5” inches is too thin and runs the risk of cracking. Cover all lath at your target thickness, keeping at eye out for thin spots. You may need to apply a second layer to achieve desired thickness and levelness.
After letting the mortar cure for a few hours, it’s time to texture the surface with a scratch coat. Use your notched trowel in even, horizontal strokes across the mortar. This will allow your Cultured Stone to connect easier to the walls or surfaces. Allow at least 24-48 hours for the mortar to cure completely.
In warmer weather, remember to lightly mist your scratch coat and stone units to keep them properly hydrated.
Setting the Stones
Before installing the stones, check the back of each and remove any dust or debris. Then, gently dampen the scratch coat and stone units with clean water. Make sure both look saturated, but not shiny with water.
Apply your setting bed mortar onto a few square feet of the prepared surface with your trowel. Then apply a thin “back butter” of mortar to the entire back of the stone unit. Press the stone into the setting bed mortar on the wall. Leave enough space for joint gaps, and then leave the stone be.
Clean out mortar droppings as you go along and check stone bonding periodically. If a stone needs to be re-mortared, remove all original mortar first before re-applying and re-setting.
Be aware that if you’re setting stones in corner layouts, that flat stones can be nested and alternated to create a uniform look.
Large Format Stones
For large firepits or radical home exterior redesigns, large format stones are a viable option. The key to proper bonding is achieving a full setting bed of quality mortar, with ample spacing between units. You should also take time to ensure your scratch coat is level and straight, adding another coat if necessary. Many of these large format stones are fitted with mortar joints, but you may need to use a larger 3/8” inch joint to make filling with mortar easier. Use spacers on all four sides of each unit to maintain uniform mortar joint gap, and remove carefully after the mortar has cured.
Joint Treatment & Wrap-Up
With your stones placed and spaced appropriately, you’re now ready to fill in your joint gaps. Make sure the mortar you use is smooth enough to flow easily through a grout bag. Carefully remove any excess setting board mortar from the joints before filling.
Fill in each joint gap evenly with mortar, being careful not to disturb the stones as you go along. Once filled in, wait until the mortar is thumbprint hard, then you can tool the joints as needed. Depending on your desired look, use either a tooling joint or a wooden stick to shape them.
After the mortar has had time to set, be sure to go over it with a masonry brush to remove any additional debris.
From here, it’s just a matter of cleaning up your worksite and letting your new wall or outdoor feature set. For more information on installing Cultured Stone outside your home, be sure to contact our talented design team!


 Having an occasional lazy day indoors is relaxing, but if you’re stuck inside because of the cold, why not be proactive? There are a variety of easy projects you can take on during the winter that you will appreciate thoroughly when springtime rolls around again… So, why not make the most of the next winter storm?
 4) Make Your Closet More Organized
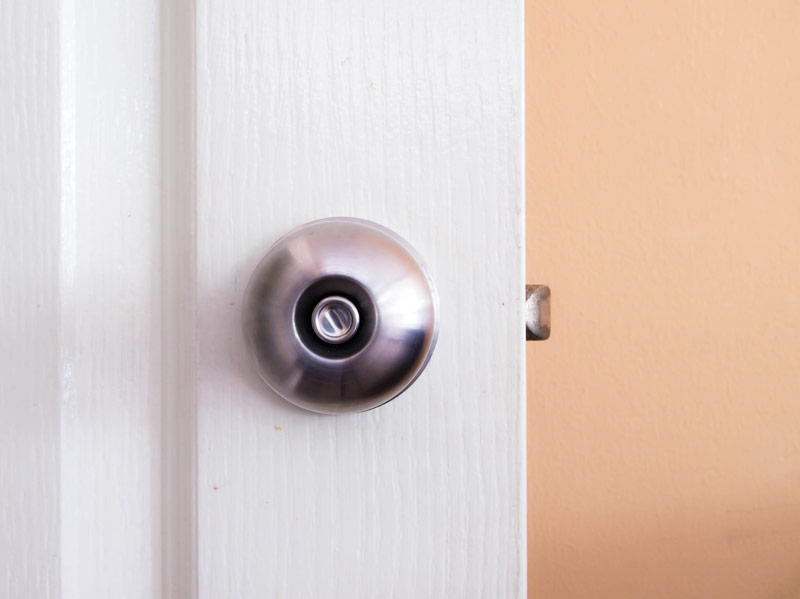


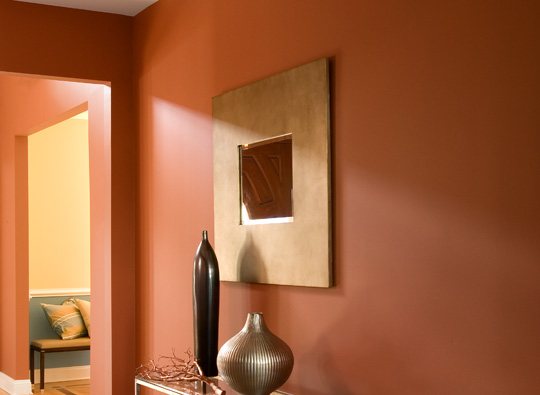
 Satin
Satin