How to Build a Firewood Rack DIY

DIY: How to Build a Firewood Rack

How to Build a Firewood Rack DIY

If you have a wood burning fireplace or stove, that means you’ve got a wood pile. And if you’re lacking a firewood rack, chances are that a heap of unorganized wood is sitting by your back door creating an eyesore.

Even if your firewood is stacked neatly outside the door, you still need to make sure it doesn’t lean up against your house and trap moisture or you will create the ideal conditions for rotting wood and vermin.

The perfect solution? A new firewood rack that will help you stack your wood and create an attractive feature for your deck, porch or backyard. A well-made wood rack helps you store firewood nearby and keeps your porch or front step clean, and dry.

So, let’s “fire” up the DIY and get to work! Check out these easy DIY outdoor firewood racks:
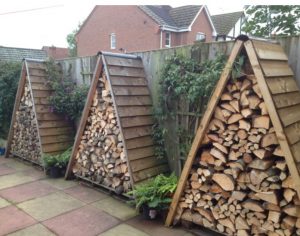
tent-firewood-rack

Stylish Storage

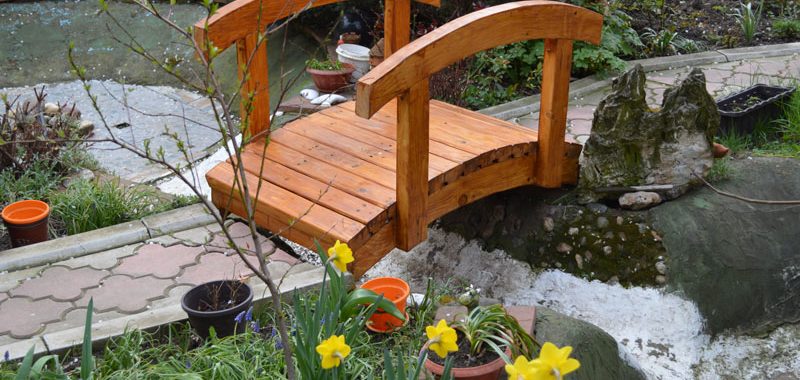
Looking for a stylish way to store wood? Using a pallet as a base, you can create a “tent” with a couple of two by fours and some planks of wood to use as shingles.

This idea comes from Single Track World. They also have some amazing ideas for building a DIY wood storage area or shed. Plus, they are beginner-level woodworker friendly.


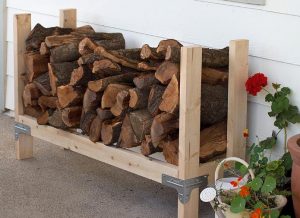
Simple Firewood Rack

If you want to build a simple yet functional firewood rack, then this is the rack for you! This is a simple but gorgeous DIY that anyone can do in less than an hour. For less than $100 dollars, you can have a firewood rack in any size you want. Stop by GNH Lumber to pick up these supplies first:

simple firewood rackTOOLS

  • Saw
  • Screw gun
  • 1/4″ hex head socket
  • Tape measure
  • Clamps
  • Framing square

SUPPLIES

  • (3) 2×4 8 ft. lumber (length can vary as needed)
  • (4) metal connectors
  • (1 box) connector screws

Check out DIY Done Right to download the plans and get started!


Rolling Firewood Cart

Rolling Firewood rack

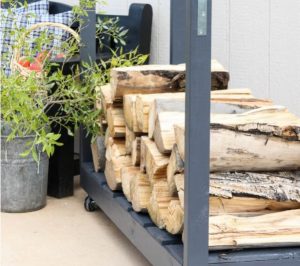
If you want a firewood rack that’s easy to move, you’ll need a cart with wheels. This fun DIY is not only easy to make, it’s mobile! Having a cart that’s mobile is convenient if you entertain regularly on your patio or deck.

This DIY can easily be made in a weekend. If you like the look of wood grain, you can seal the wood in its natural state. But if you want to add color to match your home’s siding or trim, you can also add a coat of paint.  Here’s what you’ll need at GNH to get started:

SUPPLIES

  • 2″ x 4″ x 10′ Lumber, cut to size
  • 2″ x 3″ x 8′ Boards, cut to size
  • Fence Picket Boards
  • Miter Saw
  • Screw Driver/ Drill
  • Countersink
  • 3″ Torx Deck Screws
  • Clamps
  • 4 Casters
  • Sanding Block
  • Porter Cable Framing Nailer
  • 2″ 8 CC Nails
  • Air Compressor
  • Tape Measure
  • Patch Plus Primer
  • Paint Brush
  • 4 Corner Brackets
  • Black Paint

All the directions and some great DIY photos of the process can be found on thewoodgraincottage.com.


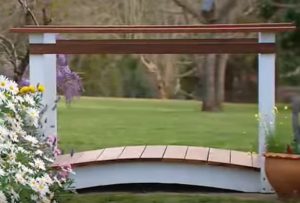
Firewood Rack with Roof

This is an awesome video that walks you through the process of building a super cool firewood rack completed with a roof and enclosed sides. They make it look easy and the end project is amazing!  If you want to create a firewood rack complete with a roof, check it out:


Happy building! And don’t forget that the experts at your local GNH Lumber are available to answer your questions, make suggestions, and help your complete your DIY project. Stop by today!

garden bridge

DIY: How to Build a Small Garden Bridge

garden bridge

What could be more charming than a small wooden bridge to accent a water feature or help you step over uneven sloping in your garden? And, it’s easier than you think to create your own bridge! Just follow these simple instructions for a sturdy, arched garden bridge with handrails that you can paint or stain any color you like.

Here’s what a small garden bridge DIY project requires:

Materials:

  • (2) 2x12s hardwood (for support stringers)
  • (13) 2x6s hardwood (for floor planks)
  • (2) 8’ 4×4 treated pine post (for handrails), cut into 6 32” posts
  • 25” Length of bendable conduit (to create arch guide on stringer)
  • Benjamin-Moore Paint or stain (available at GNH) & brushes
  • Wood screws (2” stainless steel)
  • Wood nails
  • Pencil (for marking)

Tools:

  • Circular saw
  • Jigsaw
  • Electric screwdriver
  • Drill/drill bit (1/2”)
  • Hammer
  • Wood planar
  • Vice/wood clamps

1. Draw Arches on the 1st Support Board (Stringer)

Lay one of the 2×12 boards flat to prepare to sketch pencil guides for the top and bottom arch shapes:

stringer diagram

There’s a simple trick to creating a perfectly even archway – and it works every single time! First, drive a guide nail on each end of the board. Next, bend a length of plastic conduit between the two nails (see diagram above), and use the conduit as a guide to draw the arch onto the board with your pencil.

For the lower arch, drive two nails into the lower side of the wood, each 18” from end. Repeat the process of bending the conduit between the nails and drawing the lower arch onto the wood.

You will cut the 1st archway, and then use that as a guide for the 2nd archway, so there’s no need to measure twice!

Tip: Leaving 18” from the end of the boards on the bottom cut ensures that there will be plenty of support on the stringers for the weight of the bridge.


2. Cutting & Sanding the Stringers 


The easiest way to cut the top arch from the first stringer board is by a series of short straight cuts using a circular saw. For the bottom arch, a jigsaw works best – just be sure to move slowly to get through the thick wood without damaging the blade!

Now, lay the finished stringer atop the second 2×12 board, and use it as a guide to draw the arches onto the second board in pencil. Cut the second board.

Finally, clamp both stringers together and use a wood planar to smooth out any rough edges in your archway cuts.

Paint stringer boards white (or any color or stain you choose)! We suggest Benjamin-Moore exterior paints or Arborcoat stains – available at GNH Lumber!

Allow to dry.


3. Cutting & Drilling the Planks


Cut your hardwood 2x6s into 36 inch planks. Place the stringer boards parallel on the ground and measure 32 inches between them, top and bottom (to allow for 2” of plank overhang).

Place a hardwood plank onto the stringers and arrange so that there is even overhang on both sides. Mark and pre-drill two holes on each side of the plank (all the way through to the stringers below). Drill 2” stainless steel screws to tighten.

Next, place the second plank onto the stringers. Using a carpenter’s pencil, measure a space between the first plank and the next. Now, repeat the steps above to secure the plank in place.

Continue working from one end of the bridge to the other until all the planks are secured to the stringers!


4. Attaching Posts & Handrails


If you choose to add posts and rails to your garden bridge, cut your 4 x 4 posts into four 32” lengths, and paint them white (or any color or stain you choose – just make sure it matches your stringer boards). We suggest Benjamin-Moore exterior paints or Arborcoat stains!

Allow to dry.

Remove the 2nd or 3rd planks from both ends of the bridge for post placement.

Place rail posts to the outside stringer boards, one at a time. Use a T-square to ensure they are at a clean right angle to the ground. Pre-drill holes and then secure to the stringer with wood screws.

garden bridge 2

Next, measure and cut the planks to fit around the rail posts before returning them to the bridge.

Finally, add handrails to match the planks of the bridge! Secure the handrails to the posts with 2 wood screws through each post on both ends of the bridge.


That’s all there is to it! Enjoy your brand-new garden bridge! Place it over a small creek, water feature or uneven sloping on your property.


At GNH Lumber, we have everything you need to create your beautiful garden oasis. For more guidance, tips and ideas, stop in to our Greenville or Windham locations, or visit us today online!

Sources: Great Home Ideas, How To Build A Backyard Bridge, Handcrafted Garden Bridges, Footbridge Page 1, Handcrafted Garden Bridges, Footbridge Page 2