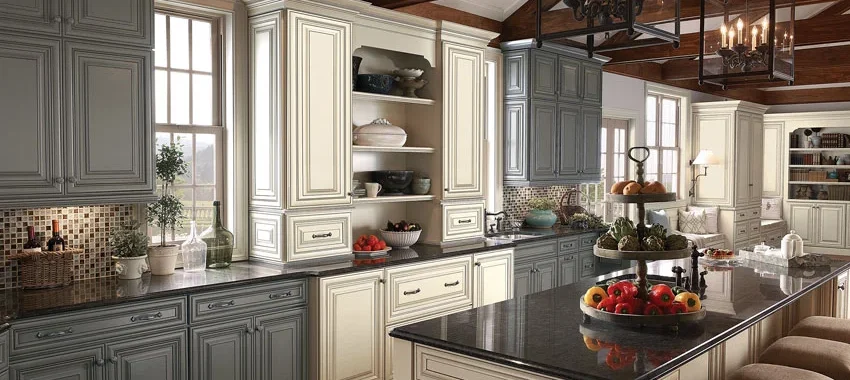
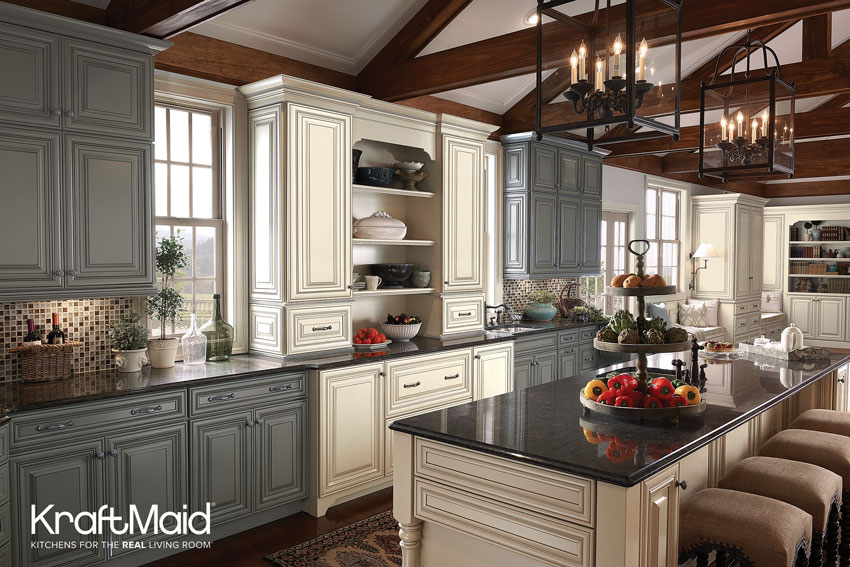
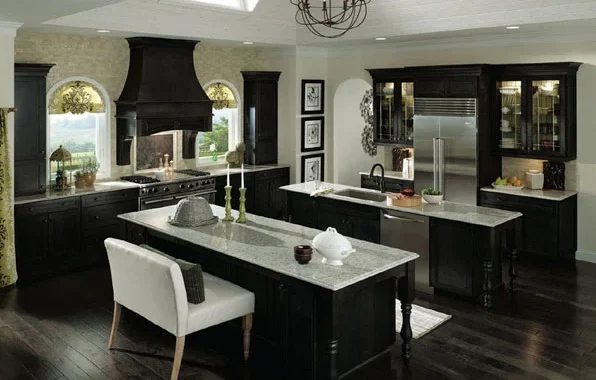
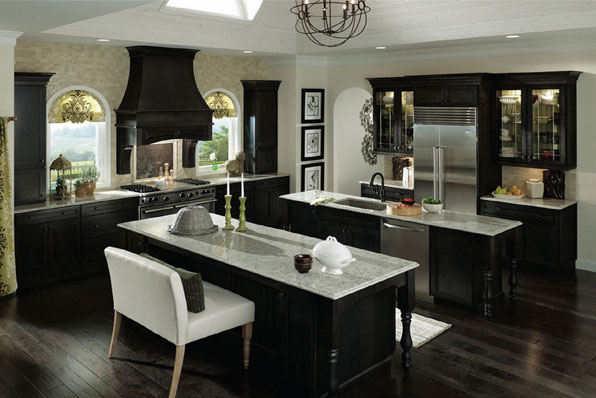
Is your kitchen space large or open concept? The layout of your kitchen design will help establish work zones, influence counter space, and allow for seating – or maybe not. Your GNH designer will help you choose a layout that maximizes your larger kitchen space and supports your family’s goals.
Here are three popular kitchen layouts for larger kitchens from KraftMaid:
1. G-Shaped Kitchens
This layout uses nearly every square foot of available floor space by adding a peninsula or partial fourth wall of base cabinets to a U-shaped layout. Because the narrower entrance into the work zone can make a cook feel claustrophobic, this layout works best in larger kitchens.
Adding a short return on the open side of a U-shaped layout minimizes traffic flow in and out of the work zone.
There are plenty of places to set up specialized zones.
This layout features the most corner base cabinets. Use corner storage solutions in your design plan to maximize utility in these awkward spaces.
2. L-Shaped Kitchens
Placing cabinets along two perpendicular walls form an L-shaped layout and adapts well to a variety of spaces, making them one of the most popular kitchen layout options.
This layout is the most cost-effective and efficient way to create a work triangle.
Typically, one side will feature your sink, while the stove goes on the other. Your refrigerator can go on either side, the longer one if available.
L-shaped layouts are great for kitchens that open to a dining or living room. With no barrier between the kitchen’s work space and adjacent room, both areas feel larger.
3. U-Shaped Kitchens
A U-shaped kitchen has cabinets along three walls with open access on the remaining side. If your room is large enough, set up multiple work zones on different sides of the “U” so two people can use the kitchen without getting into each other’s way.
Continuous countertops and ample storage surround the cook.
A U-shaped kitchen has potential for more upper cabinets than other layouts.
When three perimeter walls aren’t available, add a peninsula to an L-shaped kitchen to form the third side of the “U.”
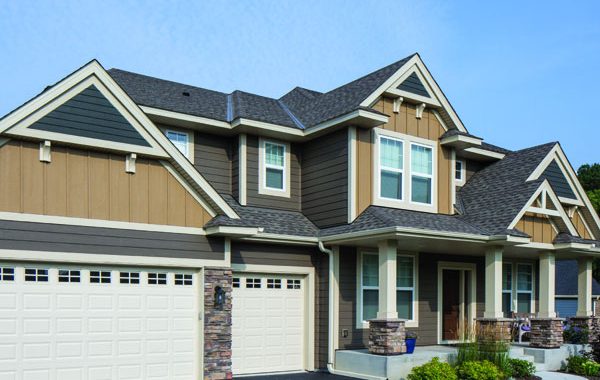
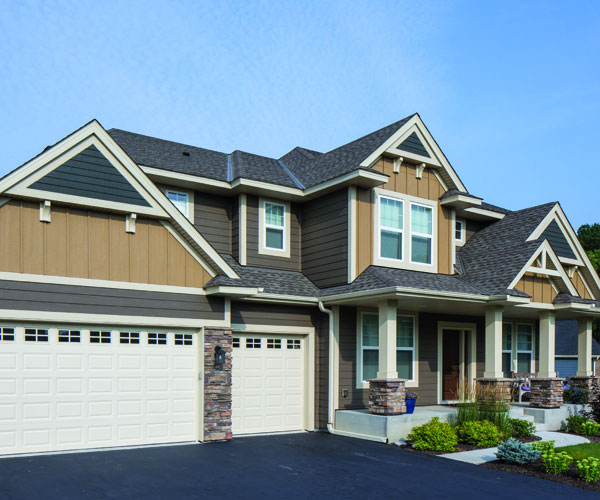
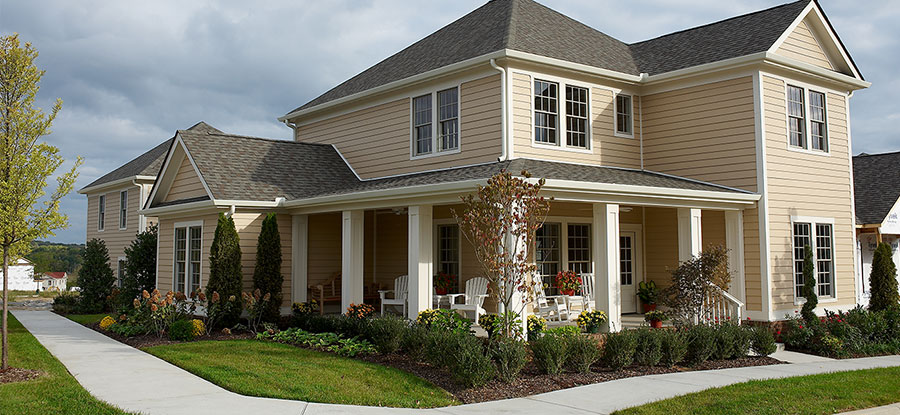
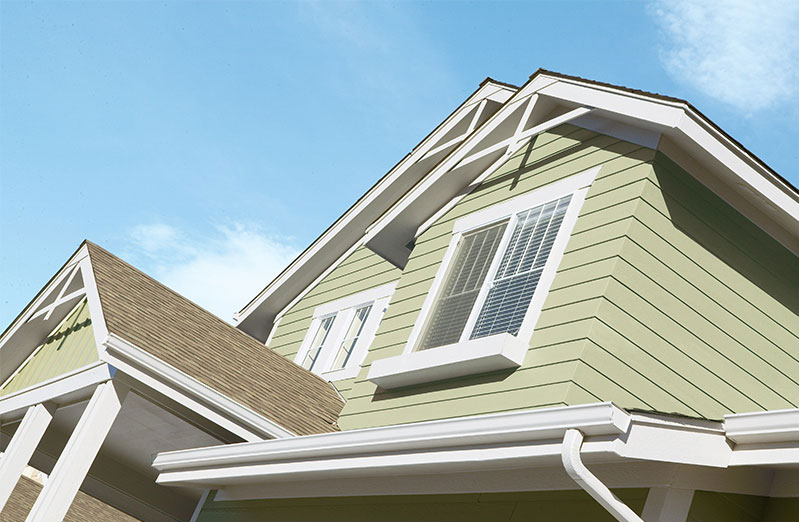
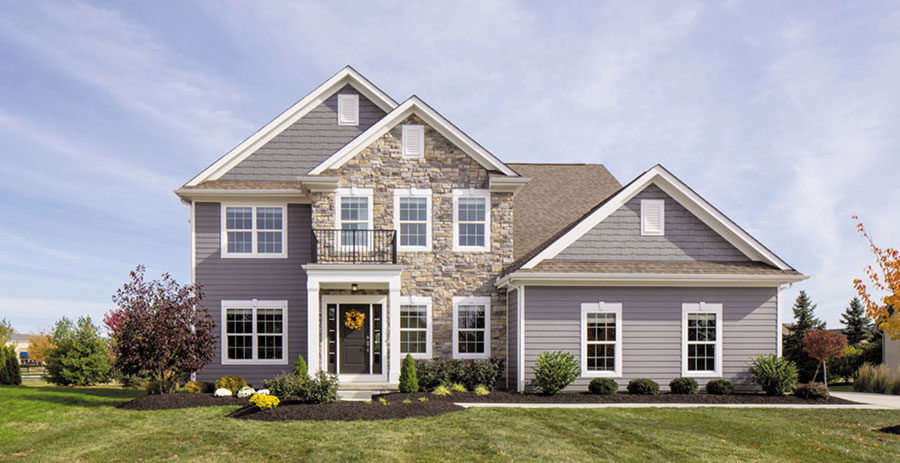
There are many benefits to choosing a neutral color palette for siding and trim. For one, neutral colors appeal to the broadest range of potential home-buyers, making your home more marketable when it comes time to sell.
Neutrals also may be the top pick in your particular neighborhood, and therefore necessary to help your home blend into its location. And because siding is something that will potentially grace your home for decades, neutral siding and trim colors are a timeless choice.
Even if your current siding color palette is quite basic, this doesn’t mean your home can’t have personality and curb appeal.
There are many creative ways to accent neutral siding if you’re looking for just a pop of color. Try these ideas to give your home a fresh new look!
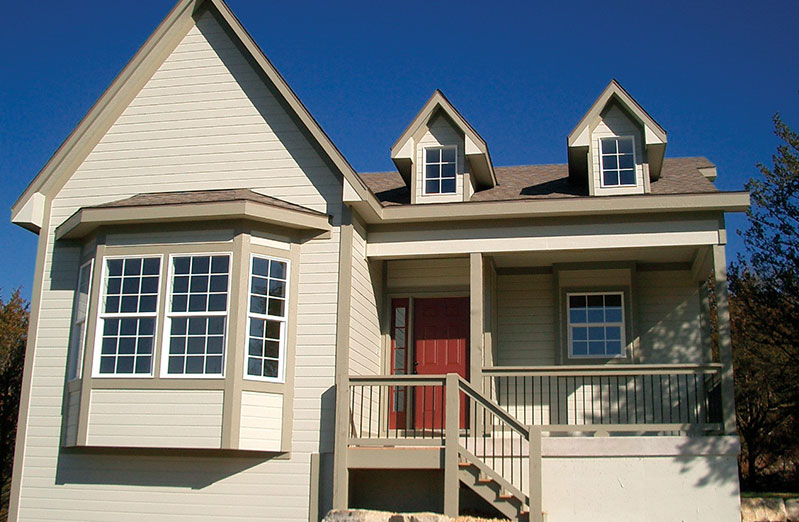
1) Create a Welcoming Entrance
The entry door is a great candidate for color! If you want to paint an existing door, use a high-quality acrylic latex paint for maximum durability. Before painting, don’t forget to clean the door, use a sander or sandpaper to remove any imperfections, and apply a latex-based primer.
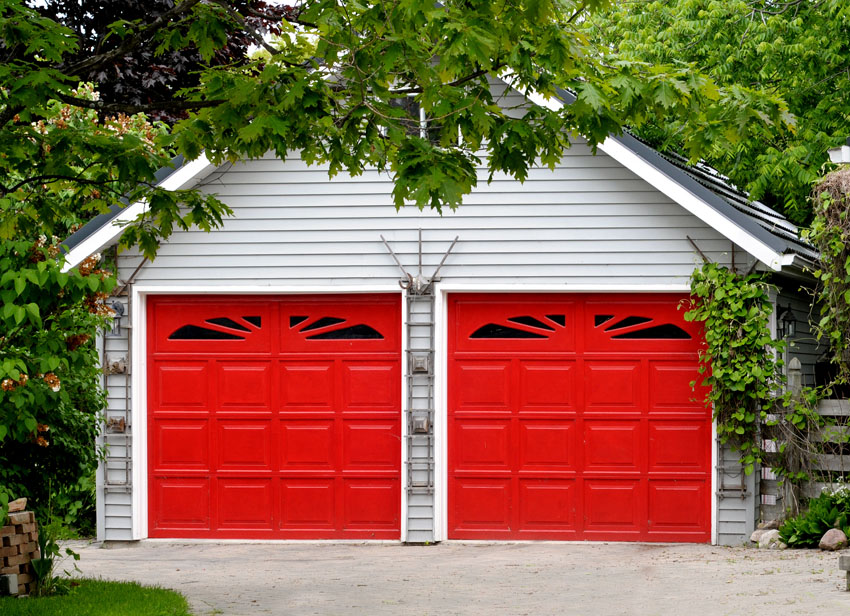
2) Choose a Bright Garage Door
Take it from DesigningIdea.com: “The color red brings intensity to a home’s character. It creates a strong impression and radiates a welcoming feel. Red garage doors are intense visual components which direct the attention away from the house. This is the ideal color if you want to make your garage door stand out from the rest of the features of your home.
“Aside from the popular ravishing red and fire red, there are less intense options like burgundy and maroon which work well as garage door colors for traditional houses. Red garage doors work well for neutral (white or beige) and earth toned exteriors. For more modern and adventurous applications, a red garage door can also be used for adding a punch of color for pale yellow or blue houses.”
3) Add Bold Shutters
Whether functional or decorative, shutters add color and historic charm to a home. For the look of wood with the least amount of maintenance, look for shutters made of fiberglass, PVC or composite wood.
4) Try Creative Gardening
A neutral home can be the perfect backdrop for a riot of colorful shrubs and flowers. From blooming shrubs to lovely annuals and perennials, there are many plant options to make your home inviting. Ask your local nursery or landscaping company for recommendations.
5) Colorful Pavers & Pathways
You use winding, curvy pathways to contrast with and compliment the hard lines of your home exterior – why not also use them to add a pop of color? Try alternating brick red and light tan to create a host of interesting designs, patterns and effects.
6) Rock Some Unique Porch Chairs or a Swing.
Can’t commit to a bold shutter or entry door color? Take your color to something that can be moved, such as chairs, a swing or planters. You’ll get the same colorful effect that can be easily updated or removed when the mood strikes.
Is it time for new siding? Are you interested in learning about LP® SmartSide® engineered wood siding products? We invite you to experience the upside of remodeling with the LP SmartSide Visualizer. Pick your home style, or upload an actual photo of your home. Choose your siding and trim colors. See what you can achieve with different LP SmartSide siding options. Then get your home re-side project started today by requesting a project quote or scheduling an appointment at GNH Lumber to discuss your project particulars!
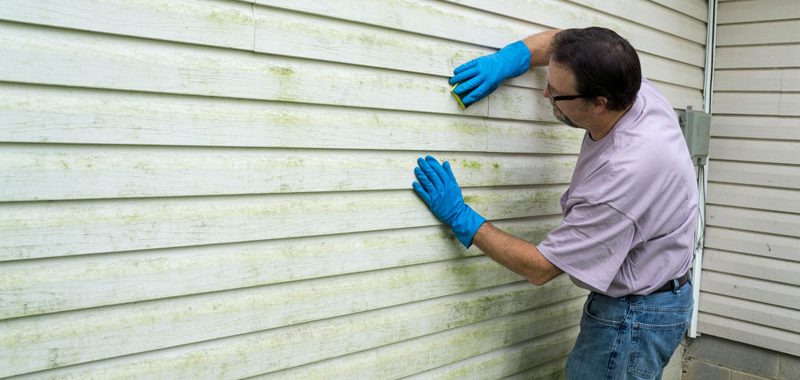
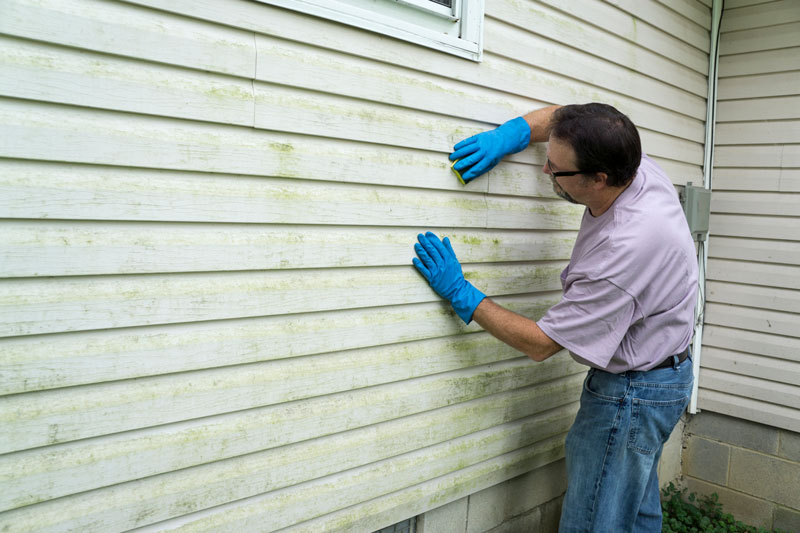
Keeping your home’s exterior siding in good shape is not only a great way to improve your home’s appearance, it also helps you avoid repairs and costly services down the road. With a bit of preventative maintenance, you’ll be able to extend the life of your home’s exterior siding for 50+ years!
In this blog, we’ll discuss how to clean and maintain your home’s exterior siding so you won’t have to worry about costs adding up for a few decades.
How Do You Maintain Your Home’s Exterior Siding?
No matter the materials, it’s important to clean your home’s siding every six months or more to keep it in optimal condition for many years to come. You should also inspect your home’s exterior for any damages at least every six months, or after violent storms and high winds. Here’s a quick guide on how to maintain the siding of your home based on the material:
Vinyl Siding Maintenance
Vinyl siding is low maintenance and is designed to be left alone, which is great! However, this doesn’t mean that it doesn’t have to be maintained. The good news is that you can easily clean vinyl siding yourself.
Vinyl siding requires a good power washing about twice a year. Check a few times a year to make sure no boards have come loose or are cracked. If they are, they will need to be fixed as soon as possible. High winds can cause damage and cracks to vinyl easily, so if you had a windy season, be sure to do a walk-around your home after the storm. Remember to give it a good pressure-washing twice a year to reduce damage and renew bright colors.
Tip: Making repairs early will save you money on more costly repairs further on down the road!
Wood Siding Maintenance
Wood siding will need to be treated every 4 to 6 years. In New York, sun and snow are particularly abundant so you may have to treat it more often than that. Because wood is porous and vulnerable to the elements, it also requires paint, stain or sealant to prevent it from moisture, rot and decay.
Like vinyl siding, you need to check the wood siding for cracks and breaks. Most repairs are easy to fix, so do it as soon as you notice the damage. If the color of your wood siding has been lost due to fading and old age, or if it’s spotted with mildew or rest, don’t worry! You can recover your wood’s natural beauty by using a stain remover, wood cleaner or brightener.
Stucco Maintenance
Often times, woodpeckers will attack your stucco siding. They tend to leave holes which will need to be replaced immediately or else they will live in your walls. Since stucco is a very porous material, if a tree leaks its sap on your siding, it can take over and cause huge problems. It can stain rather quickly so go around once or twice a year to remove any stains that are starting to form with a degreaser and bleach.
Cedar Shake Maintenance
If you want your cedar shake siding to live for a long time, you want to make sure it’s treated or stained properly and checked often. Left untreated, cedar shakes can discolor and start to soften, causing it to rot. In order to maintain healthy cedar shakes, you want to make sure to paint or stain the cedar every 5 years. Stain is a more effective protectant for cedar than paint so opt for stain when you can. Hiring a professional to paint or stain your cedar shakes could cost upwards of $2,500 depending on your home’s size.
How Often Should You Clean Your Home’s Siding?
The exterior of your home needs a good cleaning about twice a year. Overtime, cobwebs, dirt and mildew can build up and shorten the life of your siding. A clean house will protect your siding as well as your investment.
How Do You Clean All Types of Siding?
Cleaning the siding of your home can be a bit treacherous, but luckily you only need to do it once or twice a year!
All types of siding benefit from a good cleaning to remove residue. Here’s how to do it correctly:
1. Check for Cracks and Damages in the Siding
Do a quick walk around your home and check for cracks, chipped paint, cracked boards, or other damages before you start the process of cleaning your siding. If you have cracks, water from cleaning could seep into the home, causing serious damage and trouble over time.
2. Invest in a Power Washer
A power washer is key to getting up in the peaks of your house by the roof, blasting away grit and grime, and takes far less time that washing the home’s siding by hand. This is especially true for homes with vinyl and wood siding.
3. Scrub the Siding with TSP
Next time you’re at GNH Lumber, pick up some TSP (trisodium phosphate). The TSP that GNH Lumber carries is phosphate-free. Mix ½ cup with 1 gallon of water and apply to a sponge, washcloth or soft-bristled brush. Start scrubbing those stubborn areas where birds or spiders have left their droppings. These are usually the toughest things to get out of your siding! Work from the bottom to top to avoid streaking and then rinse.
Don’t want to mix your own solution? GNH recommends 30 Seconds Cleaner for Algae, Mold and Mildew. This powerful formula is safe to use around landscaping, plants and your lawn. Simply attached to a garden hose, spray on and hose off. It is proudly made in America and has been around since 1977 so it is a tried an true product. Stop into our Greenville or Windham locations and ask for it by name.
Keeping your home clean and maintained properly can save you tons of money in the long run!
With the weather warming up and the days growing longer, it’s the perfect time to spruce up your home exterior! Whether you’re building a backyard retreat (complete with firepit!) or looking to give your home exterior a new look, one product stands out. Cultured Stone veneers are a stylish and versatile option that are great for many projects. What’s more, they’re the right tool for anybody – DIY or contractor, for jobs big and small. The installation process is simple and can be completed in just a few days.
Materials Needed
Before you begin the exterior installation process, make sure you have the following tools and materials on hand:
• Cultured Stone manufactured stone veneers
• Safety equipment (N95 mask, safety glasses, work boots, etc.)
• Flashing
• Rain screen
• Jointing tool
• Masonry brush
• Spacers
• Water resistant barrier (WRB)
• Grout sealer
• Pointing trowel
• Notched trowel
• Welded wire lath complying with ASTM C933
• Corrosion resistant fasteners (staples, roofing nails, etc.)
• Mortar (scratch coat, setting bed, and pointing)
• Drop cloths and cleanup supplies
Job Site Setup
Before beginning your project, start by storing all your materials out of the way, but still convenient to application. Be sure to eliminate any trip hazards and keep your Cultured Stone veneers protected from any worksite dust or inclement weather. Use your drop cloths to protect any landscaping.
Wall Prep
If your home exterior project has metal or wood framing, begin by applying two layers of WRB as independent layers, lapped in “shingle” fashion. Evenly install your flashings across the primary layer. Make sure that your primary WRB meets all building codes and manufacturer requirements, depending on your project.
After installing the primary layer, apply the second “sacrificial” layer of WRB, to allow incidental water to drain down and out. Lap each material 2” horizontally and 6” vertically, fasten with WRB-approved fasteners.
Make sure that any contact with doors or windows are flashed properly. Head flashings and drip screen will help resist water damage.
Adding Your Rain Screen
For any home exterior projects that involve adding Cultured Stone veneers to your walls, adding rain screens adds an extra layer of protection against water damage. This physical airspace behind the cladding provides a larger path for drainage, using a ventilation drying effect. Standard building codes allow for just a single layer of rain screen, but be sure that it is at least 60 minute building paper or equivalent.
Lath Application
Depending on whether you use expanded metal, woven wire, welded wire, or alternative lath, it needs to transfer cladding load to your framing. Make sure your fasteners penetrate the framing and are spaced evenly. Typical applications would have fasteners 16” on center, spaced a maximum of 7” vertically.
When placing lath, always end lap joints over framing and fasten them there. Any that does not land on framing will need to be wire laced. For all overlaps, use at least 0.5” horizontally and 1” vertically and at end laps. NEVER end your laps at a corner, as this creates sharp edges and breaks in the barrier.
Mortar Application
Once the lath is installed, check for roughness. This will tell you the direction of the cups and determine which direction to apply the mortar. Follow the same path as the cups, using consistent pressure with your trowel to ensure mortar completely fills the lath. Whether your mortar is pre-blended or created on-site, make sure it meets NCMA standards.
Aim for at least a 0.5” to 0.75” layer of mortar, as anything less than 0.5” inches is too thin and runs the risk of cracking. Cover all lath at your target thickness, keeping at eye out for thin spots. You may need to apply a second layer to achieve desired thickness and levelness.
After letting the mortar cure for a few hours, it’s time to texture the surface with a scratch coat. Use your notched trowel in even, horizontal strokes across the mortar. This will allow your Cultured Stone to connect easier to the walls or surfaces. Allow at least 24-48 hours for the mortar to cure completely.
In warmer weather, remember to lightly mist your scratch coat and stone units to keep them properly hydrated.
Setting the Stones
Before installing the stones, check the back of each and remove any dust or debris. Then, gently dampen the scratch coat and stone units with clean water. Make sure both look saturated, but not shiny with water.
Apply your setting bed mortar onto a few square feet of the prepared surface with your trowel. Then apply a thin “back butter” of mortar to the entire back of the stone unit. Press the stone into the setting bed mortar on the wall. Leave enough space for joint gaps, and then leave the stone be.
Clean out mortar droppings as you go along and check stone bonding periodically. If a stone needs to be re-mortared, remove all original mortar first before re-applying and re-setting.
Be aware that if you’re setting stones in corner layouts, that flat stones can be nested and alternated to create a uniform look.
Large Format Stones
For large firepits or radical home exterior redesigns, large format stones are a viable option. The key to proper bonding is achieving a full setting bed of quality mortar, with ample spacing between units. You should also take time to ensure your scratch coat is level and straight, adding another coat if necessary. Many of these large format stones are fitted with mortar joints, but you may need to use a larger 3/8” inch joint to make filling with mortar easier. Use spacers on all four sides of each unit to maintain uniform mortar joint gap, and remove carefully after the mortar has cured.
Joint Treatment & Wrap-Up
With your stones placed and spaced appropriately, you’re now ready to fill in your joint gaps. Make sure the mortar you use is smooth enough to flow easily through a grout bag. Carefully remove any excess setting board mortar from the joints before filling.
Fill in each joint gap evenly with mortar, being careful not to disturb the stones as you go along. Once filled in, wait until the mortar is thumbprint hard, then you can tool the joints as needed. Depending on your desired look, use either a tooling joint or a wooden stick to shape them.
After the mortar has had time to set, be sure to go over it with a masonry brush to remove any additional debris.
From here, it’s just a matter of cleaning up your worksite and letting your new wall or outdoor feature set. For more information on installing Cultured Stone outside your home, be sure to contact our talented design team!
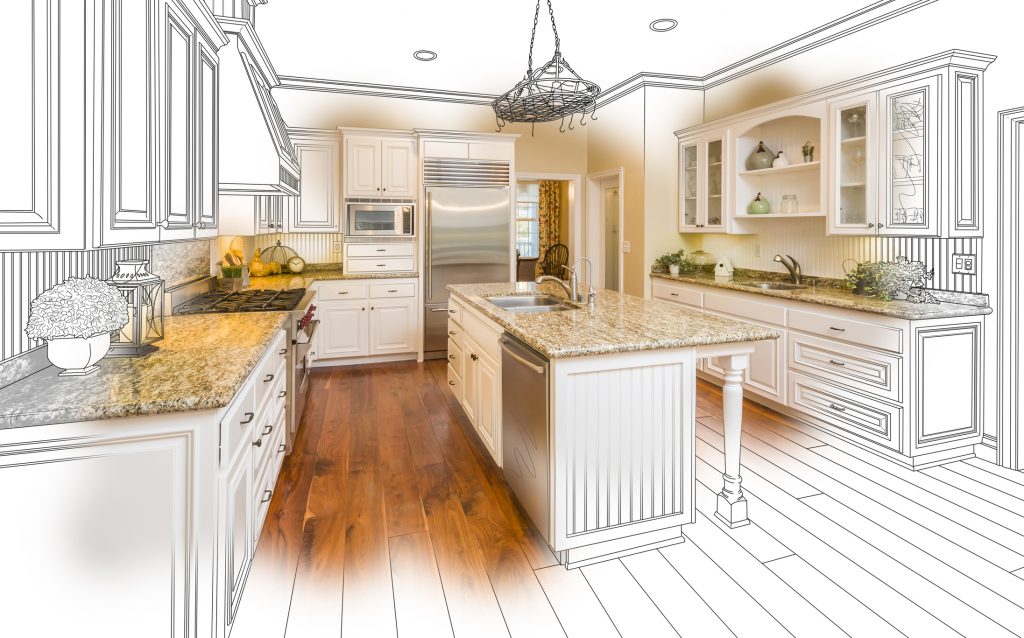
Get a jump-start on planning and designing the perfect kitchen for your family! It’s easy to create a gorgeous new kitchen with help from the pros. They’ve been doing it for years and are often on top of the newest trends. To help you get started, check out these 7 kitchen remodel tips and trends from GNH Kitchen Designer, Michele Gregg.
Things to Consider as You Plan a New Kitchen
1) Budget Wisely & Plan Appropriately
When you’re planning a kitchen remodel, making a budget and plan and sticking to it is key. The National Kitchen & Bath Association(NKBA) recommends spending 15-20% of your home’s value on your kitchen remodel. This guideline ensures that your new kitchen is a wonderful investment towards the value of your home. Planning your kitchen remodel should take more time than the actual construction. By planning well, you can reduce the amount of time you’re inconvenienced by construction mayhem. Plus, you’re much more likely to stay on budget!
2) Consult a Pro
Don’t forget: a kitchen remodel involves more than just replacing cabinetry. Working with an experienced designer will help you navigate all aspects of your kitchen remodel. From cabinets and countertops, to lighting and fixtures, and more! Designers stay up to date on trends & new materials. They are familiar with their local building codes and working with contractors. Their experience will translate to avoiding delays and will save money in the long run.
3) Have patience!
Each space is unique, and your perfect kitchen will take time to design, plan and create. Take time to enjoy the process of designing, planning, and product selection. It will be worth it in the long run! The more challenges you can anticipate and solve in advance, the faster your remodel will go, and the more money you will save.
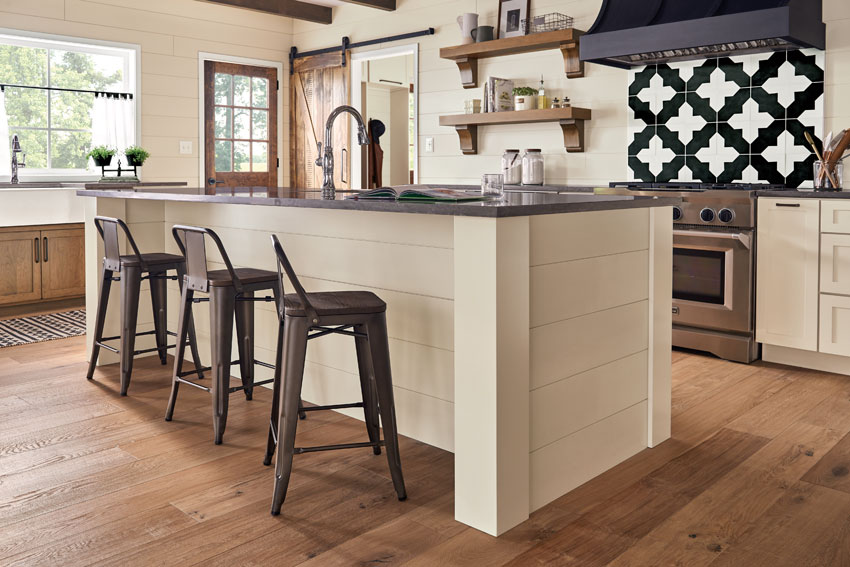
Popular Kitchen Design Trends
4) Add More Functions
Today’s kitchens are designed to accommodate more than just cooking. Kitchen designers now create spaces where people can gather, play games, and even work on their laptops or mobile devices. Of course, the modern kitchen is still a place for cooking, baking, cleanup and prepping meals. But, in addition to these basic functions, our kitchens have evolved. We’re now using this all-important room to entertain our family & friends, help our kids finish their homework, balance household budgets or plan parties–and much more!
5) Break it Open
Open concepts are very popular. Even the smallest kitchens will feel bigger and brighter in an open concept layout. This also floods the space with daylight coming from windows in other rooms and can facilitate airflow. But larger kitchen spaces are also trending towards the open concept layout. By opening up this all-important room to the living room, you make it easier to interact with your family or guests from the kitchen as they relax on the couch. You can add space needed to create “entertaining zones” like coffee nooks, breakfast bars, and more.
6) Storage, Not Space
More storage will never go out of style. Even if you’re working within the footprint of your existing kitchen space, you can still add tons of storage! Try installing cabinets that reach your ceiling. This adds more shelving space and gives you a spot to display that beautiful dishware up top. You can also install shelving units, racks, and hooks in unused spaces. These could be empty sections of wall, inside cabinet doors, or even your ceiling.
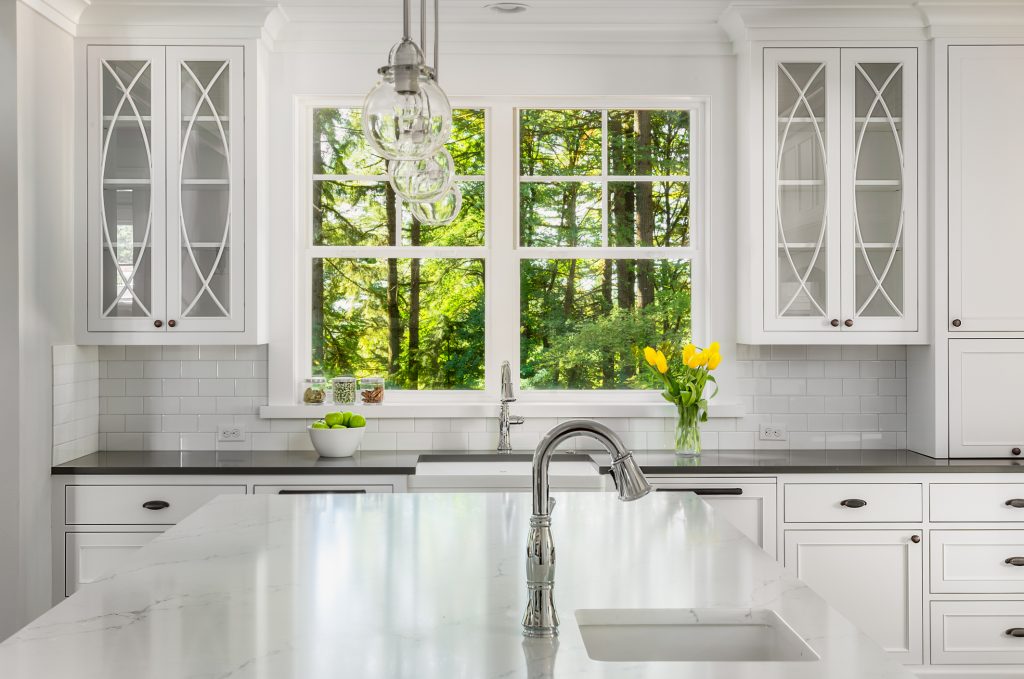
7) Go Bold
Design with color and texture in mind. White Shaker style cabinetry has been popular for years now. While it still remains popular, we are now finding ways to introduce color and texture. A dark navy-blue island stands out against the white perimeter cabinets. Wood stained floating shelves that coordinate with the hardwood floors. A honed or “leathered finish” countertop that creates warmth.
Your windows may appear operational, but if they whistle, rattle or leak, then you’re likely losing money in heating costs. The same is true of your brittle or cracked weather-stripping. Small leaks, cracks and rattles add up to a big difference in your monthly utility bills.
If it’s time to update your windows, consider double hung replacements. There are many advantages to the design of the window, including easy cleaning and care. In addition, double hung windows can improve energy-efficiency and curb appeal, too.
Here are some of the major advantages of double hung windows:
Superior Ventilation. They provide great ventilation capabilities and the ability to control airflow. For maximum ventilation, you simply open both top and bottom sashes – the bottom sash will let in cool, fresh air, while the top sash will allow warm indoor air to be expelled through it.
Aesthetically Adaptable. Its traditional look can match any home style. In fact, double hung windows are known for their classic appeal, which makes them suitable for any home or room. They also come in a variety of styles, sizes, colors, and finishes.
Easy to Maintain. These windows often come with tilt-out sashes that make cleaning easier, as you can clean both the interior and exterior from inside your home. Some even have removable sashes.
Addition Friendly. They are ideal for the easy fitting of air conditioners and screens. Because most units are designed to slide up and down instead of cranking out or sliding to the side, they can safely hold AC units, and allow for their easy removal, as needed.
Energy-Efficient. Aside from the superior ventilation mentioned earlier, this type of window brings in a generous amount of natural light. By choosing Low-E glass with gas fill you can further enhance savings on your energy costs.
For all these reasons and more, you should seriously consider double hung windows as an option when choosing replacement windows for your home.
Get Your New Windows Today!
The experts at GNH Lumberare here to answer your questions, provide product suggestions and tips for each step of your window replacement project! Click here to get started.
Are you looking to cover your walls with calming paint colors? Benjamin Moore has color choices that will make you feel even more at home.
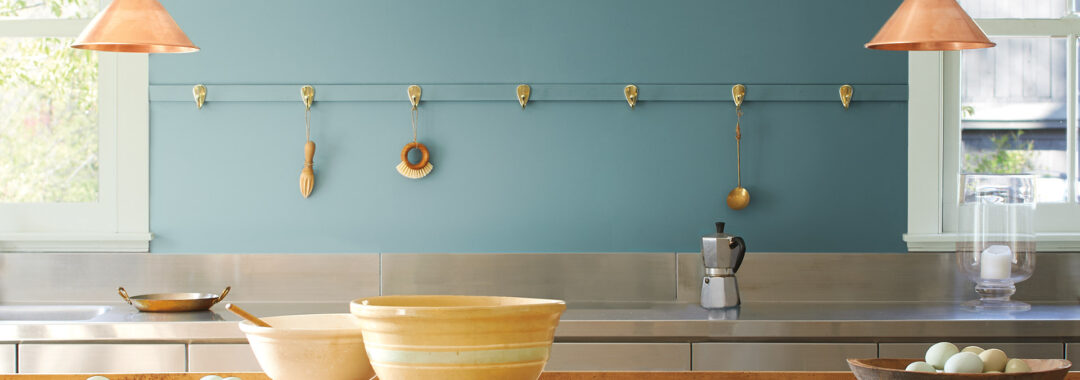
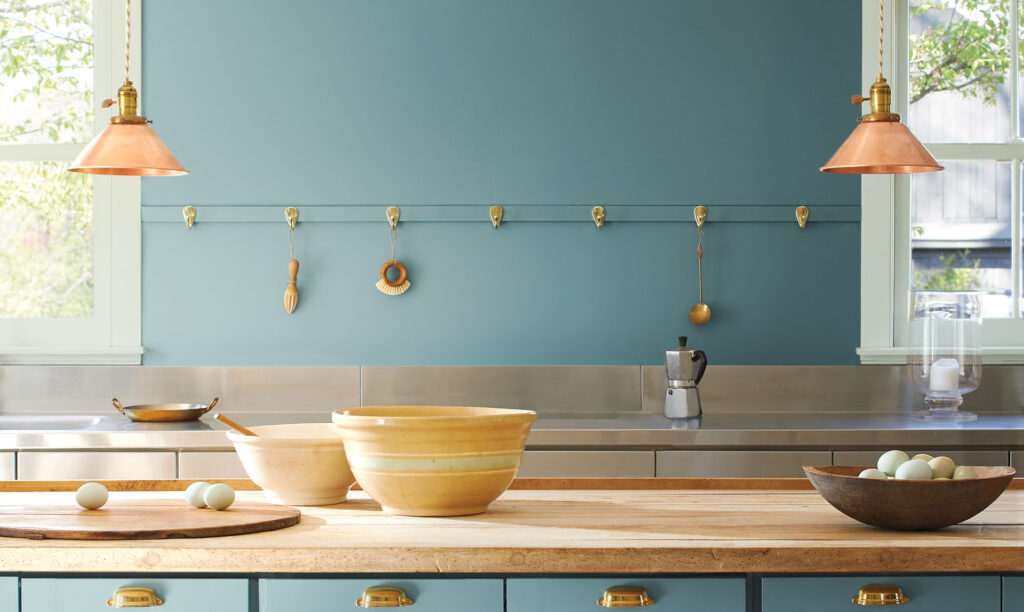
“Soft power, silence, pause.” These are some of the words that Benjamin Moore uses to describe the blend of blue-green and gray that is Aegean Teal 2136-40. This intriguing mid-tone creates natural harmony and looks just as amazing in the kitchen as it does in the bedroom, den or home office.
Want calming paint colors? The entire Ben Moore “Color Trends Collection” is designed to nourish the spirit with the comforting, sun-baked hues. It also helps us celebrate the simple pleasures in life—like “the faded rumple of linen sheets in the morning and perfectly ripened fruits on the windowsill. The twelve hues in the palette radiate warmth and well-being. These are colors that make your home feel even more like home. Settle in.”
So, go on… Take a moment to reflect and reset. Intriguing, balanced, and deeply soothing, the Benjamin Moore Color, Aegean Teal 2136-40, creates natural harmony. Check out the full video introduction to this calming blue-green and gray combination:
This isn’t your ordinary mid-tone teal. The slight hint of bluish-green evokes calm and harmony, while making yellows, whites and beige tones POP!
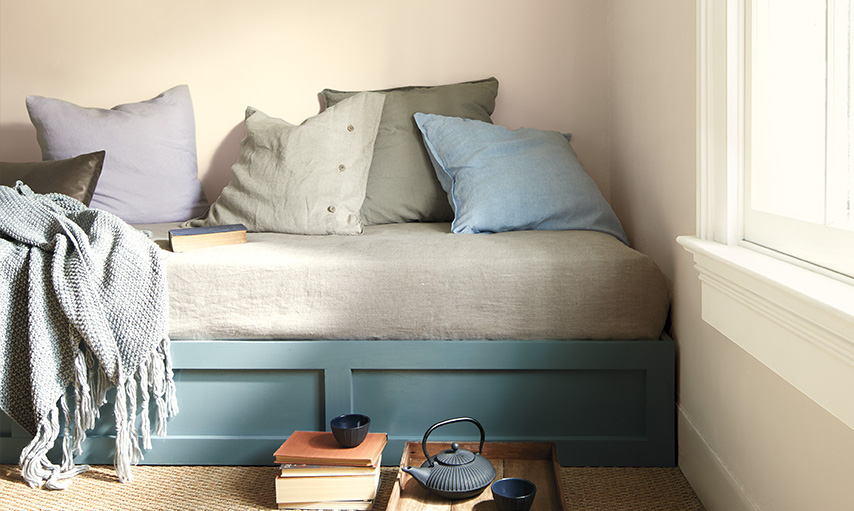
Reclaim Your Ease
Pair Aegean Teal 2136-40 with Muslin OC-12 to beautiful effect, like in the cozy bedroom above. Muslin OC-12 is part of the Off-White Color collection. Inherently sophisticated and endlessly versatile, the Off-White collection offers subtle nuances of whites that suit tranquil, serene environments as well as creates color-enhancing accents for dynamic spaces.
Tip: Less is more when working with this subtle teal. Surround Aegean Teal with whites and off-whites to allow its soft colors to really sing.
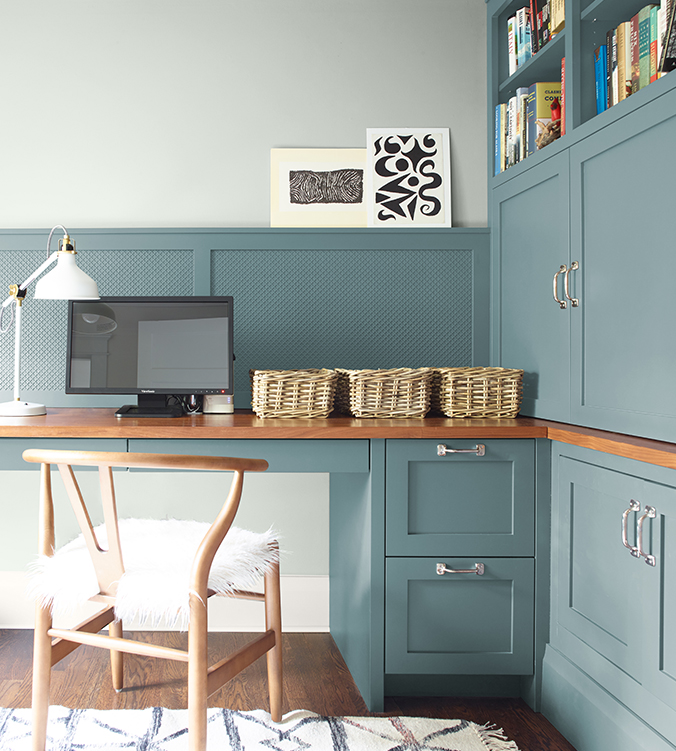
Work in Harmony
Create a home office that truly inspires productivity! These soft Aegean Teal 2136-40 cabinets create a sense of balance to help you work better and feel less distracted. It pairs well light gray walls like Benjamin Moore’s Foggy Morning, or Gray Cashmere.
Tip:Wicker baskets, metallic hardware and lighting fixtures complete this cozy and homey look.
Get Your Interior Painting Project Done!
Painting the rooms of your home can have tremendous impact, and it’s a great family project with a modest price tag. Strive for a balance of linear elements and colors, and don’t be afraid to ask the experts at GNH Lumber for guidance and tips along the way. Get your painting project started!
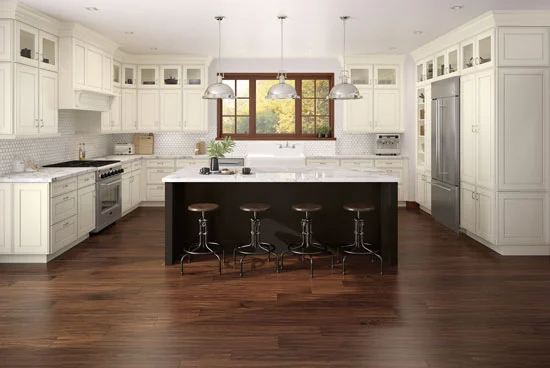
Kitchens are often central to a home, both in terms of their physical location and with regards to their importance. It’s where we prepare our morning coffee, make the kids’ packed lunches, bake birthday cakes, and gather when hosting holiday dinners. So, why tolerate a dark and gloomy kitchen?
There are many tips and tricks to making your kitchen brighter, including these 3 budget-friendly kitchen improvement steps.
1. Fresh Paint
There are several kitchen elements that can be brightened up with a fresh coat of paint, including:
The Ceiling If the room’s ceiling is painted a dark color, or has dark wooden beams, it’s probably casting a pall over the entire room. Buy a can or two of white paint and give the ceiling a fresh coat! The bright white will reflect light instead of absorbing it, and you’ll be amazed at what a difference it makes. If you don’t want to use white, try a pale yellow or even a mint color.
Kitchen Cabinets If you like the layout of your kitchen and the style of your cabinets, you can give them a facelift by applying a coat of primer, two coats of paint and a protective top coat.To do this project correctly, you’ll need to remove all the doors, remove the hardware, tape the hinges, paint the base cabinets and use a sprayer to paint and topcoat the doors outside so you don’t see brush marks. The entire project could take over a week. But, you’ll notice a tremendous difference in the final result.
The Walls While you don’t have to paint your kitchen walls white, it’s generally better to use lighter colors. Sometimes just a coat of white paint on the wall will make a huge difference in your home’s freshness, and can even make the kitchen look bigger!
2. Update Your Lighting
You would be amazed at what a difference it will make to replace your fluorescent lights with incandescent lights.
Florescent lights cast a darker tint around the room, while incandescent lights cast a pure white light.
Updating with bright white lights and adding about 10 can lights in the room will make your kitchen much brighter. Also, don’t neglect dark corners with your lighting design, and add more ceiling lights where it’s possible.
3. Make Full Use of Natural Light
If you’re working with a dark room, chances are you don’t have a lot of natural light coming in, but it’s important to make the most of what you have.
If your windows are covered with dark shades or blinds, you’re blocking out your best chance for brightening up the room.
You can also use these tips to add more natural light to your kitchen:
Consider adding a skylight if you have that option
Choose light-colored window coverings that don’t completely block out the light.
If you prefer blinds, look for cloth blinds in a light fabric. Avoid wooden or plastic blinds that block out all the light.
If you’d like more advice or you have some questions about how to brighten your kitchen, stop on in one of our GNH locations to meet with a professional. It’s a proven fact that humans respond, act and feel better in a home that is bright and open. Brightening up your kitchen is a great start to feeling better and inspired!
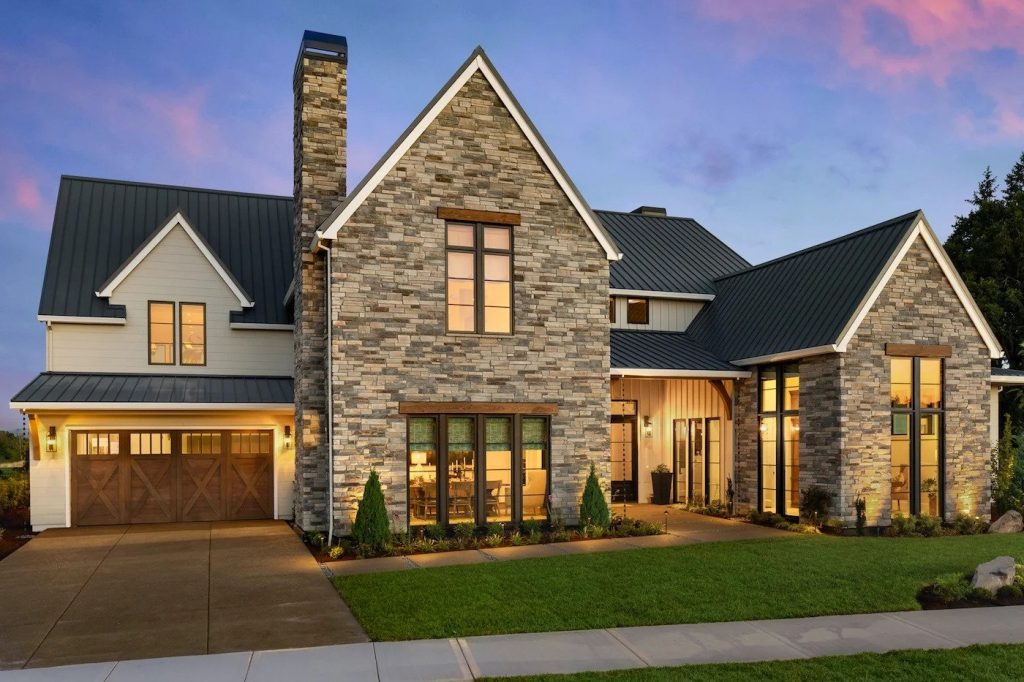
Outdoor entertaining season is in full swing! Delight your guests with siding that creates eye-pleasing symmetry and utilizes harmonious color combinations. According to LP Siding, there’s no reason your siding can’t be the true focal point of your home’s exterior, with landscaping and other outdoor elements supporting its aesthetic.
The best part? Creating a colorful and dramatic home exterior and backyard doesn’t have to be an expensive endeavor! It’s easy to re-side your home on a budget. Just ask the experts at GNH Lumber for more information.
Here are some tips and tricks from LP Siding to ensure your home’s exterior and outdoor elements complement each other perfectly this summer:
Tip #1: Go for Greens, Browns or Beiges
The greens, browns and beiges of nature are colors that are easy to integrate with outdoor focal points like a garden, shed or fencing.
Tip #2: Muted Tones are More Versatile
Grays and muted colors are more versatile than pure pastels and bright hues. You don’t have to exactly match plant and paint color with these subtle shades. Fence and shed colors should also be muted.
Tip #3: Keep Undertones Together
Keep color undertones together. A “cool” house color like blue, green or purple works well with cool plant colors and complementary fence and shed colors. Conversely, “warm” house colors like light yellow, pink or apricot harmonize with “warm” outdoor elements.
Tip #4: Use Caution with Complimentary Colors
In some cases, you can match colors that are on opposite ends of the color wheel (like red and green), but they need to be muted shades accented with gray. Otherwise, your home may stand out for all the wrong reasons (and end up looking too much like Christmas).
When you embark on a kitchen design collaboration with Keri at GNH Lumber, you quickly discover that she is like a seasoned guide leading you through the difficult terrain of design choices, options and considerations. You have a specific destination in mind, and your designer’s job is to get you there with as few mishaps as possible.
Keri likes to think of designers as ‘creative problem solvers,’ and her first task at hand, when working with a client, is to gather information about your “project, lifestyle, and overall design taste.” Always, her emphasis is on listening:
“You can achieve a lot through listening and asking the right questions, communication is a large part of my occupation. I then build the design around what I know of my client and their needs, as opposed to simply creating something that I like. This makes all the difference.”

 There are many benefits to choosing a neutral color palette for siding and trim. For one, neutral colors appeal to the broadest range of potential home-buyers, making your home more marketable when it comes time to sell.
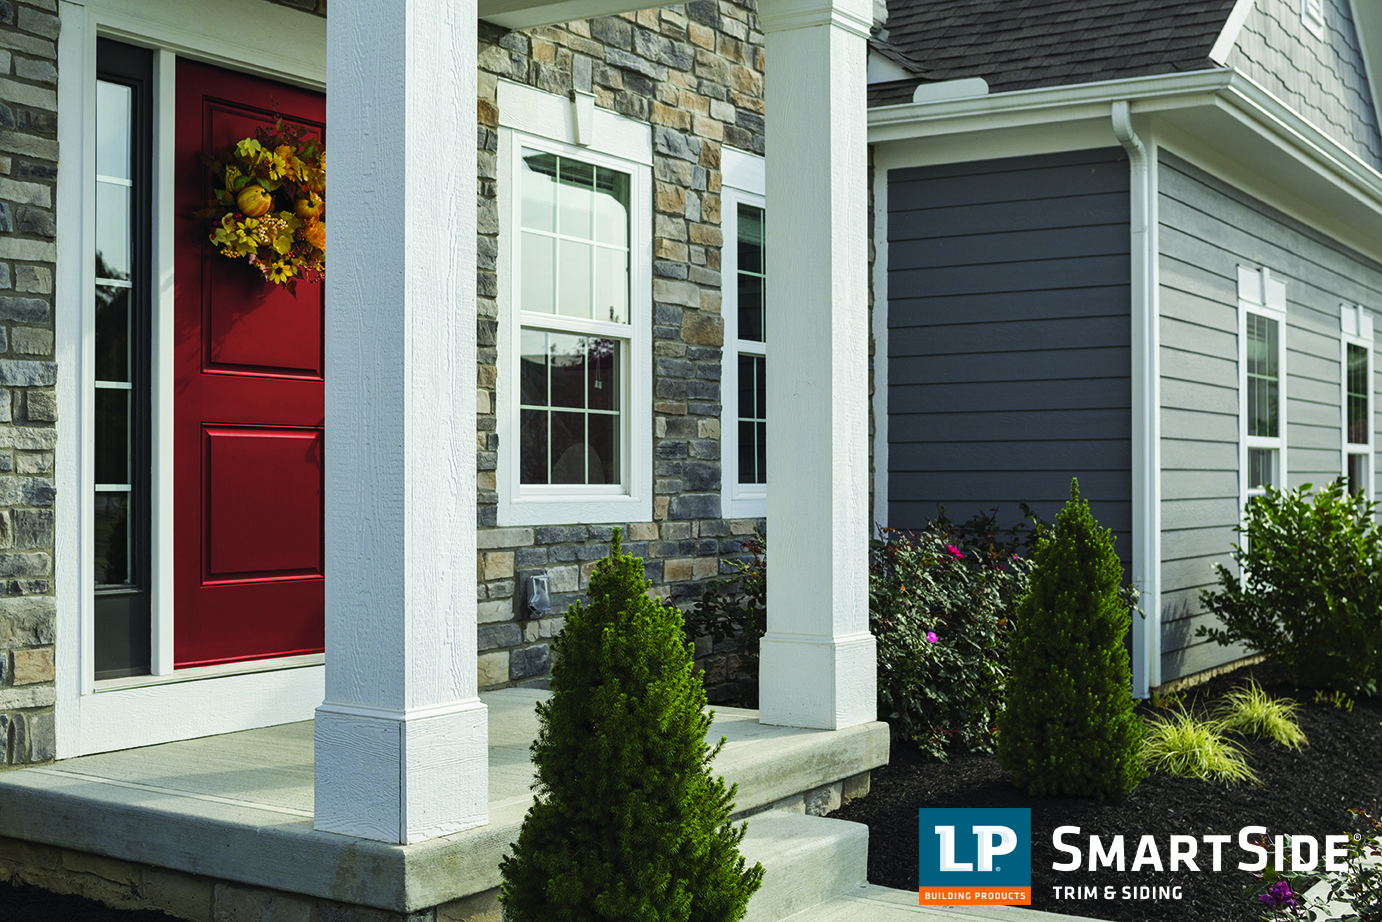
 Keeping your home’s exterior siding in good shape is not only a great way to improve your home’s appearance, it also helps you avoid repairs and costly services down the road. With a bit of preventative maintenance, you’ll be able to extend the life of your home’s exterior siding for 50+ years!
 Next time you’re at
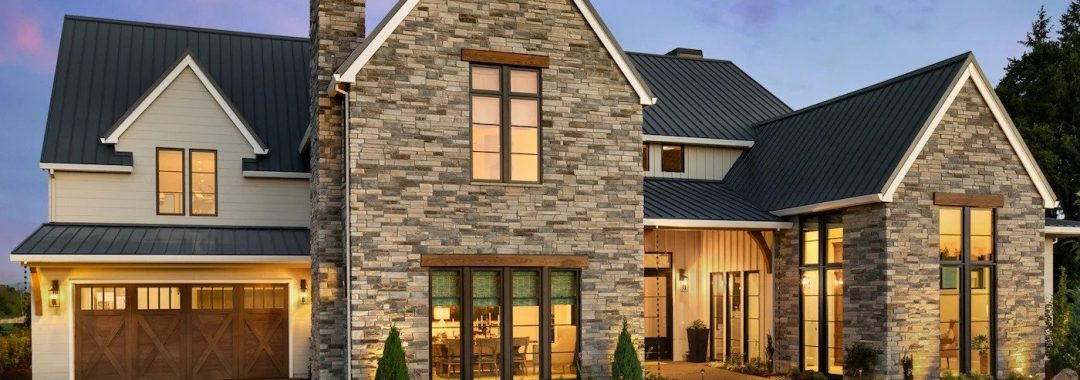
 Looking for kitchen remodel tips from the pros?
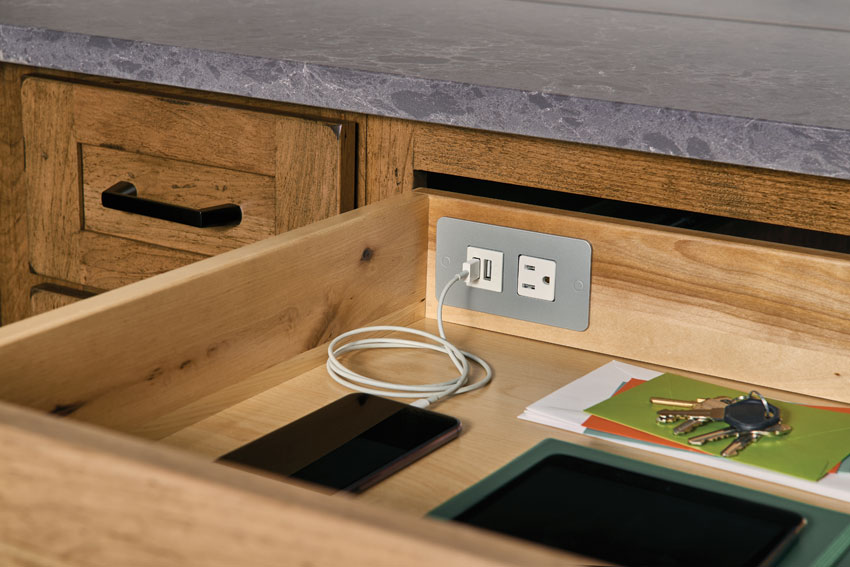


 Are you looking to cover your walls with calming paint colors? Benjamin Moore has color choices that will make you feel even more at home.
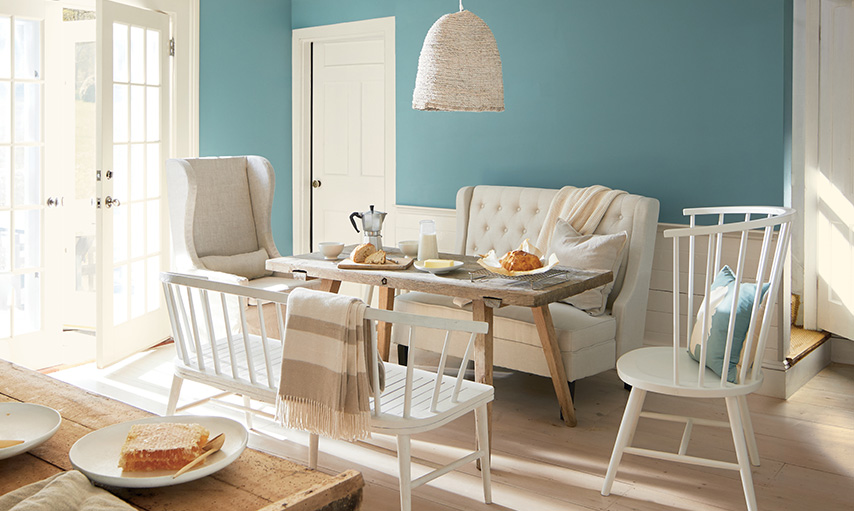
 There are several kitchen elements that can be brightened up with a fresh coat of paint, including:
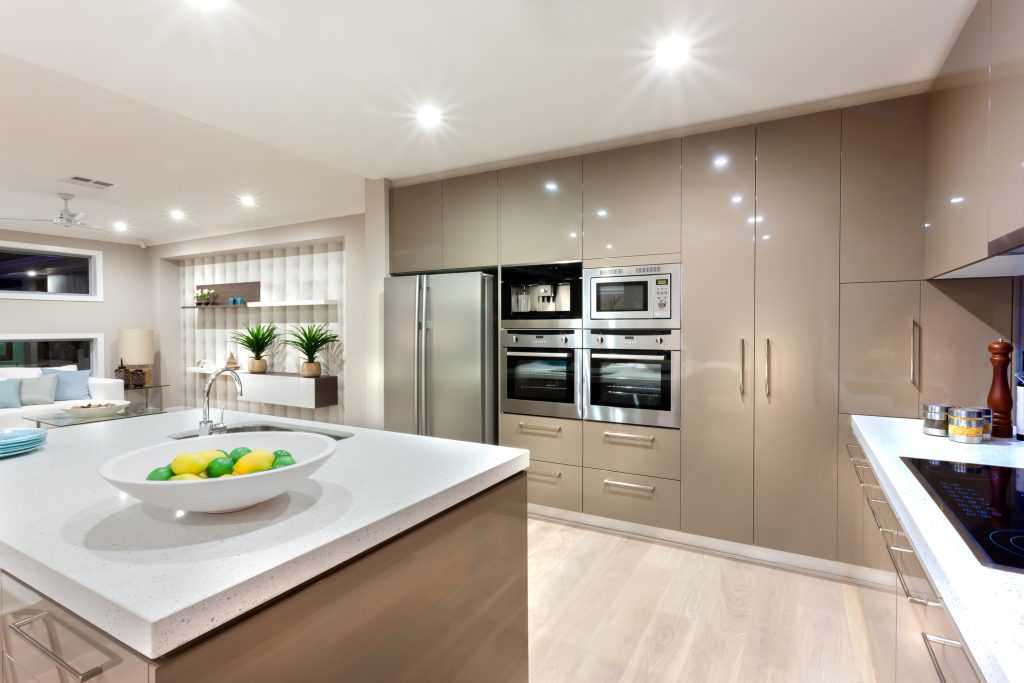
 If you’re working with a dark room, chances are you don’t have a lot of

 Kitchen Designers are “Creative Problem Solvers”