garden oasis stone path

How to Create a Garden Oasis

garden oasis stone path
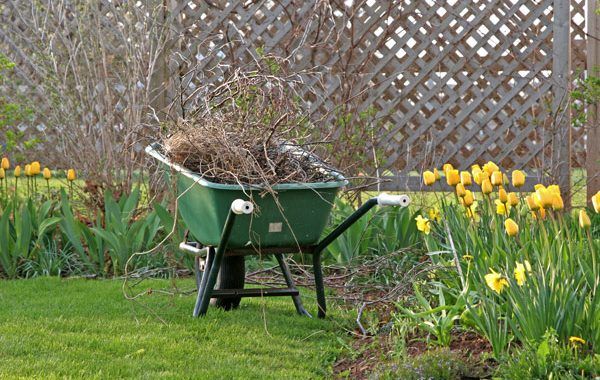
An inviting yard provides a calm atmosphere, a tranquil retreat and a relaxing place to entertain.

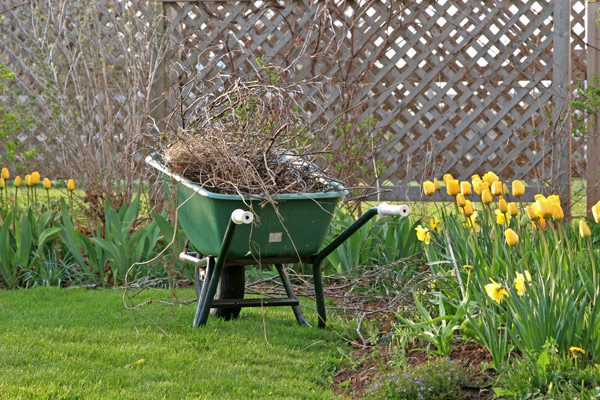
With springtime in full bloom, it’s time to start creating a detailed game-plan for your spectacular garden oasis! Remember, with a little bit of work and planning now, you can create a garden sanctuary to enjoy all season long – and one that your neighbors will envy, too.

Here are 7 ideas for creating a garden oasis that you can use to escape, relax and even entertain:

1. Add a Bird Bath

Adding a bird bath will attract birds to your garden, which are not only fun to watch but will help control pests. Place the bird bath in a relatively open area in your yard, so that birds can scan for predators. To keep your bird bath in tip-top shape, clean it approximately twice a week.

You can also put out nectar to attract hummingbirds and other pollinators. Hummingbird feeders also need to be cleaned out regularly to ensure mold doesn’t build up, which can be harmful to the birds.

garden oasis water feature

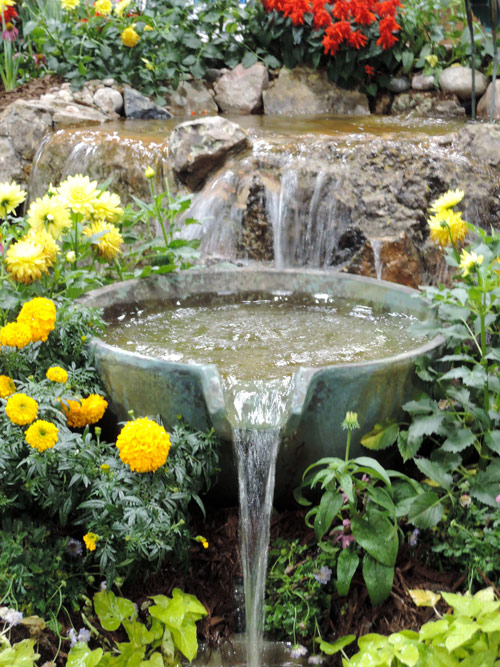
2. Create a Water Feature

There’s nothing more relaxing than the calming sound of a natural stream or waterfall in your garden. Turn a decorative pot into a waterfall feature, or create a built-in waterfall or stream element with large, stepped stones. A closed circuit of water can also act as circulation for a pond, serving dual purposes.

If you really want to go all-out, you can create a koi pond. While these are more costly to install and maintain, koi fish are mesmerizing to watch and they eat mosquito larvae.

Whatever you choose, a water feature is a dramatic touch that provides soft tranquility.


3. Hang Wind Chimes

Wind chimes are a quick and easy way to create a relaxing vibe in your garden. There are lots of designs and sounds to choose from, whether you prefer a softer, wooden sound, or something light and metallic.


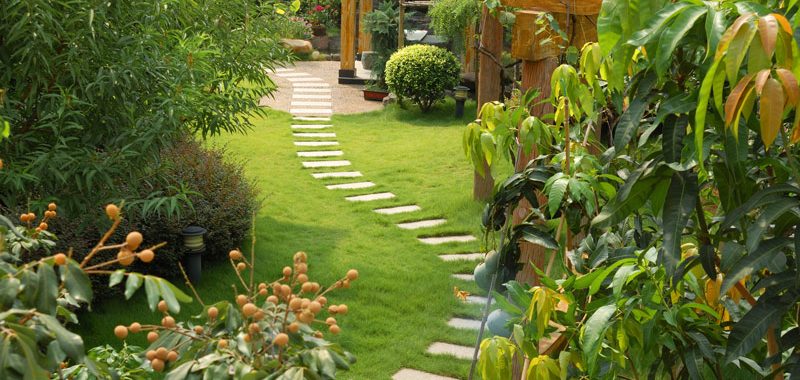
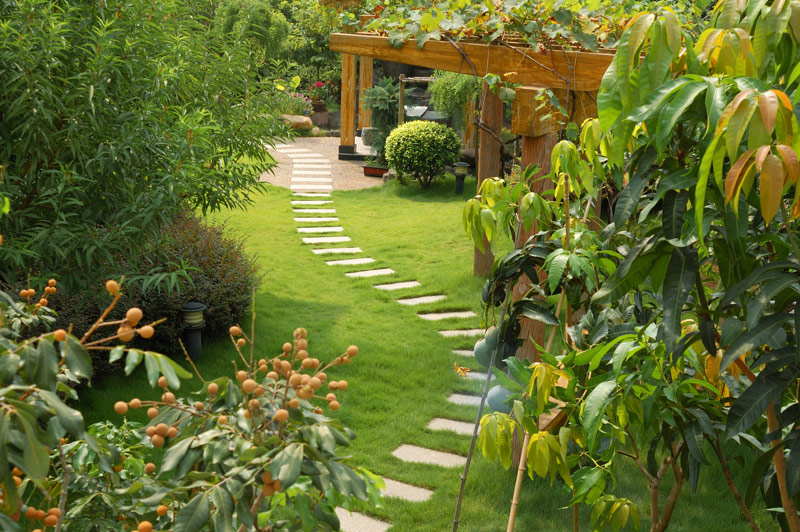
4. Incorporate Natural Stone

Natural stone accents, like stepping stone paths, are great features to add to your garden oasis. Natural stone is an easy accent feature to incorporate into your backyard and can be inexpensive, depending on the stones you purchase.


5. Install Solar Lights

Solar lights increase the function and versatility of your garden. Add them along your stone path or hang them in your pergola to create a space you can keep using after dusk.
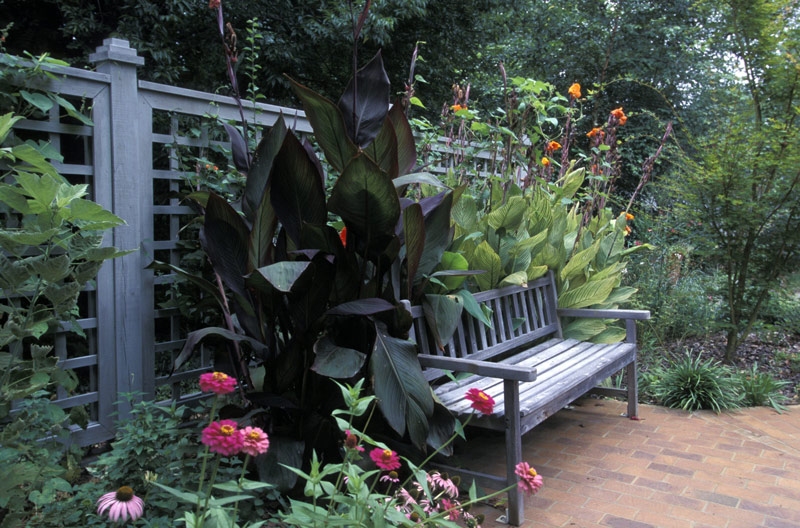
5. Add a Bench

Place a bench in view of your water feature or bird bath to create a tranquil spot where you can enjoy your oasis.

garden oasis large leaf plants

6. Get a Pergola

Pergolas are a great way to get more use out of your yard. Perfect for entertaining guests, you can set up patio furniture beneath them, plant vines that grow on them and hang solar lights to keep the party going after dark. During the day, they provide a nice shady place to keep cool and enjoy your garden.

7. Surround Yourself with Plants

Let plant life create the outdoor retreat of your dreams! By selecting tall, large-leafed plants, you can simulate a tropical rainforest experience.

Adding vines to fencing, trellises, benches and other structures in your yard will create a soothing retreat with added privacy. Creeping vines that flower such as clematis, honeysuckle, trumpet vine, and morning glories will provide a pop of color against all the green vegetation as a lush backdrop.

Adding a few of these simple features to your backyard will go a long way towards creating your tranquil retreat. A garden oasis is fun to create, and will provide a great place to decompress after a long day or even entertain your friends and family. Now get a head start on designing your garden oasis!

How to Replace Windows in Zones

How to Replace Windows in Zones

How to Replace Windows in Zones

Should you replace windows in zones?

Replacement windows can save you as much as 15% on your energy bills while reducing wear and tear on heating and cooling systems. Plus, updated windows will improve your quality of life by introducing more light and fresh air to your favorite room or home office.

If you’re overwhelmed by the idea of a full window replacement, don’t worry. You don’t have to replace every single window in your home to start enjoying beauty, function, and energy-savings. Instead, you can replace windows one zone at a time.

Explore replacement Marvin windows in a wide range of styles at GNH Lumber! Simply request a project quote today

Want to learn more about the benefits of new windows? Get the FREE guide!

Window Replacement by the Zone

Now is the perfect time to replace your home’s older or malfunctioning windows before the chill of autumn comes and begins stealing away precious heating dollars. But how do you know which windows need replacing? Some signs, such as condensation or cosmetic damage, might not need replacement at all and are actually perfectly normal. Others, like water stains and wood rot, need immediate replacement.

Knowing the signs that require prompt attention versus those that can be easily fixed can help you evaluate whether and how soon a replacement is needed. This will help you replace windows in “zones” for a more targeted, cost-effective approach.

Remember, you don’t have to replace every single window in your home in order to make a dramatic improvement in your home’s style, airflow, and energy savings!

Here’s our guide to evaluating your home’s overall window health and creating “zones” for targeted window replacement.

How to Replace Windows in Zones

Zone #1 – Immediate Attention Needed

Sometimes replacement windows are non-negotiable, especially when they greatly compromise your home’s energy-efficiency and/or security. Look for these signs that you’re in the “red” zone:

  • WATER DAMAGE – Water between glass panes, leaking, water stains or evidence of wood rot can be signs excess moisture is accumulating where you cannot see it, which means your windows are no longer effective. This can lead to mold, mildew, warping, or structural damage.
  • COMPROMISED SECURITY – As entry points into your home, you should address broken windows immediately.


Zone #2 – Time to Investigate

Sometimes replacement isn’t immediately necessary, although it would still help with ease of operation and climate control. Here are some warning signs for windows you should keep an eye on:

  • FAULTY OPERATION – Difficulty opening or closing, sticking sash and pesky operational issues can sometimes be solved with a thorough cleaning or small repair. However, these can also be signs that parts are nearing the end of their lifespan.
  • LESS CLIMATE CONTROL – New windows can get rid of drafts to make rooms more comfortable. But if the time isn’t right, replacement can wait!


Zone #3 – No Need to Replace

Some of your home’s windows may not need replacing at all! Don’t mistake these signs for critical damage. They are likely normal and can be corrected during routine maintenance:

  • CONDENSATION – Condensation is perfectly normal. It simply indicates the presence of humidity, which means your windows are doing their job and holding heat inside your home. There are many easy ways to remove condensation that don’t involve replacement. 
  • COSMETIC ISSUES – Issues like chipped paint, tarnished hardware, and dirty weather stripping can be addressed on your schedule with routine care and maintenance.

By dividing your home into zones using the evaluation methods above, you can make the right window replacements now while keeping less urgent updates on the back-burner for a later date.

yard cleanup

5 Things to Include on Your Yard Cleanup List

yard cleanupCan’t wait to get back out into the garden? Well, here’s the good news! It’s time to get a head start on your spring cleaning checklist, and that includes taking care of your yard and garden beds.

To look and feel its best after the harshest winter months, your yard and gardens require spring cleaning the same as the inside of your home. Taking a weekend to clean up as the weather begins to warm will save you time later, and it helps prevent some problems further down the road in summer.

First, look over your yard before creating a specific checklist of what needs to get done to be ready for the season.

To help you get started, don’t forget these 5 things when cleaning up your yard this spring:

1. Clean Up Around Plants

To help your plants and shrubs get ready for new growth, clean up any debris left over from the winter months. Make sure you rake out fallen leaves and dead foliage, since this can smother your plants and help foster disease. Don’t forget to cut down any mums or other fall-season plants that you haven’t had a chance to cut down due to the snow and ice.

Toss your yard waste into a wheelbarrow for easy disposal and cleanup (ideally, this is done after the threat of frost has passed). Next, you’ll want to remove existing mulch to set the stage for a new layer after spring planting. You’ll also want to push heaved plants back into flower beds and borders. To encourage new growth, you can also spread a pelletized fertilizer tailored towards your existing plantings onto the soil’s surface. Spring rains will then carry these nutrients to the root systems.

2. Prep Your Lawn

The first step to a gorgeous lawn all spring and summer long is a good feeding now. Fertilizing your lawn with Scotts STEP-1 Crabgrass Preventer Plus Lawn Food can improve a lawn’s ability to absorb water & nutrients. Apply to your lawn for a fast green-up after winter. It also controls crabgrass for up to 4 months!

Apply in early spring, anytime between February and April when temperatures are still cool (under 80° F). Step-1 prevents crabgrass before it can germinate. It also feeds to green up a winter-weary lawn, too. Learn more about the Scotts Program.

In mild climates that experience little to no snowfall, winter lawn damage is usually minimal. However, that’s not the case for us here in the Catskill Region. As a rule, it’s best to avoid walking on soggy areas of the lawn until they are dry so the grass doesn’t become damaged. But there is usually some damage from snow removal, ice prevention, shoveling and the mud of thawing.

Remove any turf damaged by salt, plows, or disease to prepare for the seeding that should follow in a few weeks. Resume mowing once the grass grows to 4 to 5 inches tall and only trim it back to 3 to 4 inches. But don’t start mowing too early! Mowing too early in spring, or trimming your lawn too low, results in weak grass that is more prone to summer damage during dry periods.

3. Clean Walkways and Patios

yard cleanup 2

The early spring is a perfect time to neaten up your hardscape surfaces, too. This includes both walkways and patios.

Make sure to rake escaped gravel back into your walkways and patios, and purchase more gravel to spread if needed. Refill joints between flagstones by sweeping in new sand or stone dust; water with a hose to set it, then repeat. Use a pressure washer with a low-pressure tip to remove any algae spots or leaf stains.

4. Replace and Paint Worn Wood

Remove badly rotted or damaged pickets or boards in your fencing, then scrub the wood clean by mixing water, bleach, and liquid soap. Once you’ve fully cleaned it, allow it time to dry before continuing. You can patch rotted sections with wood epoxy, and subsequently install new wood as needed.

Check to make sure that you don’t have any wobbly fence posts that need to be replaced. You should also scrape off old paint, sand the wood, and apply a new finish coat. Once temperatures go above 50° F, brush on a new coat of paint or stain.

5. Prune Dead and Damaged Branches

Many non-flowering shrubs, trees and woody plants respond well to spring pruning, which cleans up their appearance. Prune back to live stems if damaged, and shape hedges with hand pruners rather than electric shears. Electric shears have the tendency to cause a thick outer layer of growth, which prevents sunlight and air from reaching the shrub’s center.

Vinyl Window Care

How to Care for Vinyl Windows: “Do’s and Don’ts”

How to care for vinyl windows?

Are you wondering how to care for vinyl windows? Vinyl windows are designed for easy care and maintenance. Just a tiny bit of elbow grease from time to time will extend the life and beauty of your windows.

Below are some quick and basic tips for caring for your vinyl windows. Following these “do’s and don’ts will extend the life and performance of your vinyl windows:

Vinyl Window Care “Do’s”

  • Vacuum soil and debris from the sill or track before washing.
  • Use a mixture of mild dish soap or any non-abrasive soap and water to gently clean window frames.
  • Rinse thoroughly and dry with a soft absorbent cloth.
  • Make sure any weep holes are clear of obstruction and draining properly. Weep holes help your window drain and are located on the bottom of the window.
  • Remove the screens and wash them with a soft brush on a flat surface with mild dish soap and water.
  • Check the weather stripping around all window sashes in the fall.
  • Occasionally lubricate moving parts including rollers and tracks. Make sure to test the lubricant on an unseen part of the window to ensure it doesn’t stain.

Vinyl Window “Don’ts”

  • Don’t use abrasive or caustic cleaners or solvents as they may damage the finish of your windows.
  • Don’t wash windows in direct sunlight, if possible.
  • Don’t use a high-pressure spray to wash the windows as it may damage the insulation and glass seal.
  • Don’t use sharp instruments or abrasive pads to clean the glass.
  • Don’t attach anything to the glass, such as masking tape. Heat from the sun may bake the adhesive into the glass, and make it difficult to remove.
  • Don’t use a silicone spray on plastic parts as it may damage them; use a non-wax furniture polish instead.

Vinyl windows are a great investment for your home. Ask one of our GNH Experts about vinyl windows or visit our showrooms to see the latest styles and options for yourself!

Exterior Painting Project

How to Paint the Exterior of your Home

Exterior Painting Project

Early autumn is a great time of year to tackle your home exterior painting project. The temperature is warm during the day and the humidity is low. This means quicker drying times. If you’re not sure how to paint the exterior of your home, you will want to:

  • plan ahead
  • buy enough paint in the same color
  • tackle the job one section at a time

With a little planning, your home exterior painting project will be fun and satisfying!

Step 1: Envision the Final Product

Select a color palette for your home’s exterior walls, trim, shutters, and doors. There are some tried and true color combinations that are beautiful, taking the guesswork out of choosing colors.

Use Benjamin Moore’s Personal Color Viewer tool. It will help you visualize the end result. Plus it will list compatible paint colors by name and product number for easy reference. Tip: Basic whites, light blues, light beiges, and yellows work best for resale curb appeal.

Step 2: Prepare the Exterior Surfaces

A clean and debris-free exterior is best for holding paint. Before you apply paint, spend a day preparing your home’s exterior. The first step is sanding or scraping old and peeling paint. Then, check for gaps between the siding and windows. Caulk where needed, or replace lengths of siding or shingles. Finally, use a power sprayer to thoroughly wash your home’s exterior. Don’t forget to allow a couple of days to dry completely before applying paint.

Step 3: Planning & Prep

Watch your weather forecast. Then choose a stretch of warm, dry days to start painting. Plan on having a couple of days (a weekend) to work.

Make sure you buy more than enough paint to cover your home’s exterior. It’s helpful to get a little bit more than you think you will need for touch-ups.

Before you paint, place plastic tarps or drop cloths over walkways, shrubs, and grasses. This helps protect against spilled paint. Also, move or cover up any outdoor furniture, hoses, or grills, that are close to the house.

Step 4: Use Paint that includes Primer

Look for a paint that has combined primer and paint into one product. This will cut down on the number of coats you will have to apply.

Step 5: Start at the Top and Paint Down

Start at the top and paint down to control streaks and drips. This method will allow you to feather out mishaps in the direction you are working.

Why Should I Stain My Wooden Deck?

How to Choose and Apply Deck Stain

Why Should I Stain My Wooden Deck?

Why Should I Stain My Wooden Deck?

Your outdoor space is where you and your family share meals and memories. You’ll want it to be welcoming all year round. So, if your wooden deck is fading or peeling, a new coat of stain goes a long way to restoring it to beautiful condition!

Gather Your Gear

Before you can begin the staining process, you are going to want to have all the right tools and gear on hand! The quality of your tools means professional-level results. Before you start prepping your deck for staining, we recommend gathering the following equipment:

  • Gloves
  • Safety glasses
  • Broom
  • Garden hose
  • Drop cloth
  • Sanding sponge
  • Stiff synthetic-bristle brush (make sure it’s specific to oil, water-based formulations)
  • Pump sprayer (optional)
  • Roller covers
  • Extension pole
  • 4″ brushes (make sure they’re specific to oil, water-based formulations)

How to Choose the Right Deck Stain

From clear to solid colors, there are so many choices in opacity and color to choose from. Following these simple tips on choosing the right deck stain for your wood deck will help you get your project started.  Staining your deck is one of the easiest ways to update the exterior of your home and make it the perfect space for years to come.

Prepping Your Deck For Staining

Prepping Your Deck for Staining - Rinse Cleaner

Before you apply the stain to your deck there is some prep work that needs to be done. Follow these steps to prepare for applying stains. Make sure the surface is clean (no dust, dirt, wood fibers or grease), dry and free from mildew. If a surface is not cleaned and prepared properly, the stain may not adhere well.

  • Sweep the deck to remove debris.
  • Apply cleaner using a roller or pump sprayer (remember to wear protective equipment to avoid contact with skin and eyes).
  • Allow the cleaner to set for 15 minutes. Mist your work area with a garden hose to keep it wet while the cleaner soaks into the wood.
  • After 15 minutes, work the cleaner into the surface using a stiff synthetic-bristle brush. Scrub to remove residue thoroughly.
  • Completely rinse the cleaner from the wood with a garden hose.
  • Once the surface is clean, dull, and dry, you may apply stain or coating,

How to Apply Deck Stain

Work with the wood grain and apply an even coat of stain using a 4-inch brush. You may also use a roller to first apply the stain, and then work into the wood with your brush. Remember to always read the products’ details and instructions. There may be additional steps that are recommended.

For the best results, you will want to avoid staining midday or in direct sunlight. And avoid using your deck for 24 – 48 hours so it can dry thoroughly.


Benefits of Metal Roofing

House with Metal Roof

Metal Roofing is a Homeowner’s Dream

When most people think of metal roofing, they usually picture large commercial buildings. But metal roofing has been surging in popularity with residential homeowners lately. It’s a viable alternative to traditional asphalt roofing, but what are the benefits of metal roofing? Well, whether you’re building a new home from scratch or updating your existing roof, there are a few distinct advantages that you can enjoy!

Better Cost-Effectiveness

One of the key benefits of metal roofing is that a metal roof will last about 40 to 70 years, whereas traditional asphalt roofs last about 12 to 20 years. Live in your house long enough and you could end up replacing an asphalt roof anywhere from two to five times in the length of time a metal roof would remain in good condition. As a matter of fact, for many homeowners, the first metal roof they install on their home is the last roof they install!

Better Energy Efficiency

If you’re looking to save some money on your home’s monthly bills, installing a metal roof might be helpful. Homes that have metal roofs can help reduce your annual energy spending due to a couple of factors:

  • Reflectivity: Reflectivity means how well the roof reflects the sun’s rays, which metal roofs are great at. When your roof reflects the sun, it decreases the amount of heat transferred into the attic. The less heat in the attic, the lower your electricity bill will be!
  • Emissivity: Emissivity means how quickly your roof cools off after the heat is removed. Your roof is exposed to extreme heat in summer, and no matter what, it will soak the radiant heat and transfer it to the attic, essentially trapping it and making your AC unit fight to get it out. With energy-efficient metal roofs, your roof will be cool to the touch after the sun goes down, allowing your AC unit to take a much-needed breather, and resulting in lower cooling costs.

Better Weather Resistance

Metal Roofing Choices

In our neck of the woods, heavy snowfall and rain are a common concern. Thankfully, adding metal roofing to your home makes dealing with inclement weather a snap! Metal roofing is hard and slippery by nature which makes it hard for snow and water to make a grip. On top of that, if you install dark tones of metal roofing or metal roofing with a PVDF coating it doubles up the benefits of metal roofing. Dark tones of metal roofing quickly warm to the sun, encouraging snowmelt and the resin polyvinylidene fluoride (PVDF) coating that’s common on both Union Corrugating or McElroy Metal Roofing helps to reflect back more sunlight, further increasing your roof’s resistance to snow or rain buildup.

Better Curb Appeal

Every homeowner is going to have an opinion about what looks best on their home. But even for those who only prefer the look of shingles on a home, there are specialty metal roofing options available that look just like them! In fact, there’s a ton of metal roofing options available in a wide variety of both styles, colors, and finishes. Shingles, on the other hand, typically only come in a limited number of colors. With a metal roof, you get the benefit of using the most energy efficient materials that save you money for several decades – on top of making your home look even more fabulous.

Add Innovation & Durability with Metal Roofing

Metal roofing has truly come full circle over the years! More and more homeowners are discovering the benefits of metal roofing and are adding it to their homes with great results. Get in touch with the GNH Lumber team today to learn how it can improve your home!

Deck Repair & Cleaning

How to Clean & Repair Your Deck


Deck Repair

Did you know that with regular maintenance, a deck will easily last for twice as long as one that isn’t maintained? It’s true, and what’s more, most decks can be rejuvenated for a lot less than the cost of replacement.

Here are some techniques you can use to give an old deck a new lease on life or to help maintain the look of a new one!

1) Make Thorough Repairs

Begin by inspecting the entire deck. Pay special attention to any part of the deck that is in direct contact with the ground, such as the posts, stair stringers, or joists that are at ground level. We recommend using a screwdriver to check for structural damage.

Tip: If you can sink the tip of a screwdriver into a post or joist, it means you’ve got rot and it’s time to consider renovation.

Also, inspect the connection of your deck to your house. Screws and bolts can loosen and rust, and without the proper use of spacers and flashing, moisture can cause your band joist to rot.

Be sure to tighten the fasteners that attach the deck to the house, while looking for any missing, bent, or rusted flashing. Then, carefully inspect inside and out for any telltale black stains that suggest moisture is working its way into your home.

Next, look for any cosmetic damage. For example, tap down any popped nails or consider replacing them with screws. We advise using galvanized ring-shanked nails to repair damaged boards and ensure longevity.

Tip: If you need to rip replacement decking to match existing boards, use a table saw. Ease the sawn edge using a router fitted with a ⅜-inch roundover bit.

Finish by carefully inspecting your railings and decking for loose wood. This avoids the possibility of splinters or further cosmetic damage to your deck.

2) Clean the Surface

Deck Repair & Cleaning

Assuming your deck has been maintained regularly, it can be revived with a simple deck cleaner. Some products are mixed in a bucket and applied to the deck directly. Others come in containers with applicators that you hook up to a garden hose. Once on the deck, most still require a stiff-bristle brush and a lot of elbow grease to work the mixture into the wood.

Here’s a deck cleaner you can make yourself and that’s great for mildew and dirt:

  • 1 qt. sodium hypochlorite solution (household bleach)
  • ⅓ cup powdered laundry detergent
  • 3 qts. warm water
  • In a 5-gal. plastic bucket, add the bleach and detergent to the water, then brush the cleaner onto the deck. Rinse thoroughly before applying a finish.

For tackling tougher stains, use a pressure washer. which is the best way to remove sun-damaged wood fibers and tackle scrub-resistant stains. Graf recommends using a fan-type nozzle instead of a pinpoint nozzle that can dig into the wood.

Finish by going over your deck with a stiff-bristle brush to work the cleaner into the wood fibers, and then rinse. The boards should be kept damp in order for the cleaning solution to work effectively. Allow the deck to dry thoroughly before moving on to the next step.

3) Sanding Your Deck

When the deck is dry (36-48 hours after washing, depending upon humidity and weather conditions), it’s time to sand the surface. You can use a pole sander with 80-grit sandpaper to remove all the loose wood fibers that were lifted by the pressure washing. Or, try using a DeWalt 5-inch variable speed random orbit sander with 80-grit sandpaper to really smooth out the surface.

When you’re finished sanding the entire deck, use a leaf blower or the reverse outlet of a wet vac to remove dust from the surface and between any cracks.

4) Staining and Preserving Your Deck

Deck Staining

Once your repairs have been made and the deck is sparkling clean, it’s time to apply a protective finish. Clear finishes and transparent stains are fine for new wood, but for older decks, we recommend using a semitransparent stain.

Start by spraying on a light coat of stain and using a brush to remove puddles or splotches. Start at an inside corner and work out, applying the stain parallel to the deck boards.

Tip: To avoid staining nearby brick, use a small piece of cardboard as a spray shield.

Subsequent coats should be applied while the first coat is still wet or they will not be absorbed into the wood. The stain won’t peel, but it can wear away, especially in high-traffic areas. It’s best to apply a fresh coat every other year. A clear water repellent can also be applied between staining for extra protection.

For more help getting your deck looking its best, get in touch with the GNH team!

LP Siding

6 Colorful Ways to Complement Neutral Trim & Siding

LP Siding
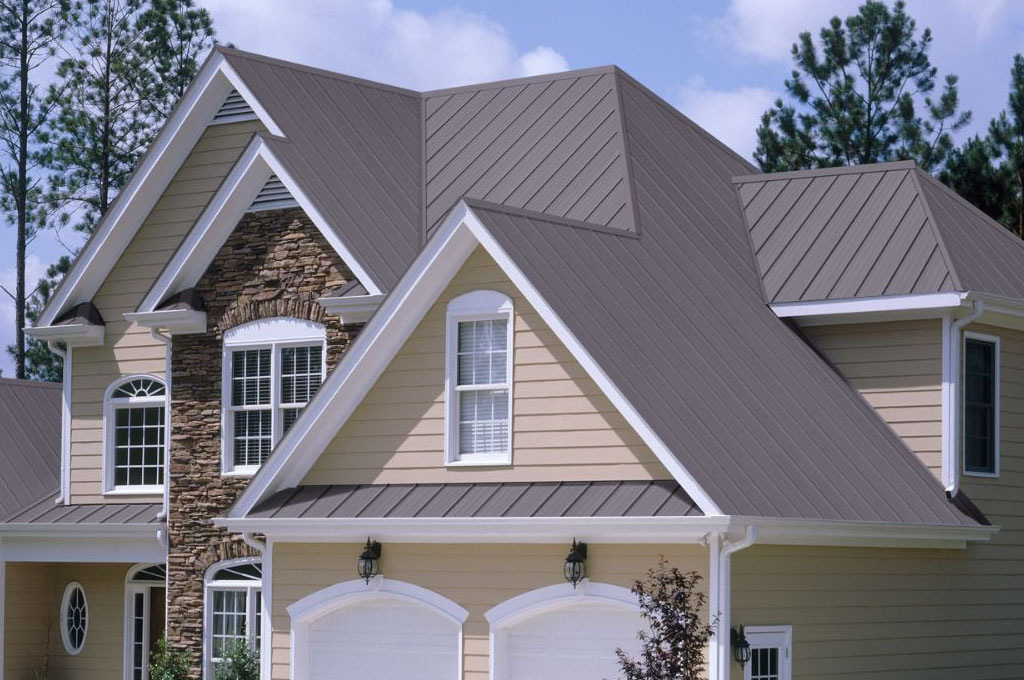
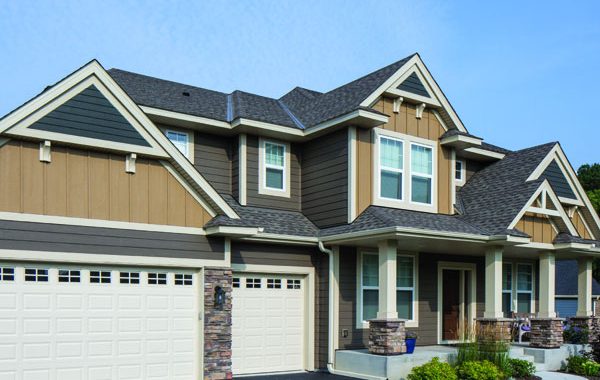
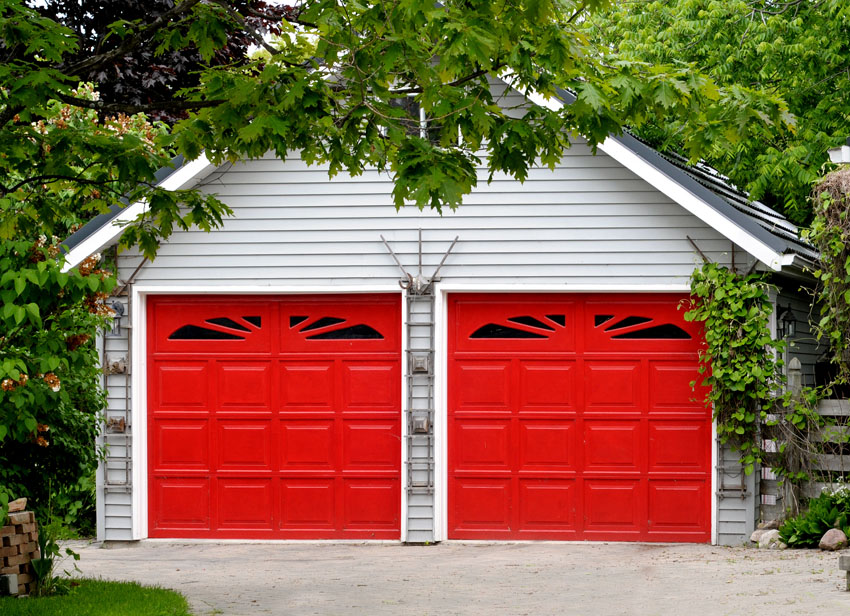
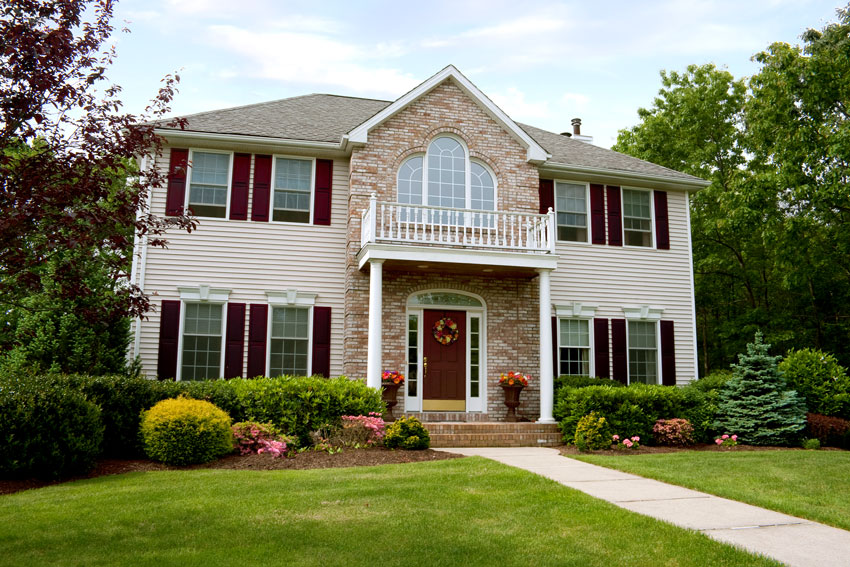
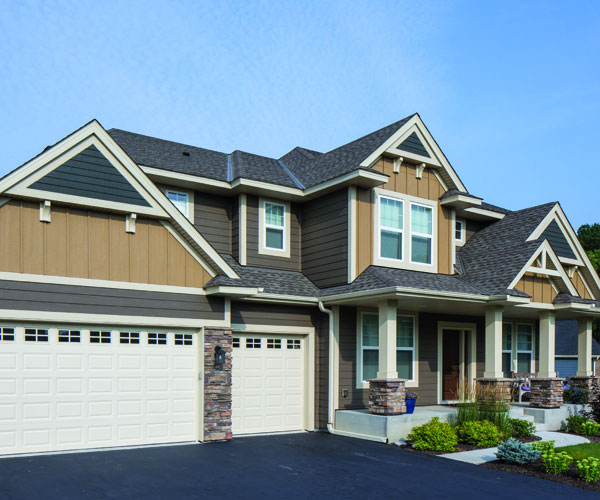
There are many benefits to choosing a neutral color palette for siding and trim. For one, neutral colors appeal to the broadest range of potential home-buyers, making your home more marketable when it comes time to sell.

Neutrals also may be the top pick in your particular neighborhood, and therefore necessary to help your home blend into its location. And because siding is something that will potentially grace your home for decades, neutral siding and trim colors are a timeless choice.

Even if your current siding color palette is quite basic, this doesn’t mean your home can’t have personality and curb appeal.

There are many creative ways to accent neutral siding if you’re looking for just a pop of color. Try these ideas to give your home a fresh new look!

1) Create a Welcoming Entrance

The entry door is a great candidate for color! If you want to paint an existing door, use a high-quality acrylic latex paint for maximum durability. Before painting, don’t forget to clean the door, use a sander or sandpaper to remove any imperfections, and apply a latex-based primer.

accents for neutral trim and siding

2) Choose a Bright Garage DoorWays to Compliment Neutral Trim and Siding

Take it from DesigningIdea.com: “The color red brings intensity to a home’s character. It creates a strong impression and radiates a welcoming feel. Red garage doors are intense visual components which direct the attention away from the house. This is the ideal color if you want to make your garage door stand out from the rest of the features of your home.

“Aside from the popular ravishing red and fire red, there are less intense options like burgundy and maroon which work well as garage door colors for traditional houses. Red garage doors work well for neutral (white or beige) and earth toned exteriors. For more modern and adventurous applications, a red garage door can also be used for adding a punch of color for pale yellow or blue houses.”

3) Add Bold Shutters

bright-shutters-complement-neutral-trim-siding

Whether functional or decorative, shutters add color and historic charm to a home. For the look of wood with the least amount of maintenance, look for shutters made of fiberglass, PVC or composite wood.

4) Try Creative Gardening

A neutral home can be the perfect backdrop for a riot of colorful shrubs and flowers. From blooming shrubs to lovely annuals and perennials, there are many plant options to make your home inviting. Ask your local nursery or landscaping company for recommendations.

5) Colorful Pavers & Pathways

You use winding, curvy pathways to contrast with and compliment the hard lines of your home exterior – why not also use them to add a pop of color? Try alternating brick red and light tan to create a host of interesting designs, patterns and effects.

6) Rock Some Unique Porch Chairs or a Swing.

Can’t commit to a bold shutter or entry door color? Take your color to something that can be moved, such as chairs, a swing or planters. You’ll get the same colorful effect that can be easily updated or removed when the mood strikes.

Learn more about using accent colors on your home’s exterior.

Need New Siding?

Is it time for new siding? Are you interested in learning about LP® SmartSide® engineered wood siding products? We invite you to experience the upside of remodeling with the LP SmartSide Visualizer. Pick your home style, or upload an actual photo of your home. Choose your siding and trim colors. See what you can achieve with different LP SmartSide siding options. Then get your home re-side project started today by requesting a project quote or scheduling an appointment at GNH Lumber to discuss your project particulars!

Sources: https://www.upsidetosmartside.com/blog/4-bold-exterior-accents-compliment-neutral-trim-siding/; https://lpcorp.com/products/exterior/siding-trim/blog/siding-products-benefits/how-to-use-lp-products-to-create-a-custom-look/; https://designingidea.com/garage-door-color-ideas/

Clean Siding

How to Clean and Maintain Your Home’s Exterior Siding

Clean Siding
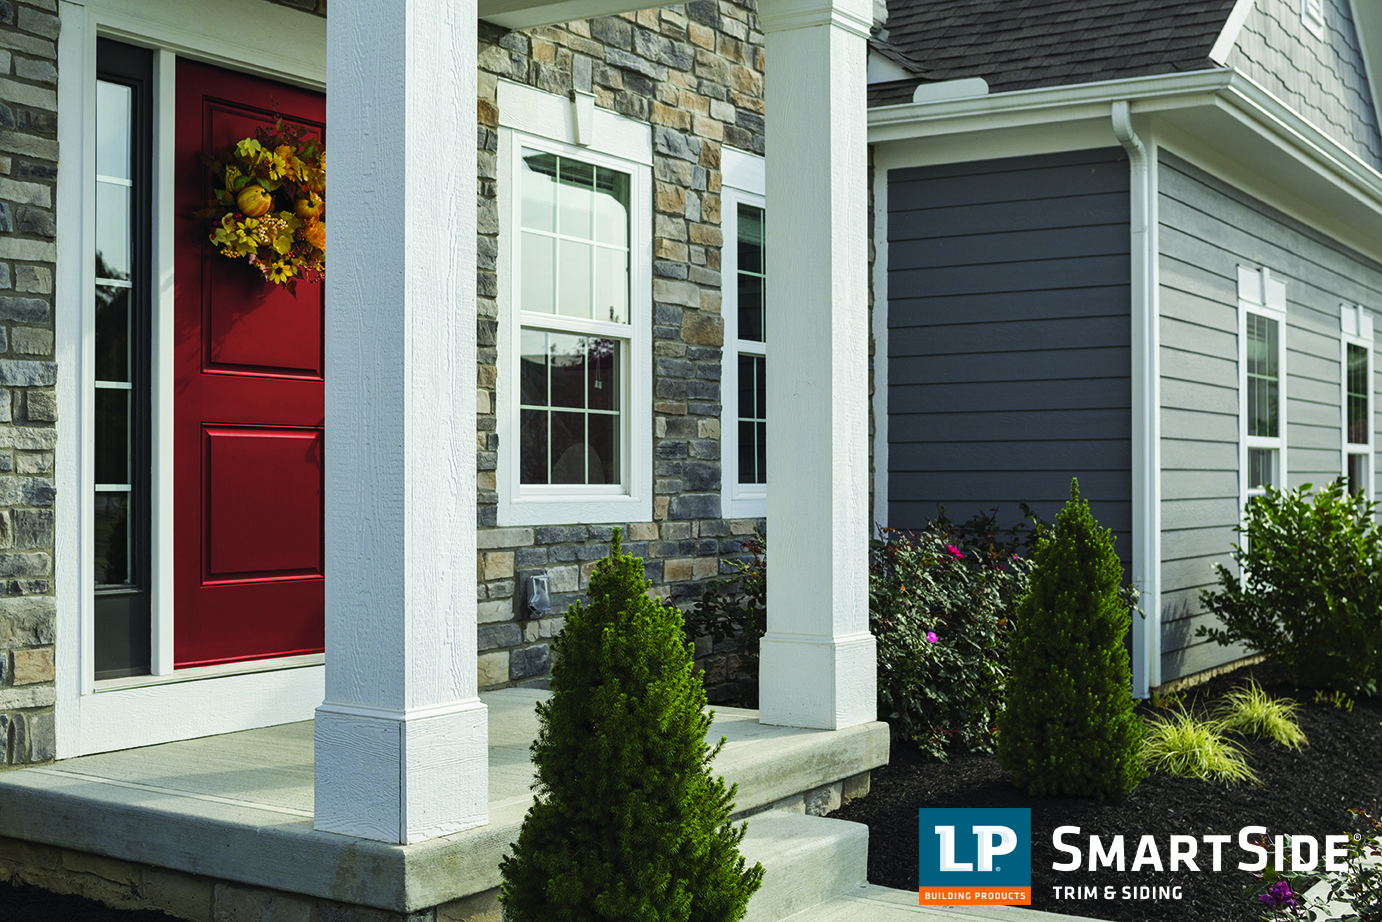
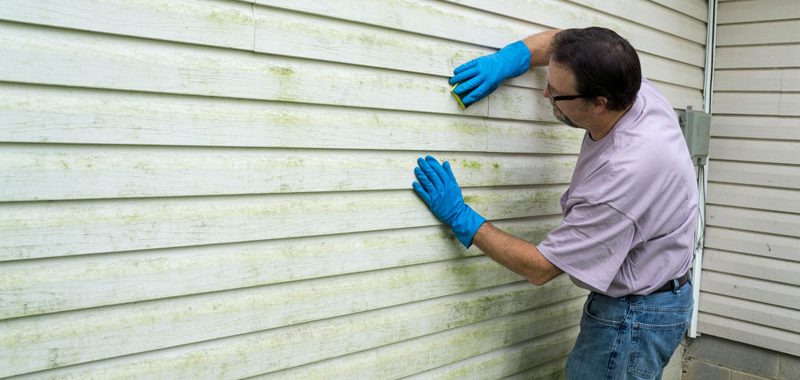
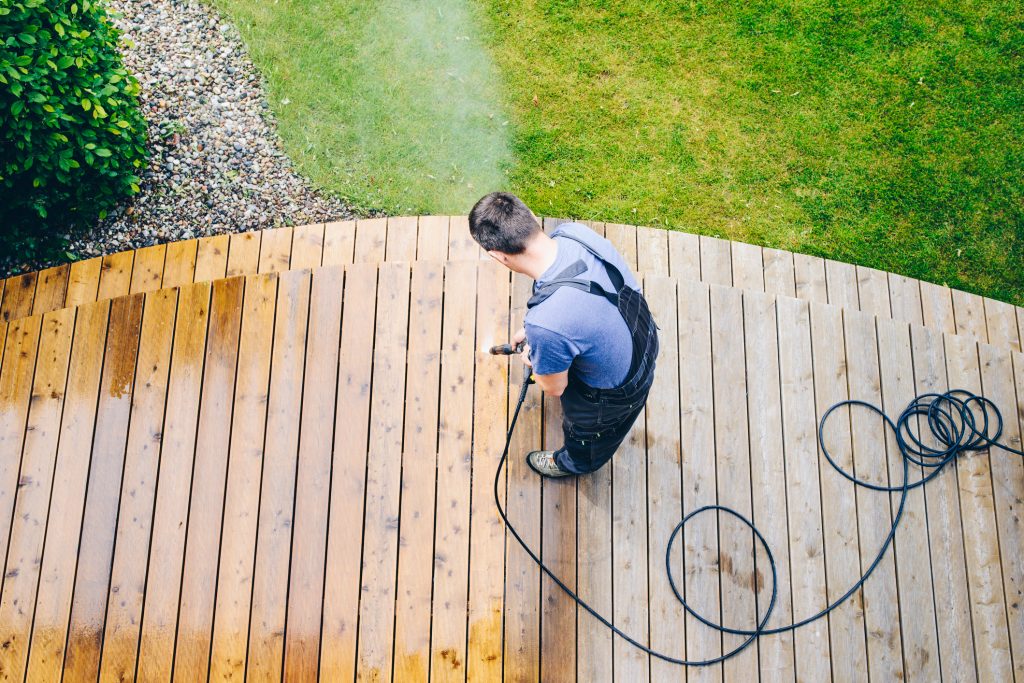
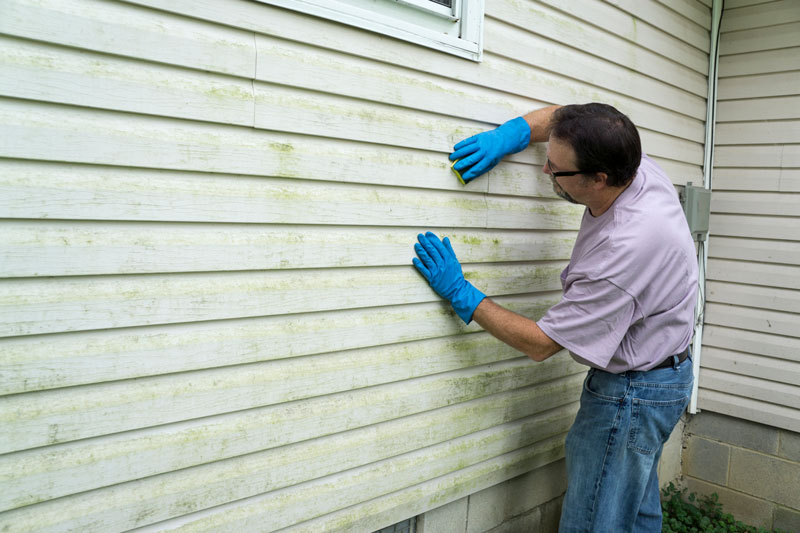
Keeping your home’s exterior siding in good shape is not only a great way to improve your home’s appearance, it also helps you avoid repairs and costly services down the road. With a bit of preventative maintenance, you’ll be able to extend the life of your home’s exterior siding for 50+ years!

In this blog, we’ll discuss how to clean and maintain your home’s exterior siding so you won’t have to worry about costs adding up for a few decades.

How Do You Maintain Your Home’s Exterior Siding?

No matter the materials, it’s important to clean your home’s siding every six months or more to keep it in optimal condition for many years to come. You should also inspect your home’s exterior for any damages at least every six months, or after violent storms and high winds. Here’s a quick guide on how to maintain the siding of your home based on the material:

Vinyl Siding Maintenance

Vinyl siding is low maintenance and is designed to be left alone, which is great! However, this doesn’t mean that it doesn’t have to be maintained. The good news is that you can easily clean vinyl siding yourself.

Vinyl siding requires a good power washing about twice a year. Check a few times a year to make sure no boards have come loose or are cracked. If they are, they will need to be fixed as soon as possible. High winds can cause damage and cracks to vinyl easily, so if you had a windy season, be sure to do a walk-around your home after the storm. Remember to give it a good pressure-washing twice a year to reduce damage and renew bright colors.

Tip: Making repairs early will save you money on more costly repairs further on down the road!

Wood Siding Maintenance

Wood siding will need to be treated every 4 to 6 years. In New York, sun and snow are particularly abundant so you may have to treat it more often than that. Because wood is porous and vulnerable to the elements, it also requires paint, stain or sealant to prevent it from moisture, rot and decay.

Like vinyl siding, you need to check the wood siding for cracks and breaks. Most repairs are easy to fix, so do it as soon as you notice the damage. If the color of your wood siding has been lost due to fading and old age, or if it’s spotted with mildew or rest, don’t worry! You can recover your wood’s natural beauty by using a stain remover, wood cleaner or brightener.

Stucco Maintenance

Often times, woodpeckers will attack your stucco siding. They tend to leave holes which will need to be replaced immediately or else they will live in your walls. Since stucco is a very porous material, if a tree leaks its sap on your siding, it can take over and cause huge problems. It can stain rather quickly so go around once or twice a year to remove any stains that are starting to form with a degreaser and bleach.

Cedar Shake Maintenance

If you want your cedar shake siding to live for a long time, you want to make sure it’s treated or stained properly and checked often. Left untreated, cedar shakes can discolor and start to soften, causing it to rot. In order to maintain healthy cedar shakes, you want to make sure to paint or stain the cedar every 5 years. Stain is a more effective protectant for cedar than paint so opt for stain when you can. Hiring a professional to paint or stain your cedar shakes could cost upwards of $2,500 depending on your home’s size.

How Often Should You Clean Your Home’s Siding?

The exterior of your home needs a good cleaning about twice a year. Overtime, cobwebs, dirt and mildew can build up and shorten the life of your siding. A clean house will protect your siding as well as your investment.

How Do You Clean All Types of Siding?

Cleaning the siding of your home can be a bit treacherous, but luckily you only need to do it once or twice a year!

All types of siding benefit from a good cleaning to remove residue. Here’s how to do it correctly:

1. Check for Cracks and Damages in the Siding

Do a quick walk around your home and check for cracks, chipped paint, cracked boards, or other damages before you start the process of cleaning your siding. If you have cracks, water from cleaning could seep into the home, causing serious damage and trouble over time.

2. Invest in a Power Washer

A power washer is key to getting up in the peaks of your house by the roof, blasting away grit and grime, and takes far less time that washing the home’s siding by hand. This is especially true for homes with vinyl and wood siding.

3. Scrub the Siding with TSP

30 Second Outdoor CleanerNext time you’re at GNH Lumber, pick up some TSP (trisodium phosphate). The TSP that GNH Lumber carries is phosphate-free. Mix ½ cup with 1 gallon of water and apply to a sponge, washcloth or soft-bristled brush. Start scrubbing those stubborn areas where birds or spiders have left their droppings. These are usually the toughest things to get out of your siding! Work from the bottom to top to avoid streaking and then rinse.

Don’t want to mix your own solution? GNH recommends 30 Seconds Cleaner for Algae, Mold and Mildew. This powerful formula is safe to use around landscaping, plants and your lawn. Simply attached to a garden hose, spray on and hose off. It is proudly made in America and has been around since 1977 so it is a tried an true product. Stop into our Greenville or Windham locations and ask for it by name.

Keeping your home clean and maintained properly can save you tons of money in the long run!

For all your outside cleaning and maintenance needs, visit our Windham or Greenville location