garden bridge

DIY: How to Build a Small Garden Bridge

garden bridge

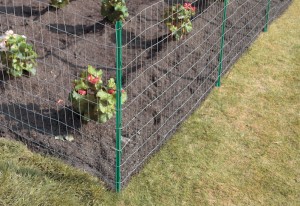
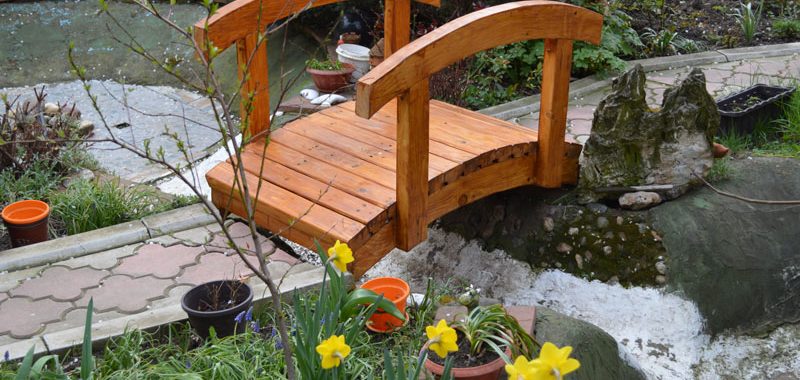
What could be more charming than a small wooden bridge to accent a water feature or help you step over uneven sloping in your garden? And, it’s easier than you think to create your own bridge! Just follow these simple instructions for a sturdy, arched garden bridge with handrails that you can paint or stain any color you like.

Here’s what a small garden bridge DIY project requires:

Materials:

  • (2) 2x12s hardwood (for support stringers)
  • (13) 2x6s hardwood (for floor planks)
  • (2) 8’ 4×4 treated pine post (for handrails), cut into 6 32” posts
  • 25” Length of bendable conduit (to create arch guide on stringer)
  • Benjamin-Moore Paint or stain (available at GNH) & brushes
  • Wood screws (2” stainless steel)
  • Wood nails
  • Pencil (for marking)
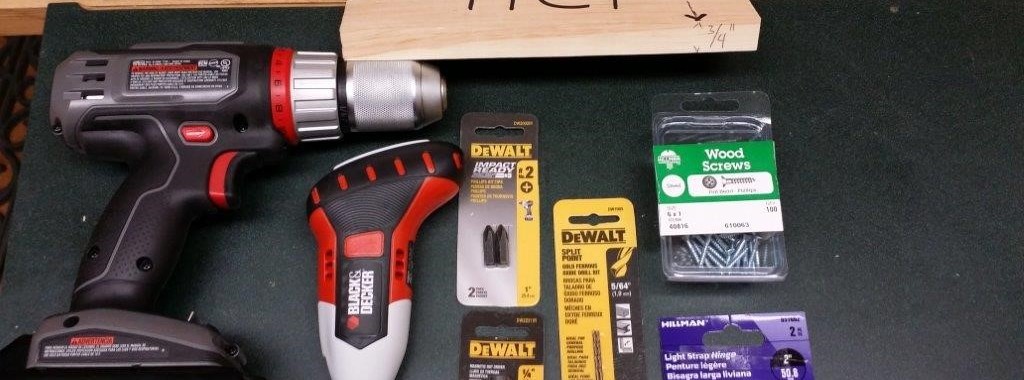
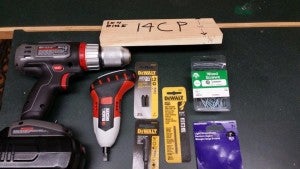
Tools:

  • Circular saw
  • Jigsaw
  • Electric screwdriver
  • Drill/drill bit (1/2”)
  • Hammer
  • Wood planar
  • Vice/wood clamps

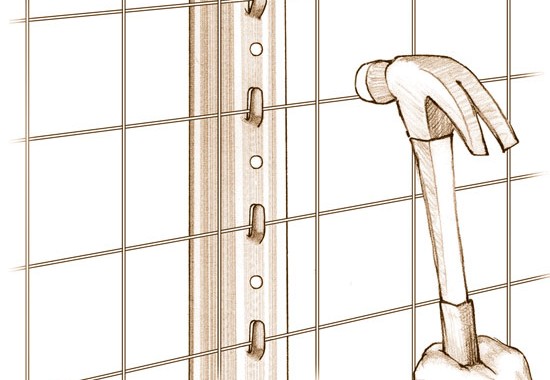
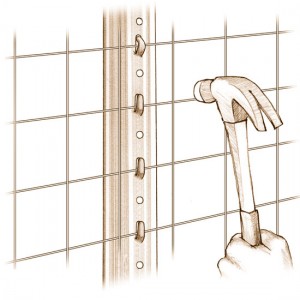
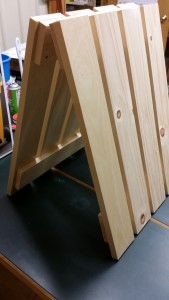
1. Draw Arches on the 1st Support Board (Stringer)

Lay one of the 2×12 boards flat to prepare to sketch pencil guides for the top and bottom arch shapes:

stringer diagram

There’s a simple trick to creating a perfectly even archway – and it works every single time! First, drive a guide nail on each end of the board. Next, bend a length of plastic conduit between the two nails (see diagram above), and use the conduit as a guide to draw the arch onto the board with your pencil.

For the lower arch, drive two nails into the lower side of the wood, each 18” from end. Repeat the process of bending the conduit between the nails and drawing the lower arch onto the wood.

You will cut the 1st archway, and then use that as a guide for the 2nd archway, so there’s no need to measure twice!

Tip: Leaving 18” from the end of the boards on the bottom cut ensures that there will be plenty of support on the stringers for the weight of the bridge.


2. Cutting & Sanding the Stringers 


The easiest way to cut the top arch from the first stringer board is by a series of short straight cuts using a circular saw. For the bottom arch, a jigsaw works best – just be sure to move slowly to get through the thick wood without damaging the blade!

Now, lay the finished stringer atop the second 2×12 board, and use it as a guide to draw the arches onto the second board in pencil. Cut the second board.

Finally, clamp both stringers together and use a wood planar to smooth out any rough edges in your archway cuts.

Paint stringer boards white (or any color or stain you choose)! We suggest Benjamin-Moore exterior paints or Arborcoat stains – available at GNH Lumber!

Allow to dry.


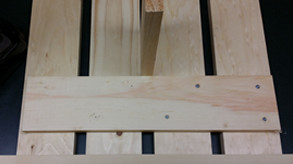
3. Cutting & Drilling the Planks


Cut your hardwood 2x6s into 36 inch planks. Place the stringer boards parallel on the ground and measure 32 inches between them, top and bottom (to allow for 2” of plank overhang).

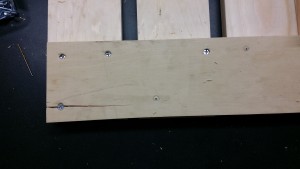
Place a hardwood plank onto the stringers and arrange so that there is even overhang on both sides. Mark and pre-drill two holes on each side of the plank (all the way through to the stringers below). Drill 2” stainless steel screws to tighten.

Next, place the second plank onto the stringers. Using a carpenter’s pencil, measure a space between the first plank and the next. Now, repeat the steps above to secure the plank in place.

Continue working from one end of the bridge to the other until all the planks are secured to the stringers!


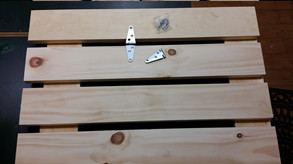
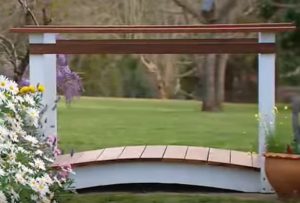
4. Attaching Posts & Handrails


If you choose to add posts and rails to your garden bridge, cut your 4 x 4 posts into four 32” lengths, and paint them white (or any color or stain you choose – just make sure it matches your stringer boards). We suggest Benjamin-Moore exterior paints or Arborcoat stains!

Allow to dry.

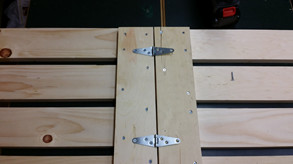
Remove the 2nd or 3rd planks from both ends of the bridge for post placement.

Place rail posts to the outside stringer boards, one at a time. Use a T-square to ensure they are at a clean right angle to the ground. Pre-drill holes and then secure to the stringer with wood screws.

garden bridge 2

Next, measure and cut the planks to fit around the rail posts before returning them to the bridge.

Finally, add handrails to match the planks of the bridge! Secure the handrails to the posts with 2 wood screws through each post on both ends of the bridge.


That’s all there is to it! Enjoy your brand-new garden bridge! Place it over a small creek, water feature or uneven sloping on your property.


At GNH Lumber, we have everything you need to create your beautiful garden oasis. For more guidance, tips and ideas, stop in to our Greenville or Windham locations, or visit us today online!

Sources: Great Home Ideas, How To Build A Backyard Bridge, Handcrafted Garden Bridges, Footbridge Page 1, Handcrafted Garden Bridges, Footbridge Page 2

Canning Tips

Step-by-Step Canning Tips

Canning Tips
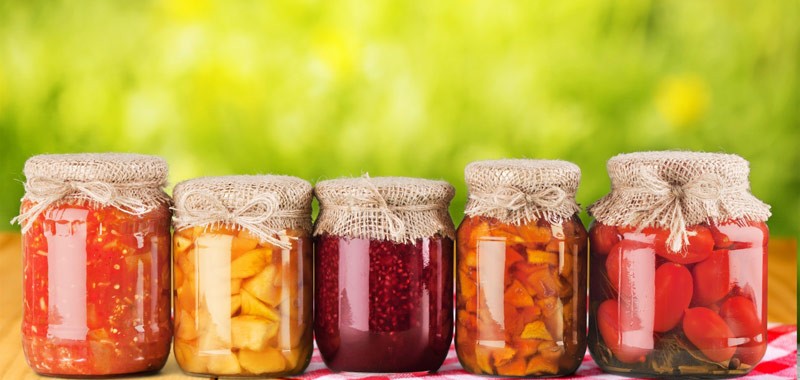
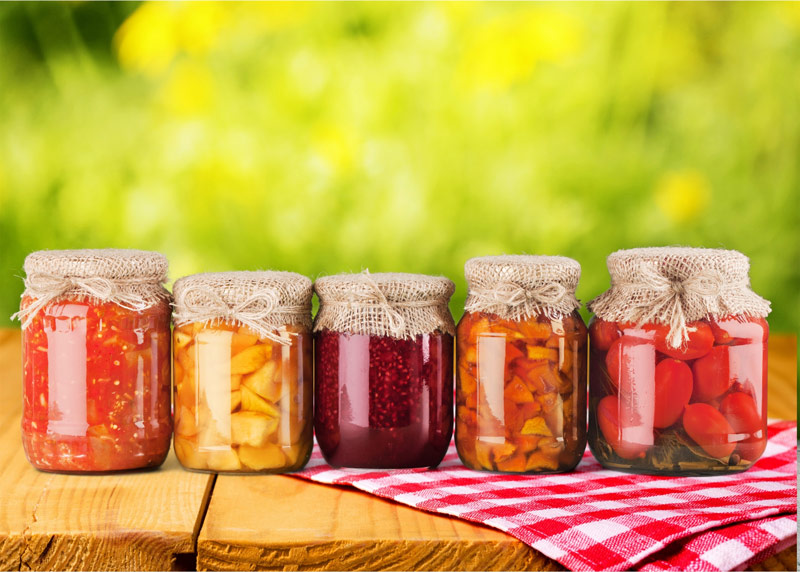
Canning fruits, vegetables, sauces and preserves may appear difficult at first, but once you become familiar with a few basic techniques and precautions, you’ll find it quite simple, and enjoyable. Here are a few basic canning tips to keep in mind.

Canning success comes from always remembering two general rules:

  1. Use the best produce you can find, and;
  2. Make sure your jars are properly sterilized and sealed.

Sterilizing

  • Never use jars with any chips or cracks. Wash the jars, lids, and screw bands thoroughly in hot, soapy water, making sure to rinse well. One-quart mason canning jars (available at GNH) are perfect for most canning projects. The come in both regular and wide mouth openings.
  • Place the jars upright on a wire rack in a large pot, fill pot with hot water until the jars are submerged, and bring the water to a boil. Boil for 10 minutes, turn off the heat, and leave jars in the water. Sterilize the lids according to the manufacturer’s instructions.
  • Using stainless-steel tongs, lift the jars from the pot, and place them on a padded layer of clean towels. If you don’t have tongs, a Canning Set (available at GNH) has all of the tools you will need to have a successful canning experience.

Sealing

  • Pour fruits or vegetables into the jars, and wipe the rims carefully. Each jar should be filled to a quarter-inch from the top.
  • Eliminate air bubbles by poking through the contents of the jar with a chopstick or wooden skewer.
  • Place the lid onto the rim and the screw band over the lid. Use one finger to press and hold the lid securely in its center. Twist on the screw band until it’s tight.
  • Put a wire rack on the bottom of a large pot, and fill the pot with hot water. Use a jar lifter to place each jar on the rack. Add enough water to cover the jars by 2 inches, and bring the water to a boil.
  • Boil the jars for 10 minutes; remove from the water with a jar lifter, and allow the jars to stand on the towels for 24 hours. When the jars are cool, check for a slight indentation in the lid, this indicates a vacuum seal.
  • Finally, store your jars in a cool (50 to 70 degrees Fahrenheit), dry, dark place. Use within one year.

It’s as simple as that! Now you can enjoy your own homemade canned goods and be proud of canning them yourself.

gardening

Calling All Green Thumbs! Let’s Get This Garden Started

gardening

Are you ready to roll up your sleeves and get serious about making your garden sensational the season? Let GNH Lumber help get you started on the path to perfection. You can cultivate the garden of your dreams – and have fun doing it!

GNH has everything you need to break ground and get the garden fenced off right!

woman gardening
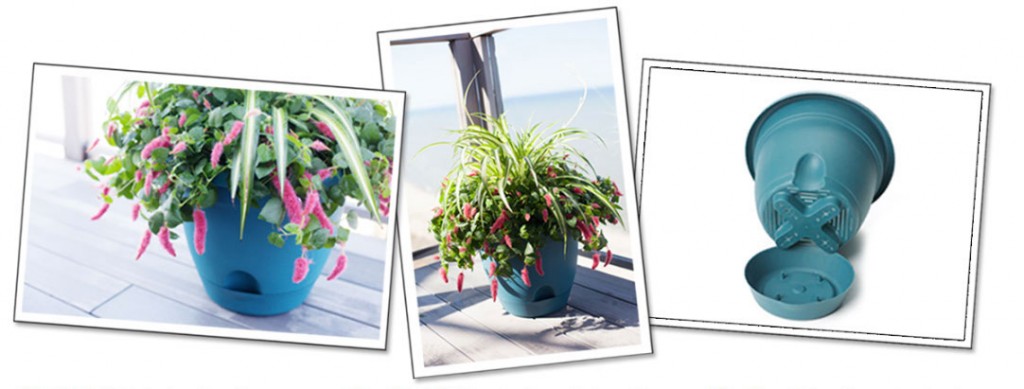
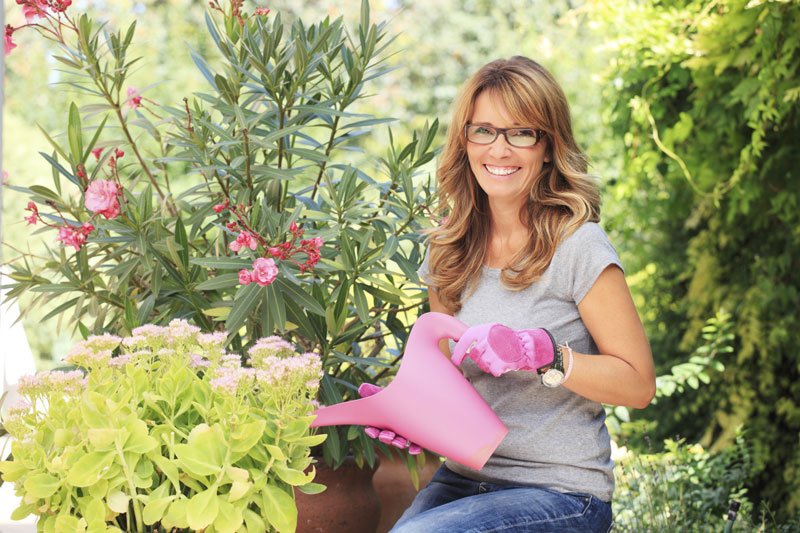
From colorful pots and planters, to decorative garden accessories, Bloem has something unique for every gardener of every age. Their planters not only get the job done, but they provide a splash of personality to any space.

Bloem’s Lucca planters come with an attached basin, so you only have to water from the top down until the root system is established, making growing easy. Make summer easier with self-watering planters that can help plants survive in drought conditions!

How do you do it? Here are the 3 easy steps:

Step 1:

Fill your Bloem Lucca planter with soil and plant your arrangement of live goods as you would normally.

Step 2:

Water plant from the top of the planter until the root base is established. (This will allow for the root system to grow into the watering tray. In the meantime, the watering tray will act as a regular saucer capturing excess water).

Step 3:

Once the root system is established (3-4 weeks), fill watering tray with clean water or fertilizer enhanced water. Root system will wick the water up for proper hydration. Once tray is empty refill as necessary!

Need seeds to start things off? GNH is happy to support and distribute Bentley Seeds for the gardening season. Bentley Seeds are developed specifically for our geographical region, so you are likely to get great growing results. And they come with easy growing instructions – even for those small garden spaces.

Added bonus: Bentley Seeds has a Give & Grow Program – with every retail packet you purchase on their website, Bentley Seeds will send a packet to a community garden or charity.

Come browse our expanded selection and get inspired!

Garden Fence

Building A Fence For Your Garden

Now that it’s time to start planting for your garden it’s also time to make sure that you keep those animals and pests out by building a fence. All you will need is some poultry netting and fence posts- both of which are on sale this month at GNH, so not only can you start building, but you will be getting a great price on your supplies! Follow these easy steps and you will have your garden fence up in no time.

Determine where you want the fence, and how much fencing you will need. Keep in mind that your posts should be about 6 feet apart, so you will need to figure out how many posts you will need as well.

Once you have all of your supplies, push the posts into the ground by stepping on the fin at the bottom.

Sell_T_Fence_Post_Star

Line your roll of chicken wire up with a corner post and slip the horizontal wires along the second column of wire cells into the tabs on the posts.

HT_PG_BM_BWF_Body_Img-wire-faster-02

Next, unroll the wire and stretch it to the next post, ensuring the wire is taunt and level.

build-best-wire-fence-professional-steps-HT-PG-BM-hero

Hook the wire to the post in the same way you did on the first post, and continue this process until you wrap all the way around to your last post. You can even  hammer in the tabs to ensure the wire doesn’t come out.

mesh-fencing-squ jpg

Cut the chicken wire with wire cutters evenly down the edge, leaving a few inches beyond your last wire column.

It’s that simple!

Shrub Cover

The time it will take to build this will vary between 30-90 minutes.

Tree/Shrub Cover Kit

The following are tools and supplies needed to complete your tree/shrub cover project.
Stop into your local GNH Lumber and pick up any items that you may need.

Supplies
  • 1X4 Pine boards nominal size 3.5″ wide by 3/4″ thick (14CP)
  • Box of #6×1 (H40816) wood screws for small sizes or #8×1 for large sizes.
  • Pair of strap hinges. (H851662)

Tools
  • A corded or cordless drill or the Gyro by Black & Decker
  • 1/16″ or 5/64″ drill bit
  • A #2 Phillip’s head with magnetic bit holder
  • Tape measure
  • Pencil
  • Framing speed square
  • Handsaw or circular saw (a miter saw works as well)
  • For safety we recommend safety glasses and leather gloves. Nothing is worse the getting wood dust in your eye or friction burn on your fingers driving wood screws!

Plan and Build Your Shrub Cover

Step 1

First, decide that size or sizes or tree/shrub coverings you want. Then, bring your list of material needs and measurements for the wood to GNH Lumber and we will be happy to help you with your tree/shrub cover needs. We recommend trying to maximize your measurements with the ability to transport your wood home in your vehicle. GNH Lumber does offer delivery for a nominal fee of $35.00

Step 2

GNH can cut your boards for you to the nearest full inch, we have a $1.00 fee per cut. Be sure you have the right length as cut products are not returnable to GNH Lumber.

Begin by putting on your safety glasses. Measure your 1×4 pine boards to the length you wish to cut (our demo was 18″). Remember to measure one last time before you cut. Use the framing speed square and pencil to get a nice clean straight line across your 1×4 for your cut. Cut your 1×4 to get all of your vertical pieces. Most covers will have eight pieces.

Step 3

Next, get ready to cut your horizontal pieces. Take one last measurement, then use your framing speed square and pencil to mark where you will cut. Cut your horizontal pieces to the length you need. Save your scarp pieces of 1×4! These will come in handy when getting the spacing between boards to match. Stack your vertical pieces together to make sure they all came out the right length. Adjust accordingly if you desire.

Step 4

Shrub Cover Step 2

On a flat surface, lay your 1×4 vertical pieces out side by side. Use one of your scrap 1×4’s for spacing between the boards (using the 3/4″ thick side), and use your framing speed square to make your first piece straight. Take one of your horizontal pieces and lay it on top of the vertical 1×4’s perpendicular (at a 90-degree angle). Get your drilling device of choice. Remember if using a cordless drill be sure that you have a freshly charged battery it will be easier to drill your pilot holes and drive your wood screws. Load your drill bit of choice in the drill.

Step 5

Shrub Cover Step 3

If unsure that your drill bit is long enough, compare the drill bit on the edge of 1×4 to see if the bit will be long enough to get to the lower 1×4 board before you drill. When drilling, most drills have a “drill” setting. Set to drill. Be sure you are at least 3/4″ from any edge. When you drive the screw the wood may still split.

Step 6

Shrub Cover Step 4

Firmly hold the two pieces down, plunge the drill bit into the top 1×4 and proceed down so it penetrates into the lower board a bit. Switch the drill to reverse, pull trigger and extract. Repeat this process in a zigzag pattern; making two holes in each vertical piece and three on the two outer pieces.

Remove your drill bit and put in your magnetic bit holder with the #2 phillips bit. Open your box of #6 or #8 x 1 wood screws. For safety keep your safety glasses on and put on your leather gloves. Take your drill off of the “drill” setting. We recommend a driving speed of 14. Put your screw on the phillips bit and firmly push the screw into the pilot hole and squeeze the trigger, keep the drill as straight as possible and drive the screw down a little past the face of the 1×4. Repeat this step on the other three horizontal pieces.

Step 7

Shrub Cover Step 5

Your panels are now together. Open your strap hinge package and choose which will be the top or your cover. Place both hinges down on the horizontal 1×4 line up to make sure the hinge screw won’t land on one of the other screws. Mark the locations with your pencil. With your drill and drill bit drill, pilot holes for the hinges. When you are done, place the hinges back over the pilot holes and drive the screws into the holes. When this is complete, place another panel next to hinges and repeat the process.

Step 8

Shrub Cover Step 6

Once all are finished, lift up your new tree-shrub cover, opened like an “A”, and admire your handy work!

Shrub Cover Step 7