Do It Yourself Winter Projects

7 Do It Yourself Projects You’ll Want to Start This Winter

Do It Yourself Winter ProjectsHaving an occasional lazy day indoors is relaxing, but if you’re stuck inside because of the cold, why not be proactive? There are a variety of easy projects you can take on during the winter that you will appreciate thoroughly when springtime rolls around again… So, why not make the most of the next winter storm?

If you’re feeling the winter blues, here are 7 DIY home improvement projects to lift your spirits:

1) Painting

Did you know that cold weather is ideal for drying paint? The dryness of the winter months makes winter the perfect time to paint the interior, so crack a window, and start painting. Select a bold color and paint an accent wall in your living room. Or add dimension to your bedroom by painting the ceiling.

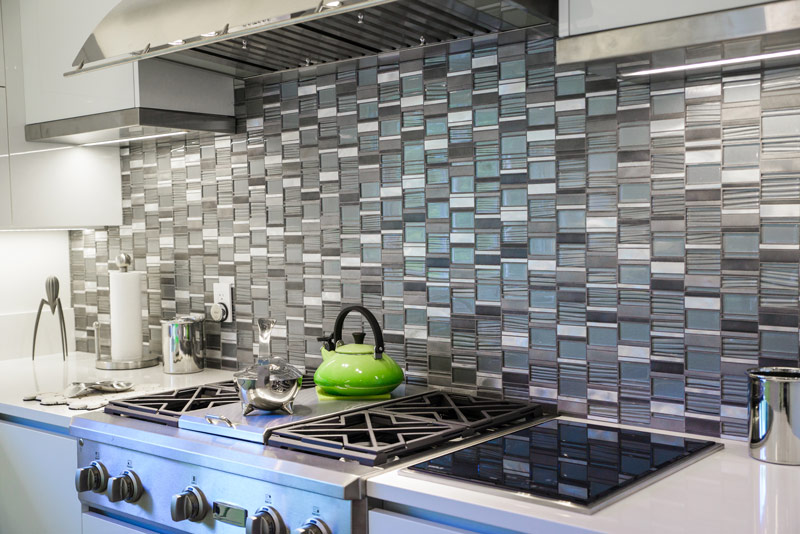
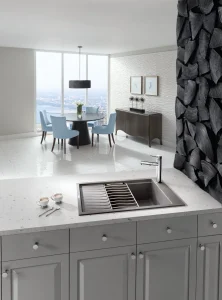
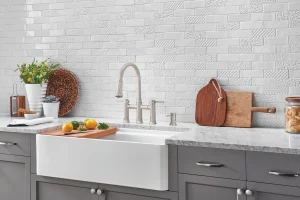
Backsplash project


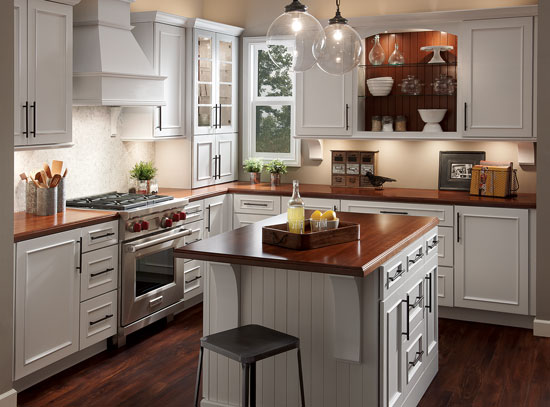
2) Add a Backsplash to Your Kitchen

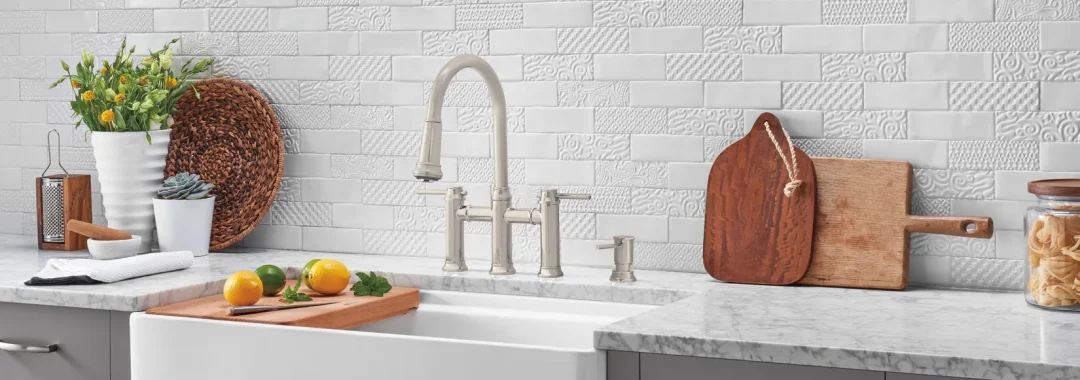
Backsplashes are important to adding personality to your kitchen. For a kitchen that needs some life, a flashy or textured tile can wake it up. For a kitchen that already has personality, a sleek, neutral tile can add unity to the room’s look.


3) Add More Lighting

What better way to brighten and warm your spirits in the winter than with new lights, lamps or ceiling fans. Not to mention it’s an easy and affordable way to update the style of any room.

LED-style lights, which come in contemporary and bold styles, also provide a money-saving option. Installing dimmers in areas like the family room or dining room saves money, while allowing homeowners to customize the ambiance.
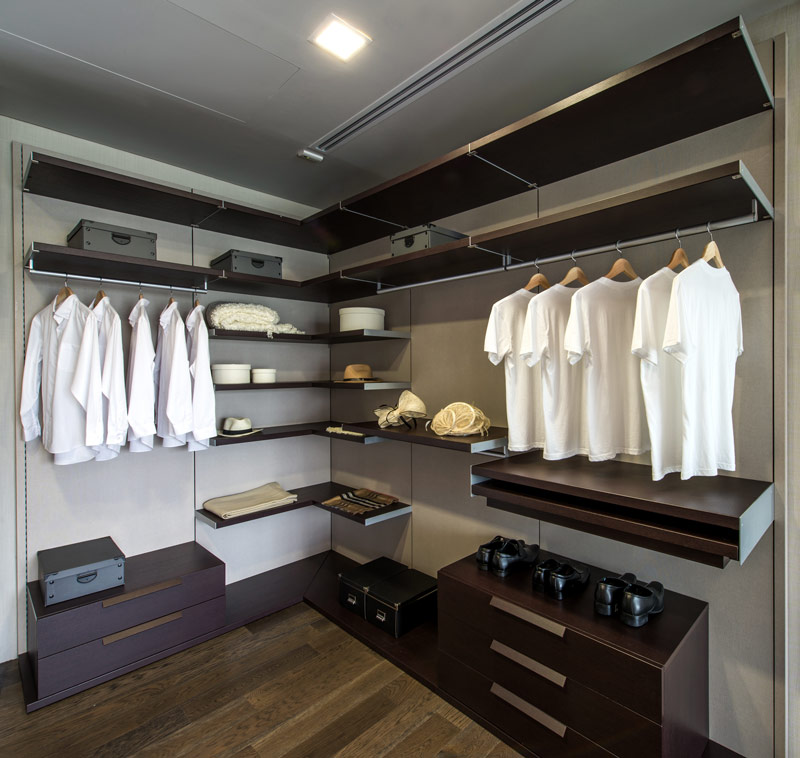
 

Organize Closet4) Make Your Closet More Organized

Is organization on your list of resolutions? Kick off the year by tackling your closet.

If you create a place for everything, you’ll be a lot more likely to put things away. There are so many things you can do to customize a closet for your needs. You can install shelving, purchase a shoe rack, create drawers and dividers, and much more. You can even try designing your own Modular Closet.

Remember, you’re only limited by your imagination.


5) Remodel Your Bathroom

There’s no better time than the winter to spice up your boring bathroom. While replacing a faucet, tile, or repainting are relatively easy for the DIYer, more ambitious jobs like replacing the tub or adding tile floor might be better left to a professional. Though a complete remodel will be a bigger investment, it’s worth considering.
 

Reburbish Doors

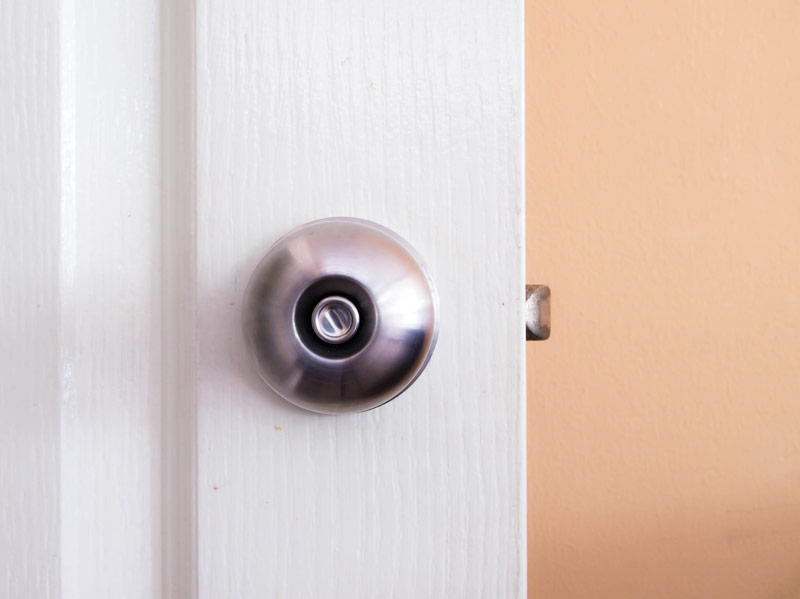
6) Refurbish Your Doors

Interior doors can have a lot of visual impact on your home. The good news is you can virtually “replace” all of your doors without spending excessively.

You can easily refurbish your interior doors by painting them, changing the doorknobs, and even adding moulding.


7) Change Your Light Bulbs

You won’t regret replacing your bulbs with energy-efficient ones. It’s a great way to go green and save money. On average, an Energy Star qualified light bulb will save between $30 and $80 in electricity costs over its lifetime, so don’t let the upfront cost of these bulbs scare you away from making the purchase.


By focusing on the inside of your home while the weather is cold, you’ll have a lot more time to tackle the warm-weather stuff when spring rolls around. And, as you begin your project, stop by GNH Lumber for all the supplies you’ll need, including tips and guidance!


Sources: “5 Easy Home Improvement Projects & Upgrades For the Winter”, moneycrashers.com.

Winter Preparedness 101: Is Your Home Ready?

winter-preparedness

It’s fall season again. The leaves have fallen from most of the trees and the air is increasingly chilled. Like it or not, we all know that winter is close behind. Before the snow starts falling and temperatures drop, it’s a good time to think about things like:

  • Preparing your home for snowstorms
  • The cost of winter heating
  • Ways to improve your home efficiency

Is your home ready for the coming winter? Not yet? Not sure? Don’t know? Don’t worry! There are a few simple steps you can take each autumn to protect against damage from winter storms and create a more efficient home.

So, let’s start exploring some steps you can take right now to prevent those wintertime headaches:

Continue reading

How-to-Transform-Your-Home-for-the-Holidays

How to Transform Your Home for the Holidays

How-to-Transform-Your-Home-for-the-Holidays

The holiday season is upon us again! As the days grow shorter and the occasional snowflake swirls through the air, you may be inspired to create a magical environment for family gatherings this year.

Perhaps you want to create a warm and cozy bedroom, a festive winter wonderland in your living room, or a unique color combination for your dining room. Whatever the mood you’re trying to set, a touch of paint can help you transform your home in dramatic fashion. Here are some ideas to give you inspiration:

Get your painting project started!

1. Warm & Cozy 

How to Transform Your Home for the Holidays - Warm Paint Hues

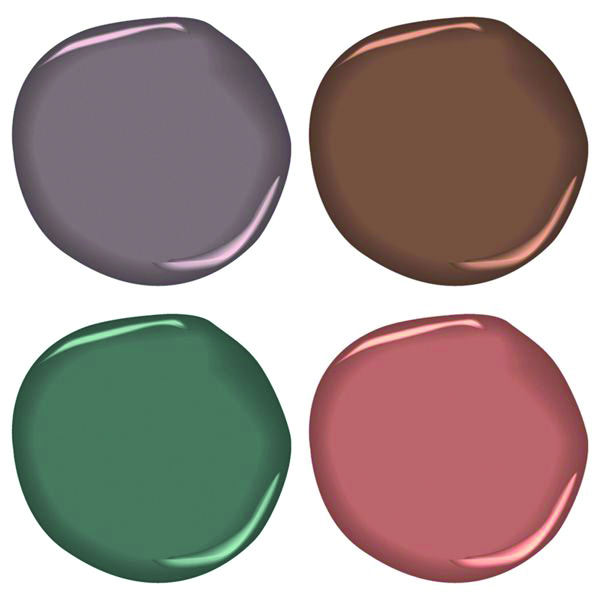
Adding the right hue can instantly create a warm and cozy feel for the holidays. (Clockwise from top left, Cinnamon Slate; Hot Chocolate; Jack Pine; Spiced Apple Cider; all colors by Benjamin Moore)

And you don’t have to paint the whole wall to create a big impact. “Pops of color can be great ways to add interest to a room in a subtle way,” says Benjamin Moore’s Director of Color and Development, Andrea Magno. “The inside of a bookcase, behind glass cabinets, an accent piece of furniture, or even the inside of a closet or a door—the key is to bring in a pop of color in a location that makes sense with the space.”

2. Winter Wonderland

How to Transform Your Home for the Holidays - Winter Wonderland

Another great way to add a festive touch to your home is by transforming a room into a winter wonderland. A fresh coat of white or off-white paint with silvery-gray or blue trim is an excellent starting point. You can also paint your fireplace in stunning white to help set off your holiday decorations. Plus a big bonus is a white fireplace works well all year-round.

3. Colorful Combinations

Looking for a unique holiday color combination? Here’s a great tip from HGTV.com: “Take a color cue from holiday gift bags. Incorporating several colors into a space is often a stumbling block for many do-it-yourselfers. By simply perusing the gift bag aisle, you’ll find exciting and unusual combinations that are often easily transferable to your space.”

Maximize Kitchen Space

5 Ways to Maximize Kitchen Space During the Holidays

Maximize Kitchen Space

December is a busy month for the kitchen. Many of us spend our time planning and shopping for the holiday season, as well as welcoming family into our homes.

While it’s an enjoyable time, it can get quite chaotic, especially when you’re the one that’s preparing all the food.

Get your kitchen design project started!

To save yourself some stress this holiday season, consider these tips for both reorganizing your home and maximizing kitchen space:Continue reading

Fire prevention week

Tips for Fire Prevention Week

Fire prevention week

In a fire, seconds count. Seconds can mean the difference between residents of our community escaping safely from a fire or having their lives end in tragedy.

That’s why this year’s National Fire Protection Association’s Fire Prevention Week theme: “Every Second Counts: Plan 2 Ways Out!” is so important. It reinforces why everyone needs to have an escape plan.

Here’s this year’s key Fire Prevention Week campaign messages:


  • Draw a map of your home by using our grid in English (PDF) or Spanish (PDF) with all members of your household, marking two exits from each room and a path to the outside from each exit.
  • Practice your home fire drill twice a year. Conduct one at night and one during the day with everyone in your home, and practice using different ways out.
  • Teach children how to escape on their own in case you can’t help them.
  • Make sure the number of your home is clearly marked and easy for the fire department to find.
  • Close doors behind you as you leave – this may slow the spread of smoke, heat, and fire.
  • Once you get outside, stay outside. Never go back inside a burning building.


The NFPA has developed a series of Sparky video clips that reinforce important home escape planning and practice messages. In the video above, Sparky says know two ways out of every room.


Tips for Creating and Practicing Your Escape Plan:

  • Everyone in your household should know two ways to escape from each room in your home.
  • Decide where to meet once you get outside.
  • If a fire starts, you may have just two minutes to get to safety. So, time your fire drills and find out: what’s your escape time?
  • Smoke is dangerous: practice low crawling.
  • If your clothes catch on fire: stop, drop and roll.


Top Tips for Fire Safety from The American Red Cross:

  1. Install smoke alarms on every level of your home, inside bedrooms and outside sleeping areas.
  2. Test smoke alarms every month. If they’re not working, change the batteries.
  3. Check smoke alarms yearly to be sure they are less than 10 years old.
  4. Carbon monoxide alarms are not substitutes for smoke alarms. Know the difference between the sound of smoke alarms and carbon monoxide alarms.
  5. Talk with all family members about a fire escape plan and practice the plan twice a year.
  6. If a fire occurs in your home, GET OUT, STAY OUT and CALL FOR HELP. Never go back inside for anything or anyone.

If your home needs a new smoke detector, Carbon Monoxide detector, or combination of both, GNH Lumber is offering several options on sale this October. In support of National Fire Prevention Week initiative’s, we are also featuring a sale on fire extinguishers and straps. Visit our web sales page for pricing and details.


CLICK HERE for Fire Prevention & Safety Checklist

CLICK HERE for this month’s GNH Web Sales


Sources: Home Fire Safety“, RedCross.org; “Fast Facts About Fires“, NFPA.org.


Smoke & Carbon Monoxide Alarms are ON SALE this month only at GNH Lumber! CLICK HERE for web sale details.

Benefits of Going Cordless

Are you sick of having to plan your construction project around a power source? Tired of tripping over extension cords or pulling them out of the outlet when you take just a step too far? You may want to consider upgrading to cordless power tools.

Why Cordless?

There are a number of perks to using cordless power tools. For example:

  • Convenience- Cordless tools allow you to be more mobile. Outdoor projects are a breeze without having to find an outdoor outlet, extension cords or a set up a generator. If you’re moving from job site to job site, they’re easy to pack up and go without the hassle of wrapping a cord.
  • Efficiency- Long battery life allows you to work for hours without interruption. When it does finally die, you can seamlessly switch the battery out with a fresh, charged one.
  • Safety: No more tripping on cords. No more patching up frayed cords with electrical tape.

Is Cordless right for you?

Before making the switch, it’s important to consider whether a cordless tool is right for the type of project(s) you are working on. For most every day projects around the house, a cordless tool will get the job done. Cordless tools are also a good choice if you’re going to be working in tight areas or on a ladder.

If the tool you need uses a lot of power, such as miter saws or metal cutoff saws, or if you’re going to be working with very tough material such as concrete or stainless steel, chances are you will need a corded tool.

While there is not a huge difference in cost between the corded and cordless tools themselves, you need to also factor in purchasing at least two batteries and a charger. This means that cordless tools cost more upfront, but the added convenience is worth the price.

Here are some cordless DeWalt power tools you can find at GNH:

20V MAX* Inflator Bare Promo

This versatile Air Inflater can either be used with a power cord or with a battery to inflate tires, pool floats and basketballs. It features a simple, easy to use digital gauge and its automatic shutoff feature ensures accurate inflation. The inflater also has an LED light for increased visibility in dimly light spaces.

ATOMIC™ 20V MAX* 1/4 in. Brushless Cordless 3-Speed Impact Driver

This Cordless 3-Speed Impact Driver is great for your framing, decking, cabinetry, electrical, dry-wall or plumbing projects. It features an LED light that increases visibility in dimly light work areas. At less than 4” in length, this driver is lightweight and compact, perfect for tight spaces. But don’t let its small size fool you: its motor delivers 1,825 lb of torque and 3,250 rpm to get the job done.

ATOMIC™ 20V MAX* Brushless Cordless Compact 1/2 in Drill/Driver

This Cordless ½” Drill/Driver has variable speeds for increased precision and control, as well as an LED light for increased visibility. Its compact, ergonomic design is comfortable in your hands. Despite its small size, the motor delivers 340 unit watts out and the 1/2” ratcheting chuck has superior bit gripping strength.

20V MAX* XR® Brushless Cordless 3-Speed Oscillating Multi-Tool Kit

This 3-Speed Oscillating Multi-Tool Kit comes with the oscillating multi-tool, battery, charger, bi-metal blade, wood cutting HCS blade, universal accessory adapter, sanding pad, 15 sheets of sandpaper, a depth guide and a tool bag. The Quick-Change accessory system makes switching blades easy without the need for wrenches, and the DUAL-GRIP variable-speed trigger increases precision and control. The multi-tool’s powerful brushless motor provides up to 57% more runtime over similar brushed tools.


To see our full line of DeWalt power tools, stop by GNH at our Greenville or Windham locations.

Make Your Deck Cozy for Fall

5 Ways to Make Your Deck a Cozy Gathering Place This Fall

Make Your Deck Cozy for Fall

Fall is the perfect time to gather out on the deck and enjoy the crisp cool air. That means it’s time to transition your summer deck from a “fun in the sun” hotspot to a warm and cozy autumn hangout!

And here’s the good news: it doesn’t take much time, effort, or money to change the feel of your deck, and effectively reinvent it for the coming fall season.

Get your deck or porch project started!

Here are 5 easy ways to make your deck a cozy gathering place this fall:

1. Create a Focal Point

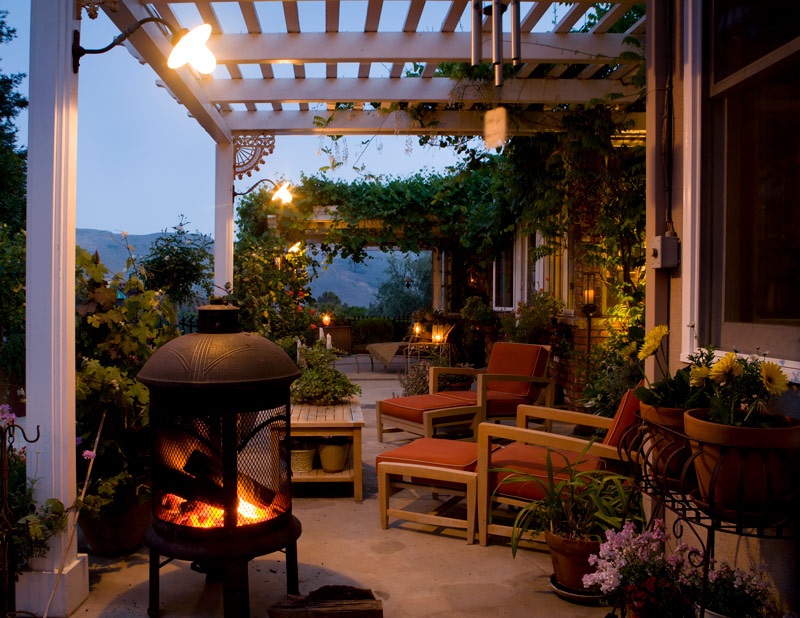
One easy way to give your deck a cozier feel is to create a visual focal point. Focal points encourage people to gather, chat and gravitate together in the space. This can be created by using an outdoor rug or a sitting area with a coffee table and comfy chairs. You can also use a stylish Chimenea or an outdoor fireplace to create a warm, inviting focal point

2. Make Large Areas Smaller

Pulling furniture closer together naturally makes people feel cozier. If your furniture is strewn out across the deck, try rearranging it into several smaller seating areas. Also, bring grills, benches and potted plants into tighter circles to improve this effect. You can also screen off larger portions of deck with room-divider screens or trellises covered with fabric to create cozy nooks.

3. Spice Up Your Space

If you want people to gather on your deck, then give them something fun to do!  The addition of a spa or hot tub might just be the thing that beckons everyone outside. Try adding stylish outdoor lighting or strings of outdoor lights to further enhance that cozy glow in the evening.

Remove canopy umbrellas, sun-lounging chairs and other remnants of summer. Then try placing sturdy, woodsy furniture, like Adirondack chairs and picnic benches. Add some large, cozy pillows to encourage people to kick back and relax.

4. Add Some Greenery

Cozy Deck Greenery for Fall

Adding plants is a quick and easy (and budget-friendly!) way to update your outdoor areas each season. Vines crawling up a pergola softens the space while adding interest. You can also create a splash of color with potted plants and seasonal flowers like goldenrod and chrysanthemums. This not only adds color and interest, it also gives you the flexibility to replace them depending on the occasion or your color palette.

3. Use Warm Colors

Summer means bright-colored plastic and garish, colorful decor. Fall calls for a more subdued, warm palette. Earthy tones like maroons, oranges and rusts. You can easily change out your color scheme by changing out cushions, accessories and carpets. Consider adding painted wood-furniture with deep-red and orange throws for snuggling under!

When making your deck the superstar of your cozy autumn gatherings, you’re only limited by your creativity and imagination! And don’t hesitate to stop by your local GNH Lumber for expert tips and guidance for your decking project.


Fall Deck Design TipsStop in to your local GNH Lumber for more tips and techniques for making your deck the gathering place of the season. We have outdoor furniture, lighting, Halloween decorations and other items to help you create a magical effect this fall!

Fall in Love with Tops Knobs’ Morris Collection

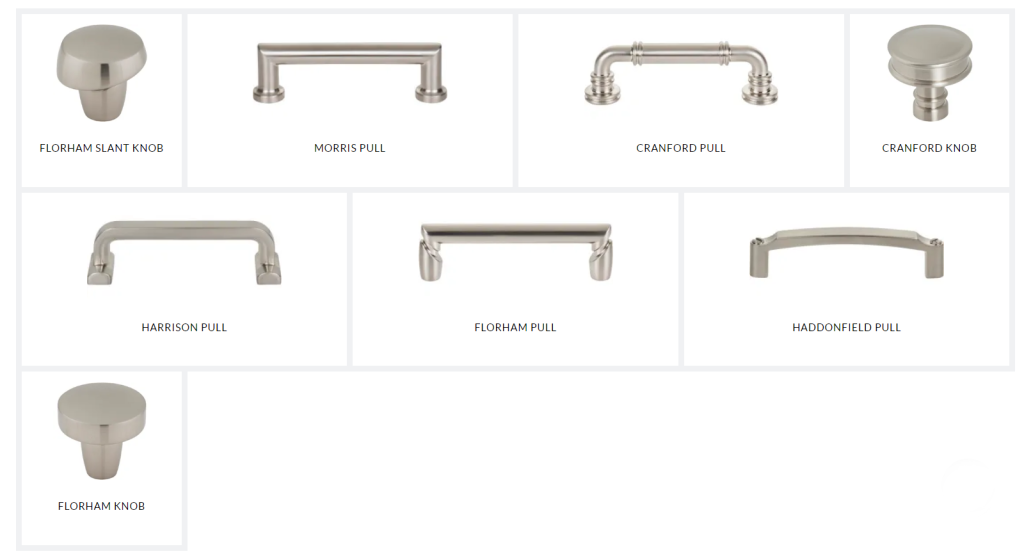
Using decorative hardware in your kitchen or bathroom is a great way to accent your design. Top Knobs’ Morris Collection offers classic designs with a timeless twist. This versatile collection pulls inspiration from various styles including farmhouse chic, modern industrial, transitional, contemporary and grand millennial.

With five different styles of pulls and knobs to choose from, you can mix and match to your heart’s content.


Each piece of hardware comes in 6 different finishes. Appliance pulls are also available.


What’s Trending this Season

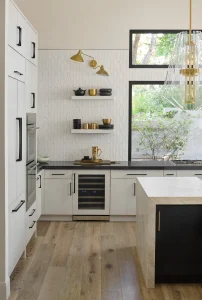
Thinking of sprucing up your kitchen this fall? Whether you’re looking to do a complete remodel or just jazz it up with a fun backsplash, keep these trends in mind as you transform your kitchen.

Artistic Designs

A fun and visually-appealing pattern can really make a difference in your kitchen!

Unique Textures

Similar to artistic designs, adding unique textures can really draw the eye and add depth to your kitchen.

Bold Backsplashes

Take advantage of a mostly-white kitchen by adding a bold backsplash. The high contrast makes the kitchen counters pop!

Warm Highlights 

You’ll love the way the light glints off your bronze hardware, fixtures and furniture. It really warms up the space and makes it more inviting.

Neutral Palettes

Neutral palettes are a great foundation for kitchen design because they go with almost anything! With this artistic freedom, you can find hardware that blends seamlessly into your design, like the example below, or make a statement with something bold.

Accessories to Match

Take your design full circle by making your hardware, light fixtures and even dinnerware match your kitchen’s color scheme.

Find Your Style

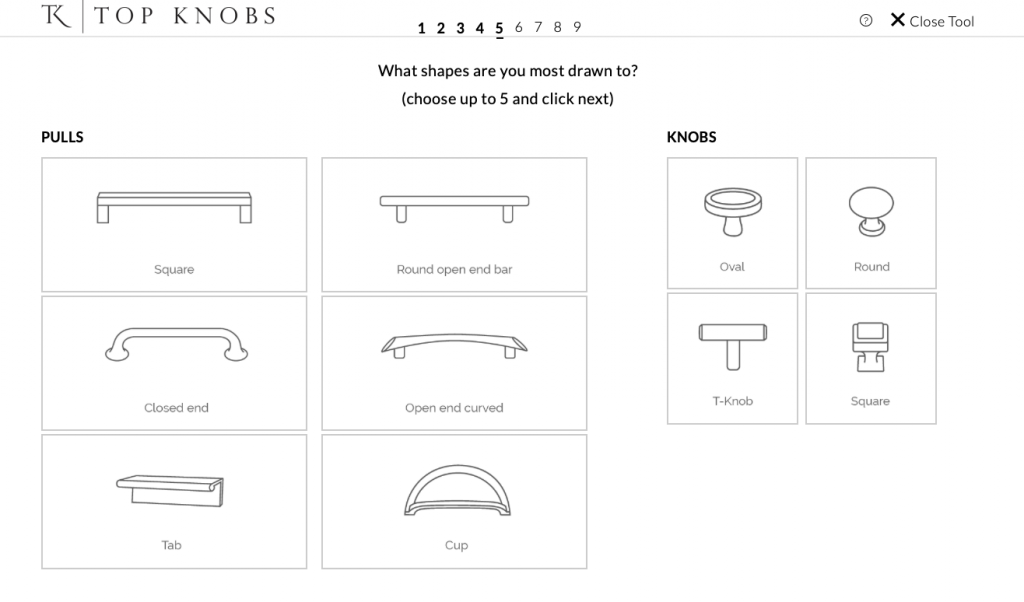
With so many different styles of knobs and pulls in countless finishes, it can be hard to decide what will look best in your space. Fortunately, Top Knobs’ Find Your Style tool makes the process easy from the comfort of your own home!

The tool is essentially a visual quiz, where users are asked 9 questions and matched with the hardware that best matches their style.

Based on your answers to the questions, the tool will generate a list of recommended knobs and pulls. You can save or share your results, or better yet bring them with you to GNH Lumber to pick out your new hardware!

Trending Textures for your Home’s Exterior

Gone are the days of boring, cookie-cutter style houses. Today’s homeowners are finding ways to express themselves by designing their homes in a way that reflect their style. One increasingly popular trend is mixing textures on your home’s exterior, which makes your home stand out among the rest.

How to mix textures

You’ll want to pick 2-3 different textures for your home’s exterior, and no more than 2-3 different colors. Too much variation will appear chaotic, so it’s important to be thoughtful about your choices.

You can take a drive around your neighborhood to get a sense of what you like, use online design tools like Cultured Stone’s Visualizer tool, or talk to our GNH design experts to get started.

Think about what focal points you want to stand out on your home— dormers, gables, porches, bump-outs, etc. Use contrasting colors and/or textures to draw attention to these features. You may also want to switch up the siding on different levels of your home.

Not ready for a remodel? You can start small by adding contrast with your front door, shutters or trim.

Using Cultured Stone for texture

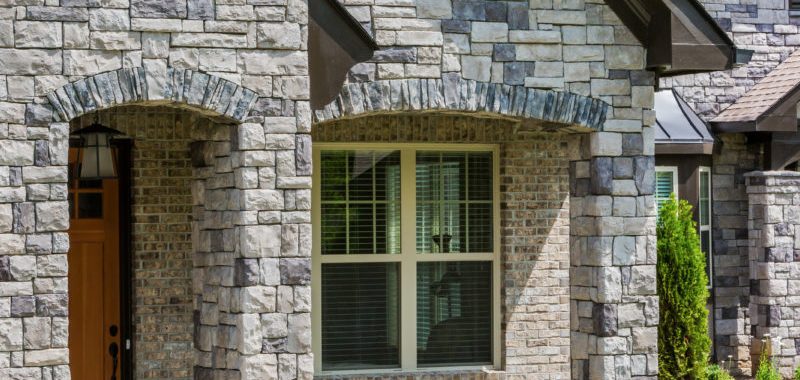
One texture you’ll definitely want to consider using is stone. With so many colors and textures to choose from, the possibilities are limitless. You can also choose between using natural stone or a manufactured veneer, such as Cultured Stone veneers. There are a number of benefits of using Cultured Stone veneers. Cultured Stone is about one-quarter the weight of natural stone and is generally easier and less costly to install. Because of its light weight, Cultured Stone can be installed on a variety of substrates, unlike natural stone which needs to be fixed to something structural. Composed of lightweight concrete, Cultured Stone will last as long as other concrete materials, which can be anywhere from 50-100 years. Cultured Stone products are virtually maintenance-free and come with a 50-year limited warranty.

Some consumers may worry that manufactured stones will be too repetitive in appearance, but Cultured Stone uses thousands of individual molds and no two stones are ever cast with the same exact coloring. In fact, Cultured Stone has the largest variety of colors and textures in any manufactured stone line, with more than 20 textures available in over 100 color combinations. Check out some combinations below!

Echo Ridge Country Ledgestone      Credit: Symphony Homes

Artic Pro-Fit Terrain Ledgestone
Credit: Hearth and Home

Aspen Dressed Fieldstone & Aspen Country Ledgestone

These examples show how you can use different colors of Ledgestone to create vastly different styled homes. One the left you have Echo Ridge Country Ledgestone and an arts and craft style home, followed by a modern looking home in the middle with Artic Pro-Fit Terrain Ledgestone, and lastly the rustic log cabin style home with a combination of Aspen Dressed Fieldstone and Aspen Country Ledgestone.


Echo Ridge Dressed Fieldstone
Credit: Barrington Homes

This Echo Ridge Dressed Fieldstone gives the house a rugged and historic look like it has been here through the ages.

Gray Cobblefield


The Gray Cobblefield on this home is designed to mimic the architecture of 19th century rural America.

For more inspiration, visit the Cultured Stone Designs Gallery.

GNH How to Save Kitchen Remodel

How to Save Money on a Kitchen Remodel

How to Save Money on a Kitchen RemodelFind out how to save money on a kitchen remodel from GNH designer, Michele Gregg.
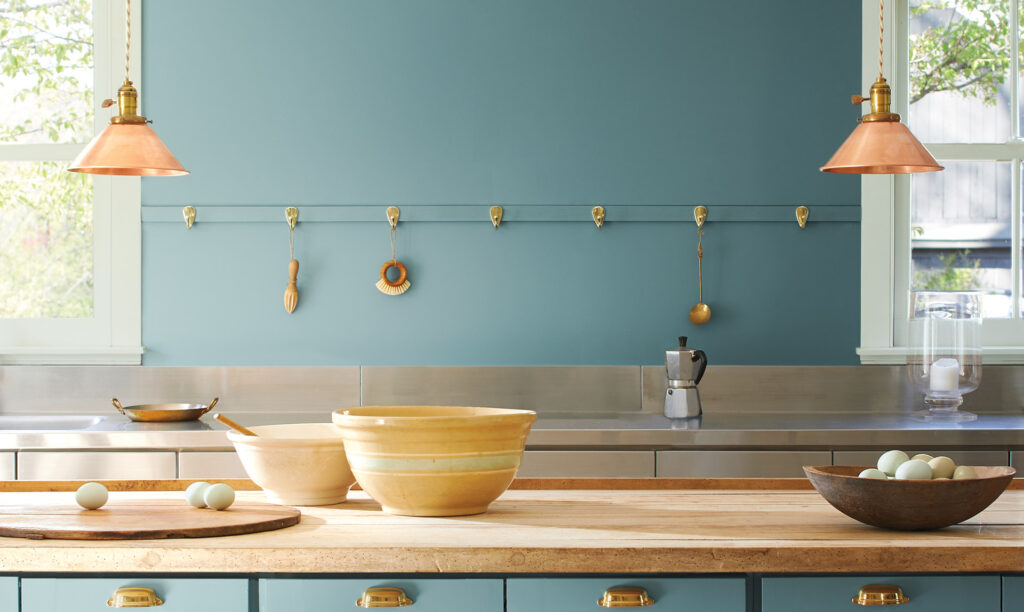
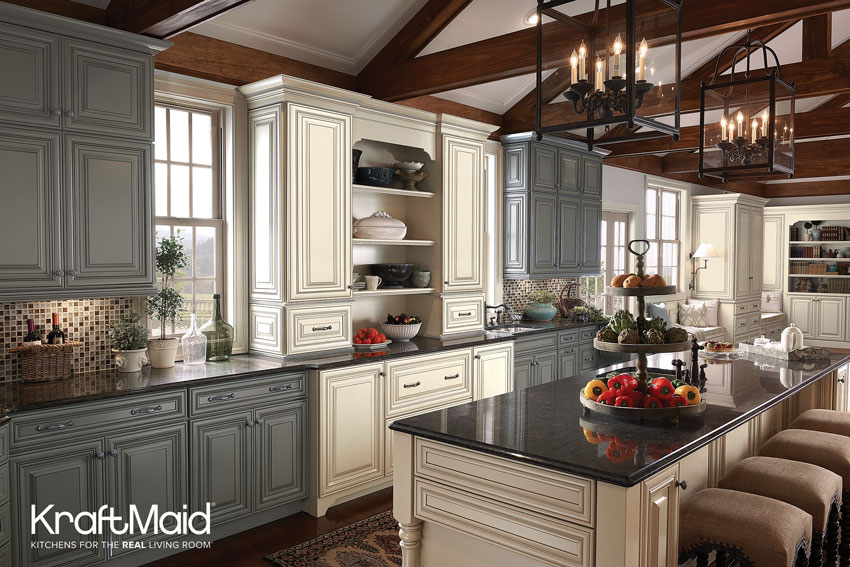
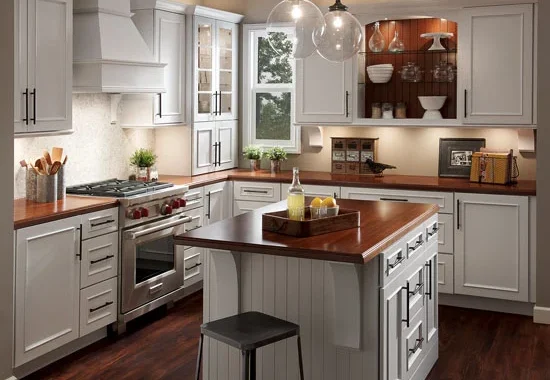
Are you dreaming of an updated kitchen but don’t have a huge budget to spend? Maybe you’re thinking of selling and want to bump up the value of your existing kitchen and make a great first impression? Well, you’ve come to the right place! From a few small cosmetic updates to a major reno, GNH kitchen designer, Michele Gregg shares her secrets for how to save money on a kitchen remodel.

If you’re looking to update your kitchen on a tight budget, there are many different approaches depending on the size of your project. There are a few tried and true updates that are low cost with big impact. But if you have a little bit more to spend, a well-placed upgrade can reap big rewards when it comes to resale value.

Here are a few simple ways to create a functional & aesthetically pleasing kitchen, without spending a fortune.

  1. Fresh coat of paint. A new wall color can change the room drastically!
  2. Wallpaper an accent wall. Wallpaper is making a comeback! Give the room a focal point… Easily add texture and depth.
  3. Hang a new light. Swapping out existing light fixtures will give a fresh update to your space. You can select a light to fit your desired style.
  4. Add undercabinet lighting, gives great task lighting!
  5. Replace your faucet.
  6. Swap out your cabinet hardware. This is a great way to add some style to your cabinetry.

The best part? All these projects can be completed by a DIY homeowner on a weekend!

How to save money on a kitchen remodel - fresh coat of paint

For a full-fledged kitchen remodel, you can pick and choose what to upgrade in order to get the most bang for your buck.

Here are some recommendations for cutting costs on your kitchen remodel:

  1. New Design, Old Layout – Embarking on a new design using your existing layout will help keep labor costs and construction costs down. Relocating appliances, plumbing & electrical can inflate costs.
  2. Keep Existing Appliances – If you keep your existing appliances and replace only as needed, you can use that money elsewhere in the remodel. There are many appliances that you can swap out after your remodel is complete. With some appliances, advanced planning with your designer will be necessary. Example: Your current working refrigerator is a 32” wide, but you know you will want a 36” French Door refrigerator. Your designer can ensure your space will accommodate the future refrigerator.
  3. Avoid Costly Project Delays – With a kitchen remodel, it is more than just replacing cabinetry. Working with an experienced designer will help you navigate all aspects of this remodel. Designers stay up to date on trends & new materials. They are familiar with their local building codes and working with contractors. Their experience will translate into avoiding delays and will save you money in the long run.
  4. Choose Affordable Cabinetry – Cabinetry comes in a variety of pricing. All serve a purpose, when paired with the right application. Working with a designer will help you navigate the quality, customization, and necessities for your space & budget.
  5. Prioritize Needs vs. Wants – Make a list of ideas, necessities, and dreams for your space… prioritize them in order of most important to least important. Be realistic with yourself! Understand how certain cost-effective products can help with achieving your dream list. Or invest in top-desired items first and stretch your projects out over time.

What's the Best Layout for Large Kitchens?