
Did you know that with regular maintenance, a deck will easily last for twice as long as one that isn’t maintained? It’s true, and what’s more, most decks can be rejuvenated for a lot less than the cost of replacement.
Here are some techniques you can use to give an old deck a new lease on life or to help maintain the look of a new one!
1) Make Thorough Repairs
Begin by inspecting the entire deck. Pay special attention to any part of the deck that is in direct contact with the ground, such as the posts, stair stringers, or joists that are at ground level. We recommend using a screwdriver to check for structural damage.
Tip: If you can sink the tip of a screwdriver into a post or joist, it means you’ve got rot and it’s time to consider renovation.
Also, inspect the connection of your deck to your house. Screws and bolts can loosen and rust, and without the proper use of spacers and flashing, moisture can cause your band joist to rot.
Be sure to tighten the fasteners that attach the deck to the house, while looking for any missing, bent, or rusted flashing. Then, carefully inspect inside and out for any telltale black stains that suggest moisture is working its way into your home.
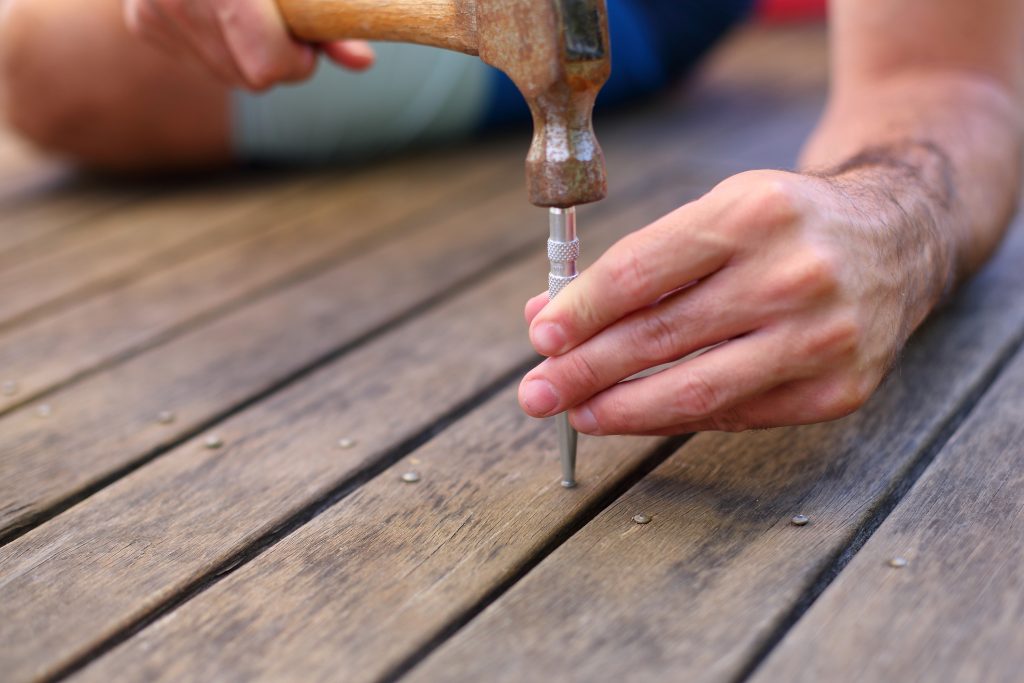
Next, look for any cosmetic damage. For example, tap down any popped nails or consider replacing them with screws. We advise using galvanized ring-shanked nails to repair damaged boards and ensure longevity.
Tip: If you need to rip replacement decking to match existing boards, use a table saw. Ease the sawn edge using a router fitted with a ⅜-inch roundover bit.
Finish by carefully inspecting your railings and decking for loose wood. This avoids the possibility of splinters or further cosmetic damage to your deck.
2) Clean the Surface
Assuming your deck has been maintained regularly, it can be revived with a simple deck cleaner. Some products are mixed in a bucket and applied to the deck directly. Others come in containers with applicators that you hook up to a garden hose. Once on the deck, most still require a stiff-bristle brush and a lot of elbow grease to work the mixture into the wood.
Here’s a deck cleaner you can make yourself and that’s great for mildew and dirt:
- 1 qt. sodium hypochlorite solution (household bleach)
- ⅓ cup powdered laundry detergent
- 3 qts. warm water
- In a 5-gal. plastic bucket, add the bleach and detergent to the water, then brush the cleaner onto the deck. Rinse thoroughly before applying a finish.
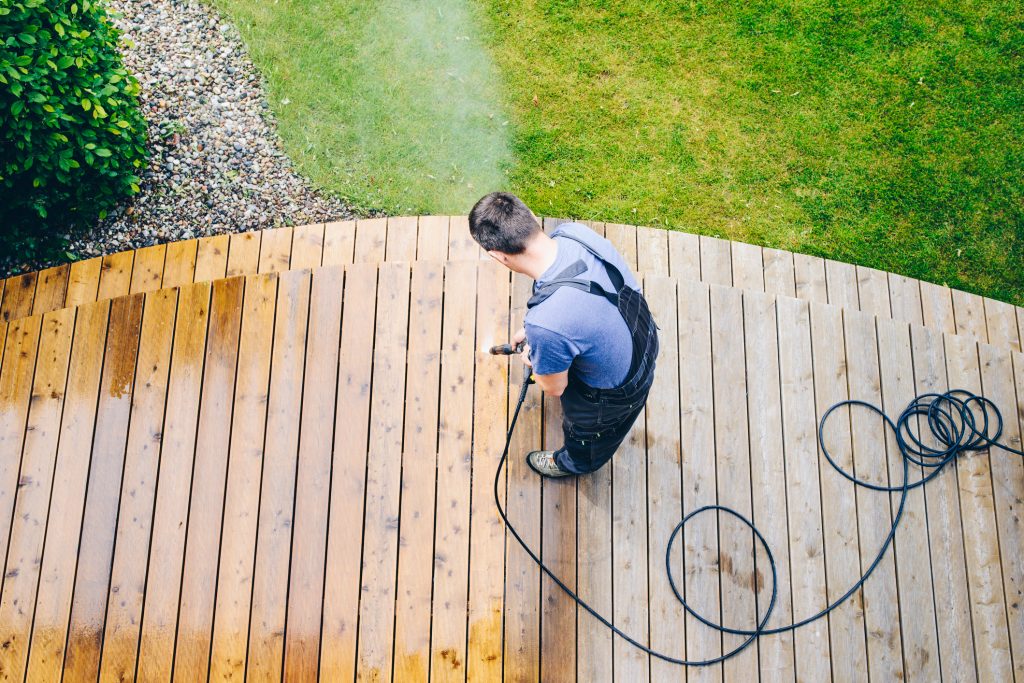
For tackling tougher stains, use a pressure washer. which is the best way to remove sun-damaged wood fibers and tackle scrub-resistant stains. Graf recommends using a fan-type nozzle instead of a pinpoint nozzle that can dig into the wood.
Finish by going over your deck with a stiff-bristle brush to work the cleaner into the wood fibers, and then rinse. The boards should be kept damp in order for the cleaning solution to work effectively. Allow the deck to dry thoroughly before moving on to the next step.
3) Sanding Your Deck
When the deck is dry (36-48 hours after washing, depending upon humidity and weather conditions), it’s time to sand the surface. You can use a pole sander with 80-grit sandpaper to remove all the loose wood fibers that were lifted by the pressure washing. Or, try using a DeWalt 5-inch variable speed random orbit sander with 80-grit sandpaper to really smooth out the surface.
When you’re finished sanding the entire deck, use a leaf blower or the reverse outlet of a wet vac to remove dust from the surface and between any cracks.
4) Staining and Preserving Your Deck
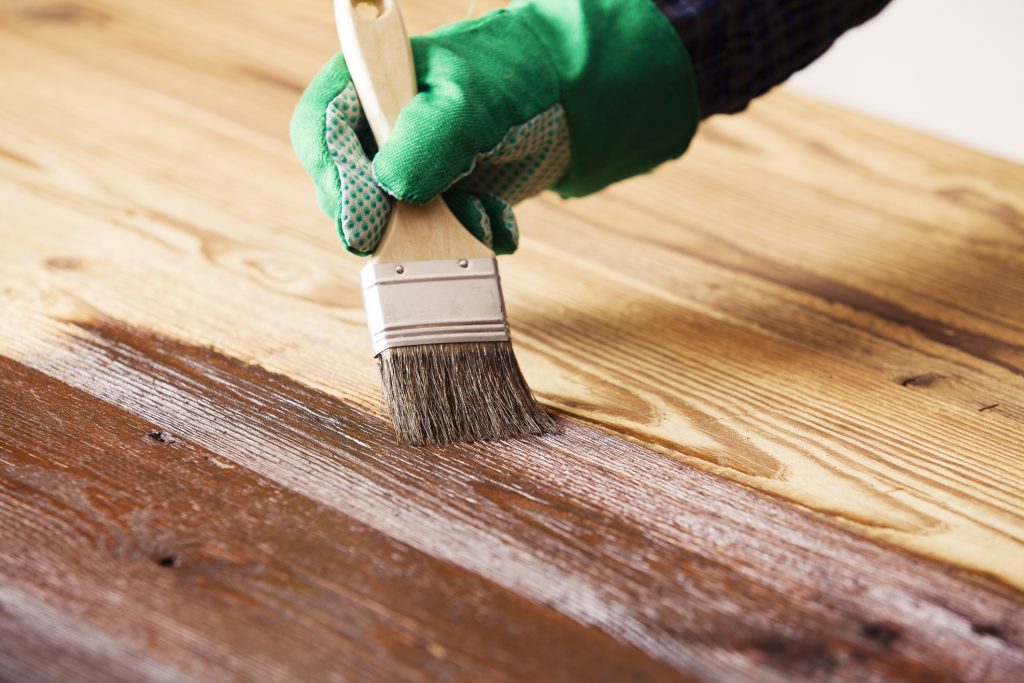
Once your repairs have been made and the deck is sparkling clean, it’s time to apply a protective finish. Clear finishes and transparent stains are fine for new wood, but for older decks, we recommend using a semitransparent stain.
Start by spraying on a light coat of stain and using a brush to remove puddles or splotches. Start at an inside corner and work out, applying the stain parallel to the deck boards.
Tip: To avoid staining nearby brick, use a small piece of cardboard as a spray shield.
Subsequent coats should be applied while the first coat is still wet or they will not be absorbed into the wood. The stain won’t peel, but it can wear away, especially in high-traffic areas. It’s best to apply a fresh coat every other year. A clear water repellent can also be applied between staining for extra protection.
For more help getting your deck looking its best, get in touch with the GNH team!
Protect and Beautify your Outdoor Living Space!
Now’s a great time to give your deck a fresh coat of stain. Don’t forget: the experts at GNH Lumber are here to offer guidance, tips and product suggestions.