
Blankets can be an essential design element in your living space. Not only are they great to have on-hand when it’s chilly, they also add a pop of color, interesting textures and a cozier feel to your living room.
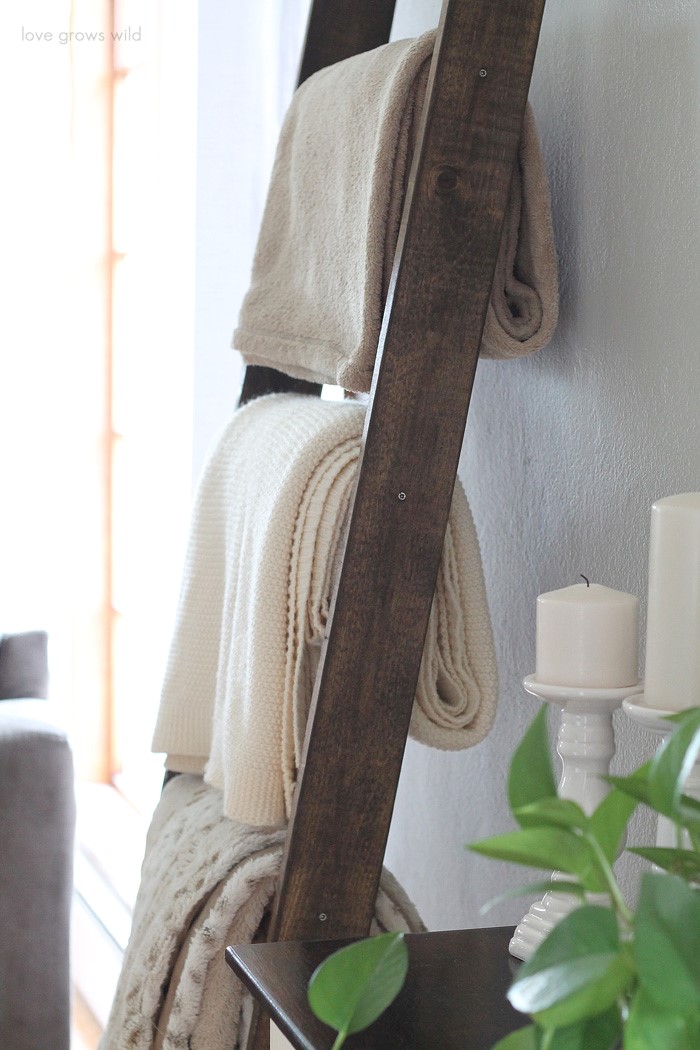
Because most living rooms have blankets scattered all over the couches and chairs, the trick is deciding how to display them in an attractive and functional way. Blanket ladders are a nifty and visually-interesting way to keep those blankets stored yet still in view. Keep your home tidy – and stylish – this winter by making your own blanket ladder!
Even if you’re a newbie to DIY projects, building your own blanket ladder is quite simple – and fun!
Get started by bring the following supply list to your local GNH Lumber.
Materials:
- 2 six foot (1 x 4-inch) pieces of lumber
- 1 six foot (2 x 2-inch) piece of lumber
- Saw
- Wood screws
- Drill
- Sandpaper, rough
- Minwax Stain
- Paint brushes
- Cloth
- Rags
- Felt pads to protect the wall the ladder leans against (optional)
Step 1: Cut the boards and sand the edges.
First, cut four 18-inch boards out of the 2 x 2 lumber, and sand all board edges to create a rustic look. Sand the edges of the 2 six foot (1 x 4-inch) pieces of lumber, as well.
Step 2: Determine the placement of the boards to construct the ladder.
Place the six foot (1 x 4-inch) pieces on the ground and place the 18-inch boards at even intervals between them.
Spacing the rungs at 14 1/2 inches apart works well, but you can space the rungs however you like.
Step 3: Secure in place with screws.
Screw the rungs of the ladder into the rails of the ladder using wood screws.
Step 4: Staining (or painting).
Wipe thoroughly with a slightly damp cloth to remove any dust. Then use a paint brush to apply your favorite wood stain (or paint), wiping away any excess stain with a rag.
*Don’t forget to the stain dry overnight to prevent smudging and sticking.
5: Attach felt pads.
Attach felt pads to the back of the ladder on the top end to protect the walls it leans against. These can be purchased inexpensively.
Voila! You now have a stylish and interesting display ladder for your blankets.
Don’t forget, you can customize this DIY in a variety of ways to personalize it for your home. If your room has very high ceilings, you may want a taller ladder with wider spacing between the rungs. You can you dowels for ladder steps, or choose a bright paint color instead of a stain. You can also place several light coats of paint and then sand roughly for a more distress look. You’re only limited by your imagination!
Questions or concerns about your woodworking project?
Stop in to your local GNH Lumber! We’re always glad to offer guidance, tips or suggestions, or point you in the right direction for just the product needed to get the DIY project done.